Configure Card Link
This guide walks through configuring Card Link in the Apata Portal, covering the available settings, how to enable it for your organisation or individual BIN ranges, and how to disable it when needed.
Before configuring Card Link in the Portal, your team must implement the webhook endpoint that Apata calls to retrieve card details. See the Card Link and Card Link with Risk guides for the integration details.
Configuration Options
A Card Link setting is made up of four options. Once created, the setting can be applied to your organisation or to individual BIN ranges.
Card Link Type
The Card Link type controls the format of the request and response payload exchanged with your system.
The standard integration. Apata calls your endpoint with the PAN and expects card details in return. Apata's own Risk Profile rules handle the risk decision.
Use this type for all new integrations unless you need to pass risk decisions from your own risk engine.
See the Card Link API reference for the full request and response schema.
Webhook
The Webhook field identifies the configured webhook that Apata calls to fetch card details. The webhook must be set up in your Financial Institution settings before it can be selected here.
PAN Format
Controls how Apata sends the PAN to your endpoint. Select the format your system expects.
The PAN is included in the request payload exactly as received from the payment scheme, with no transformation applied.
Storage Mode
Controls how Apata handles card data retrieved during a Card Link lookup. See the Card Link guide for a full explanation of each mode.
Card details are stored as a full Enrolment in Apata after the first successful lookup. Subsequent transactions for the same card use the stored record without calling Card Link again.
Best for reducing repeated calls to your system for known, stable cards.
Enabling Card Link
Card Link can be enabled at two levels. Choose the level that fits your setup.
Applies Card Link to all transactions for the organisation. Use this when all cards across all financial institutions share the same Card Link configuration.
Applies Card Link only to specific BIN ranges. Use this when Card Link is needed for selected ranges or when configurations differ per range.
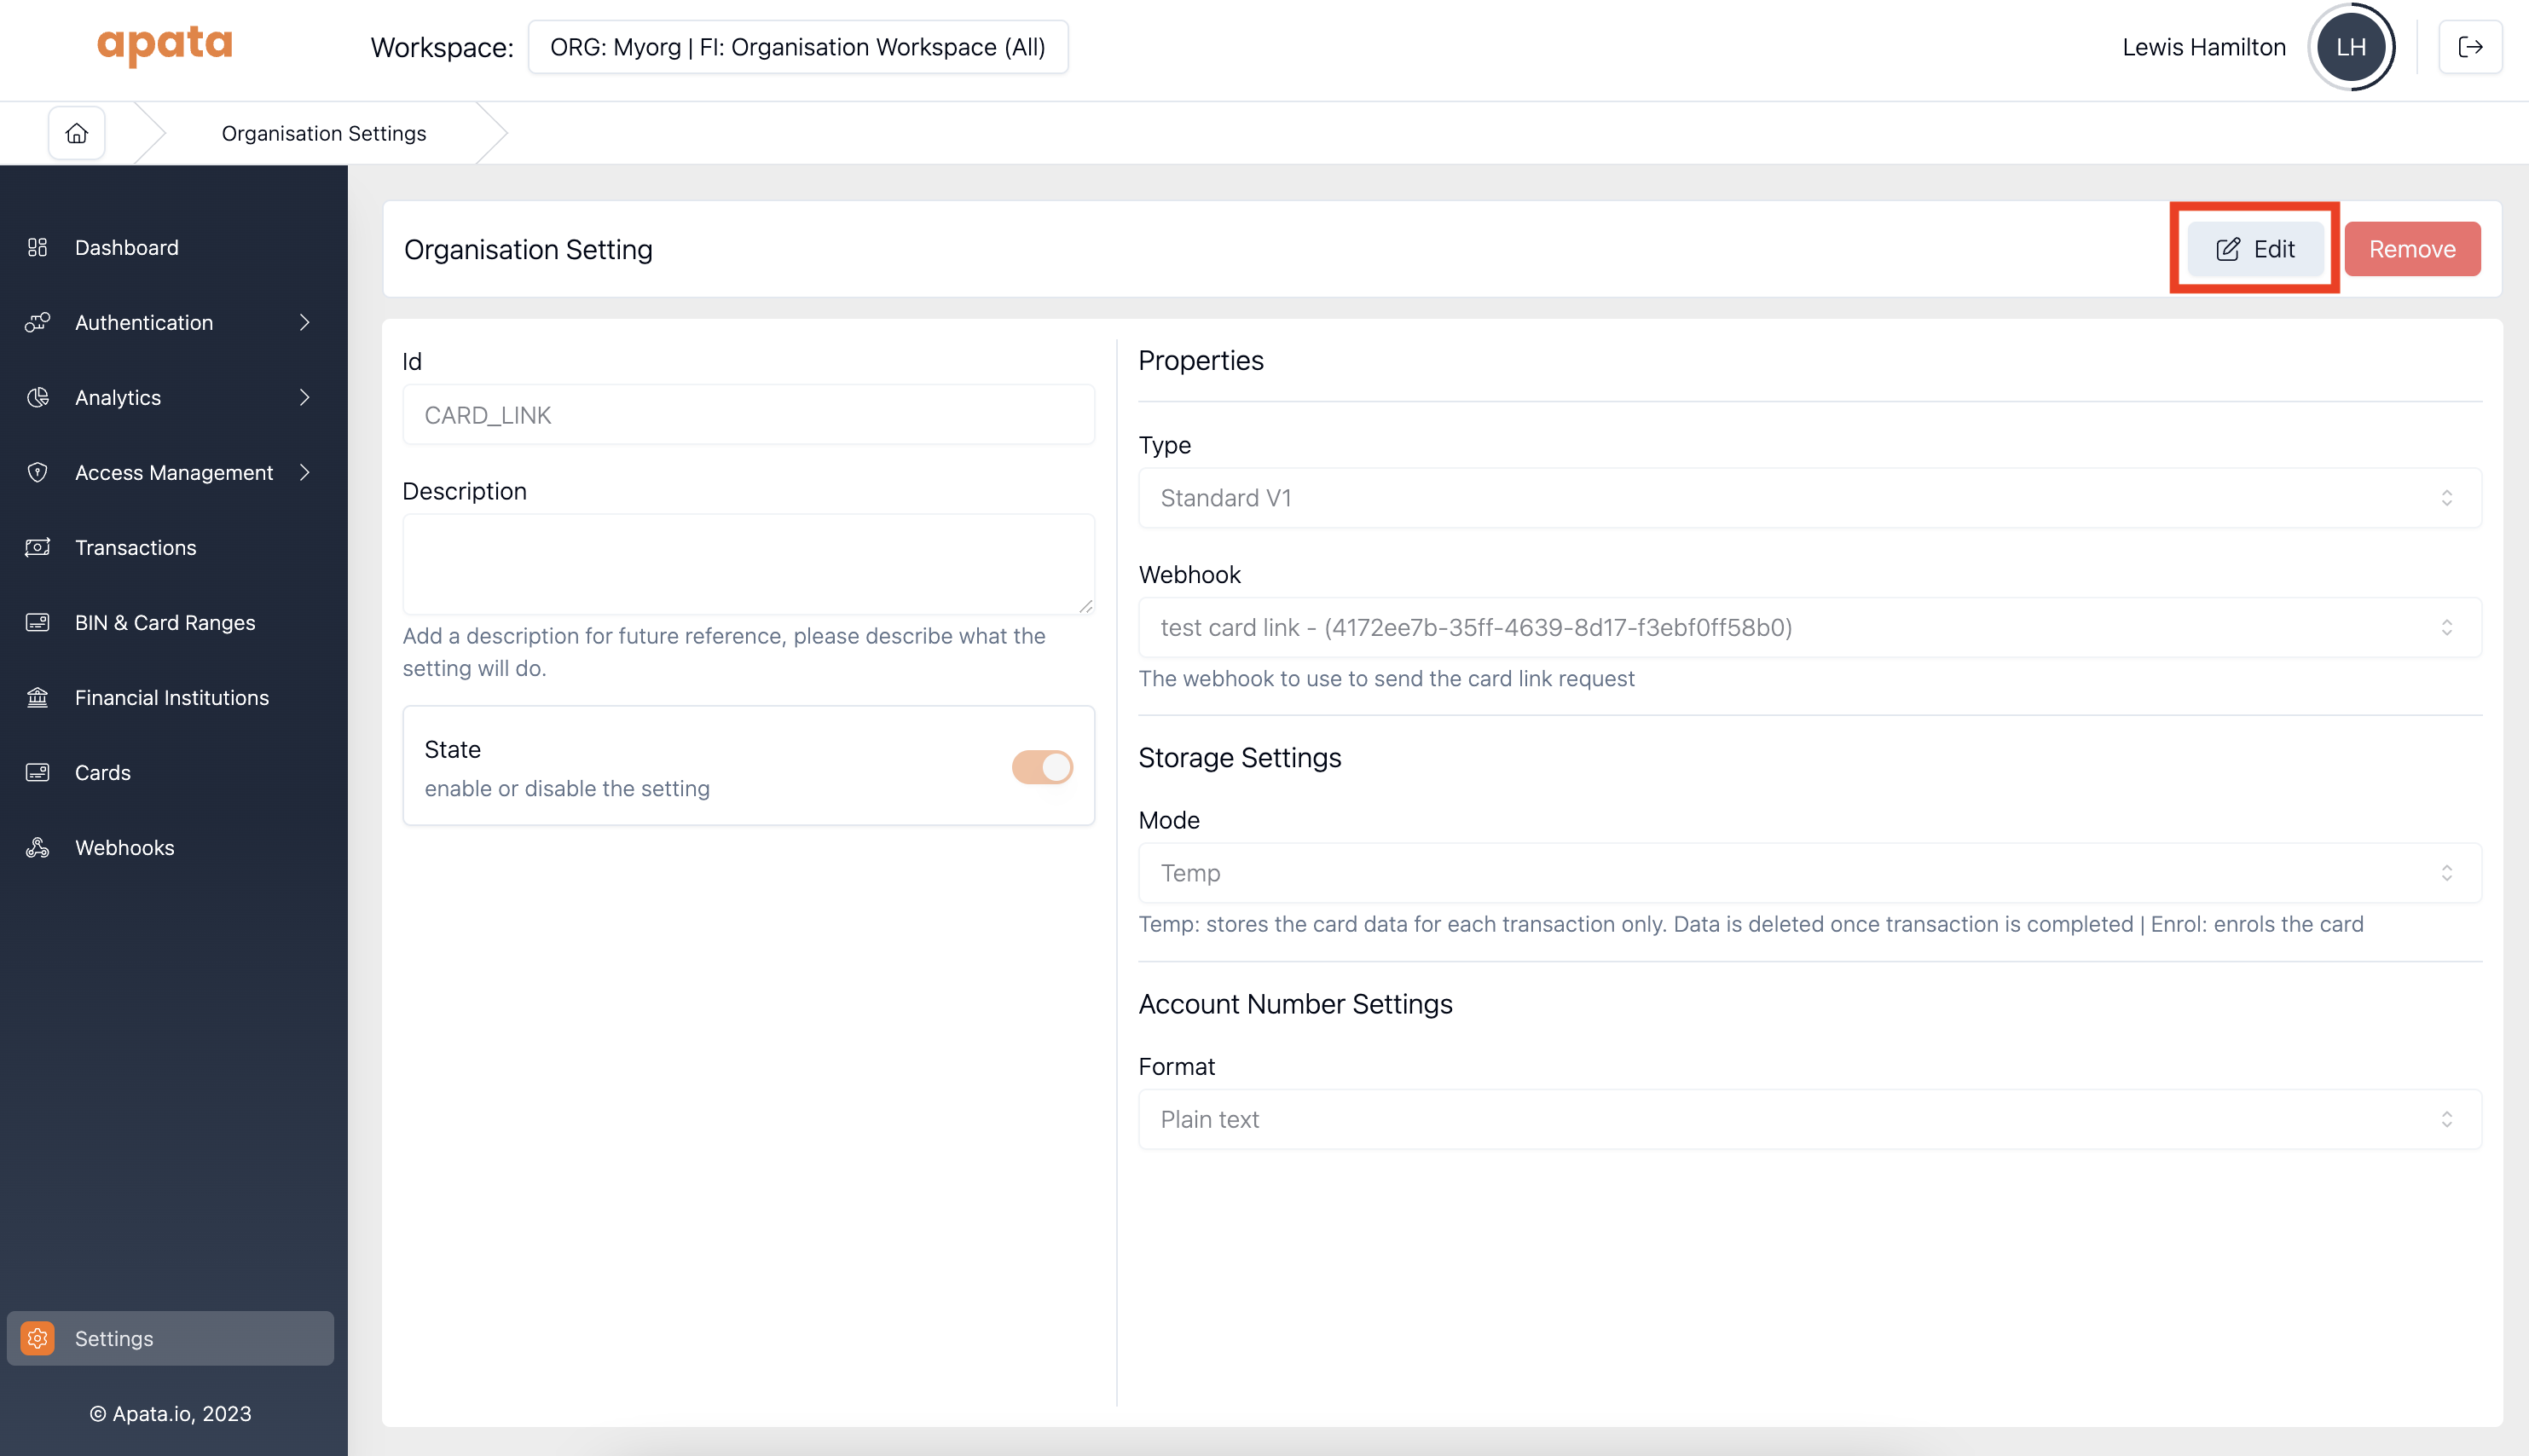
For an Entire Organisation
Once saved, Apata immediately applies the Card Link setting to all transactions for the organisation. Any transaction will trigger a call to your endpoint to retrieve card details. If you are not ready to go live, ensure the setting is in a disabled state before saving.
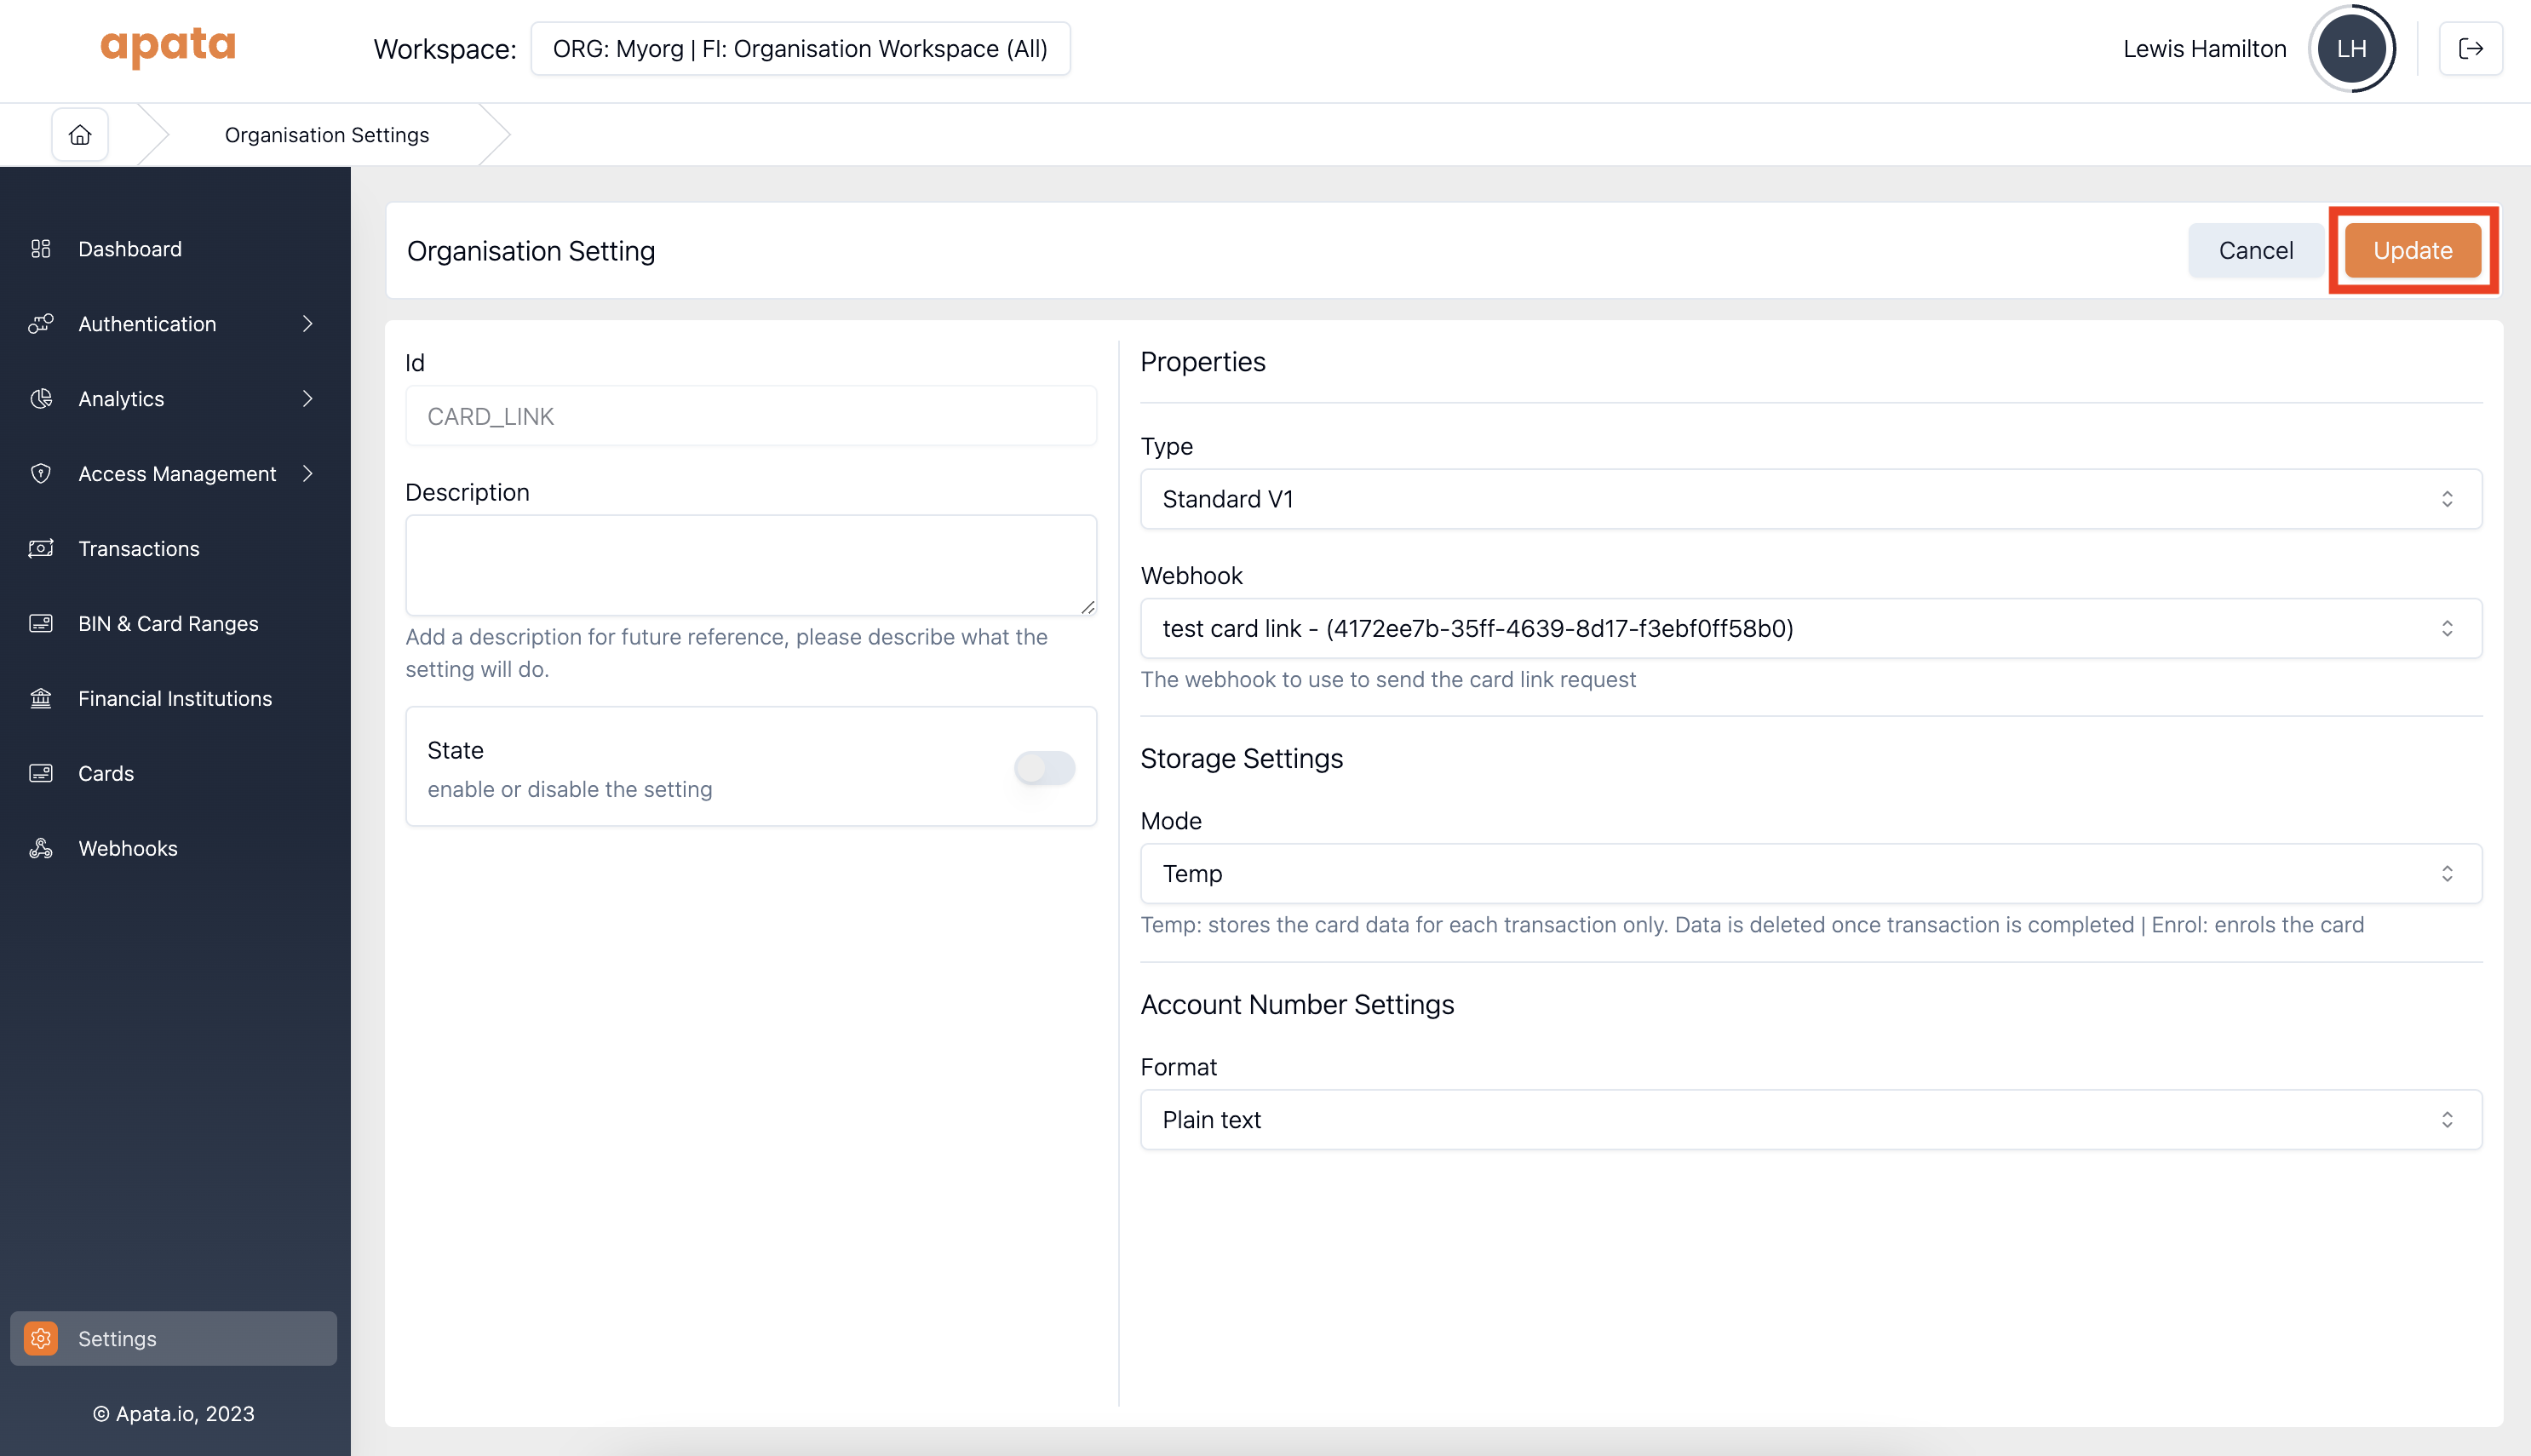
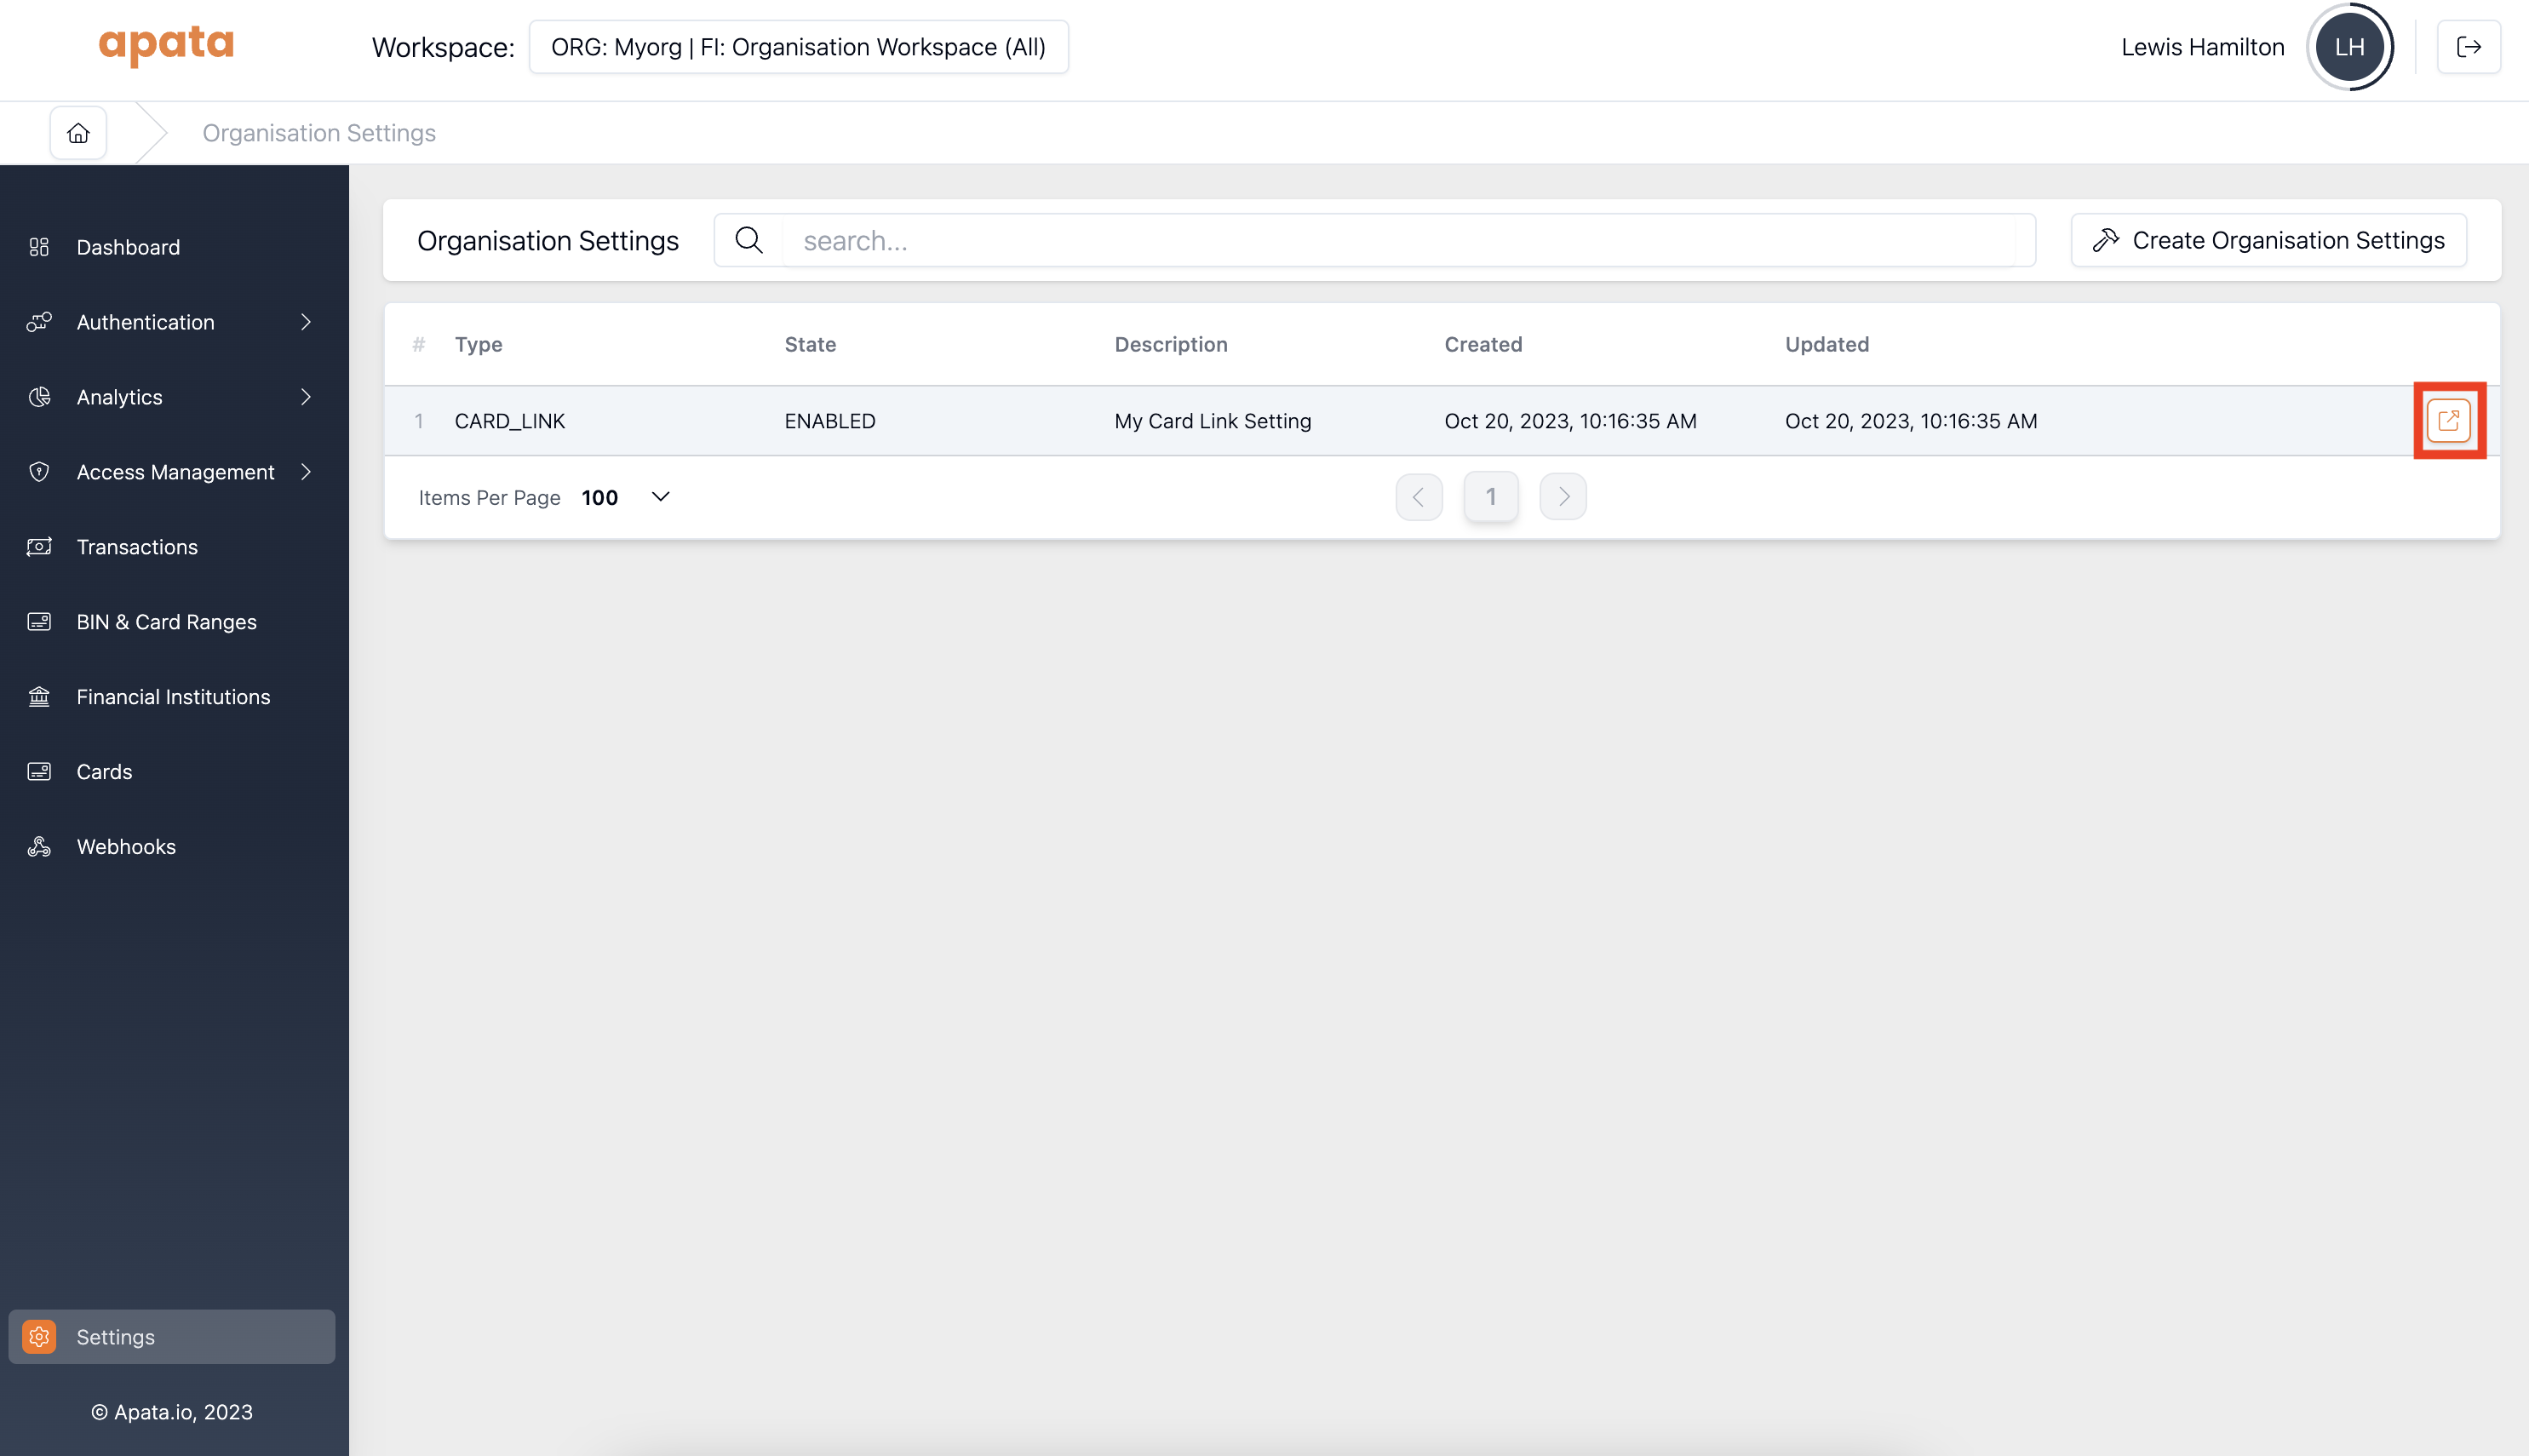
Step 1. Navigate to the Organisation Settings section of the Portal.
Step 2. Click Create Organisation Settings in the top right corner.
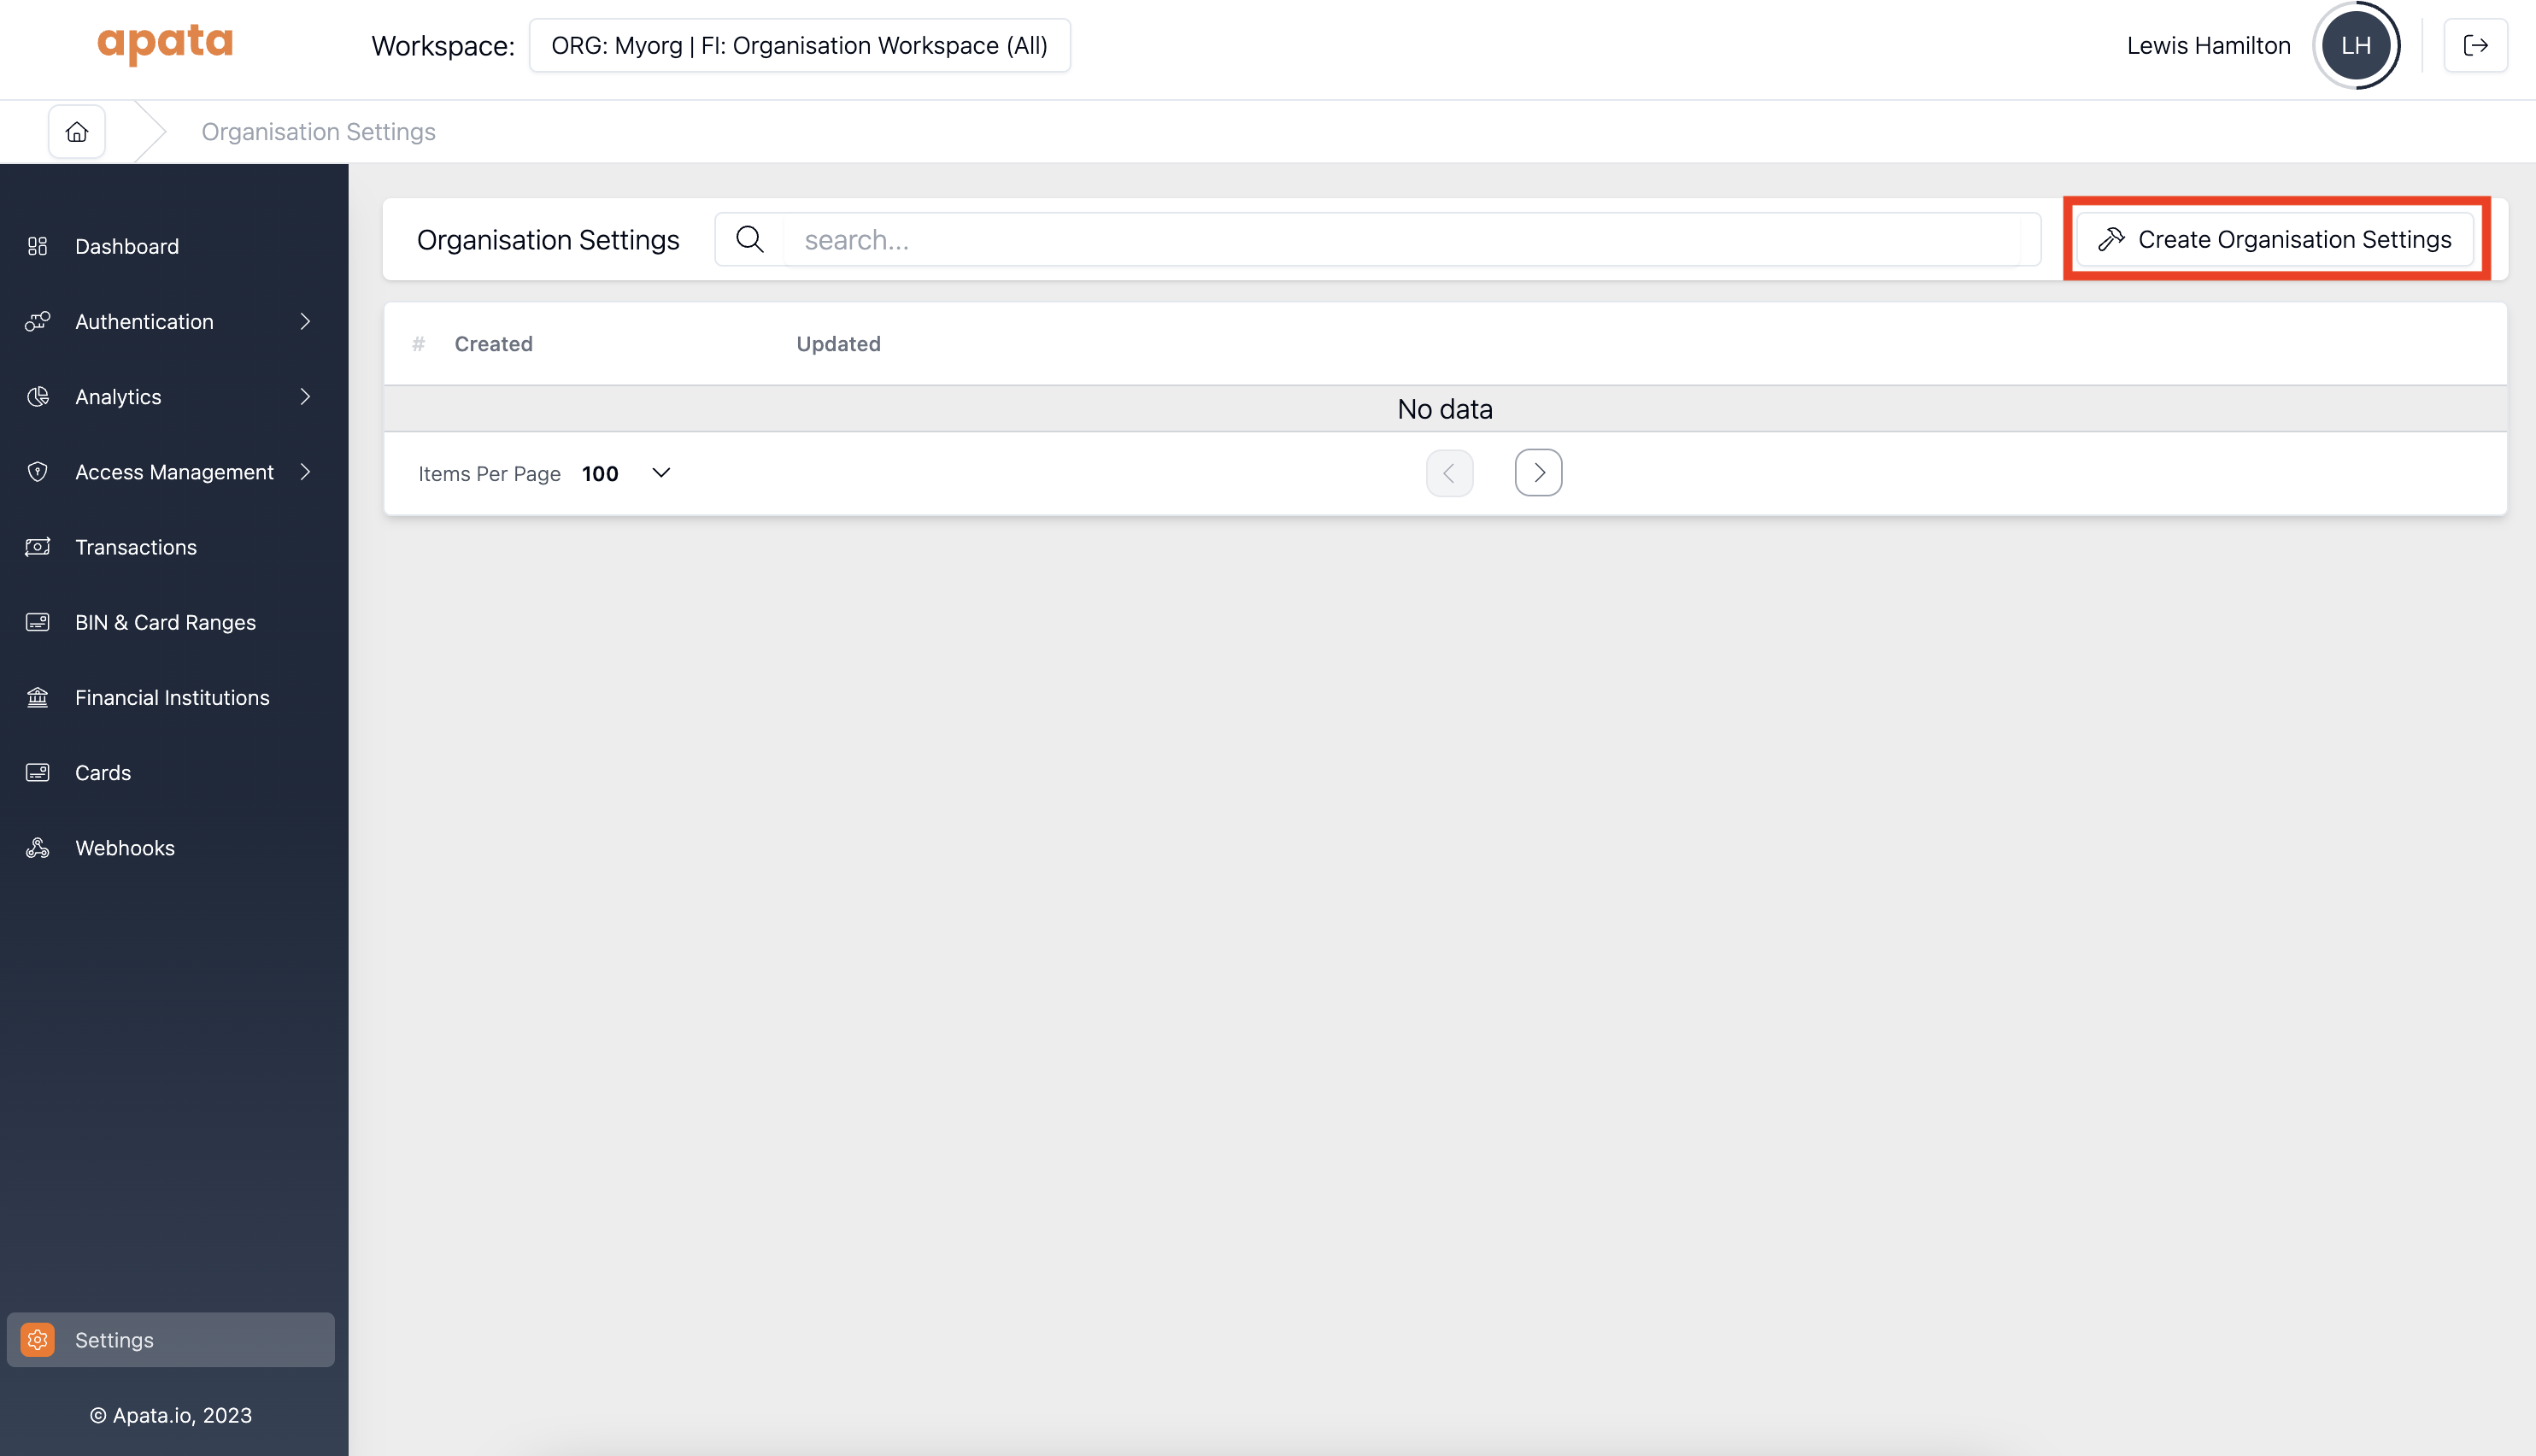
Step 3. Select Card Link from the setting type dropdown.
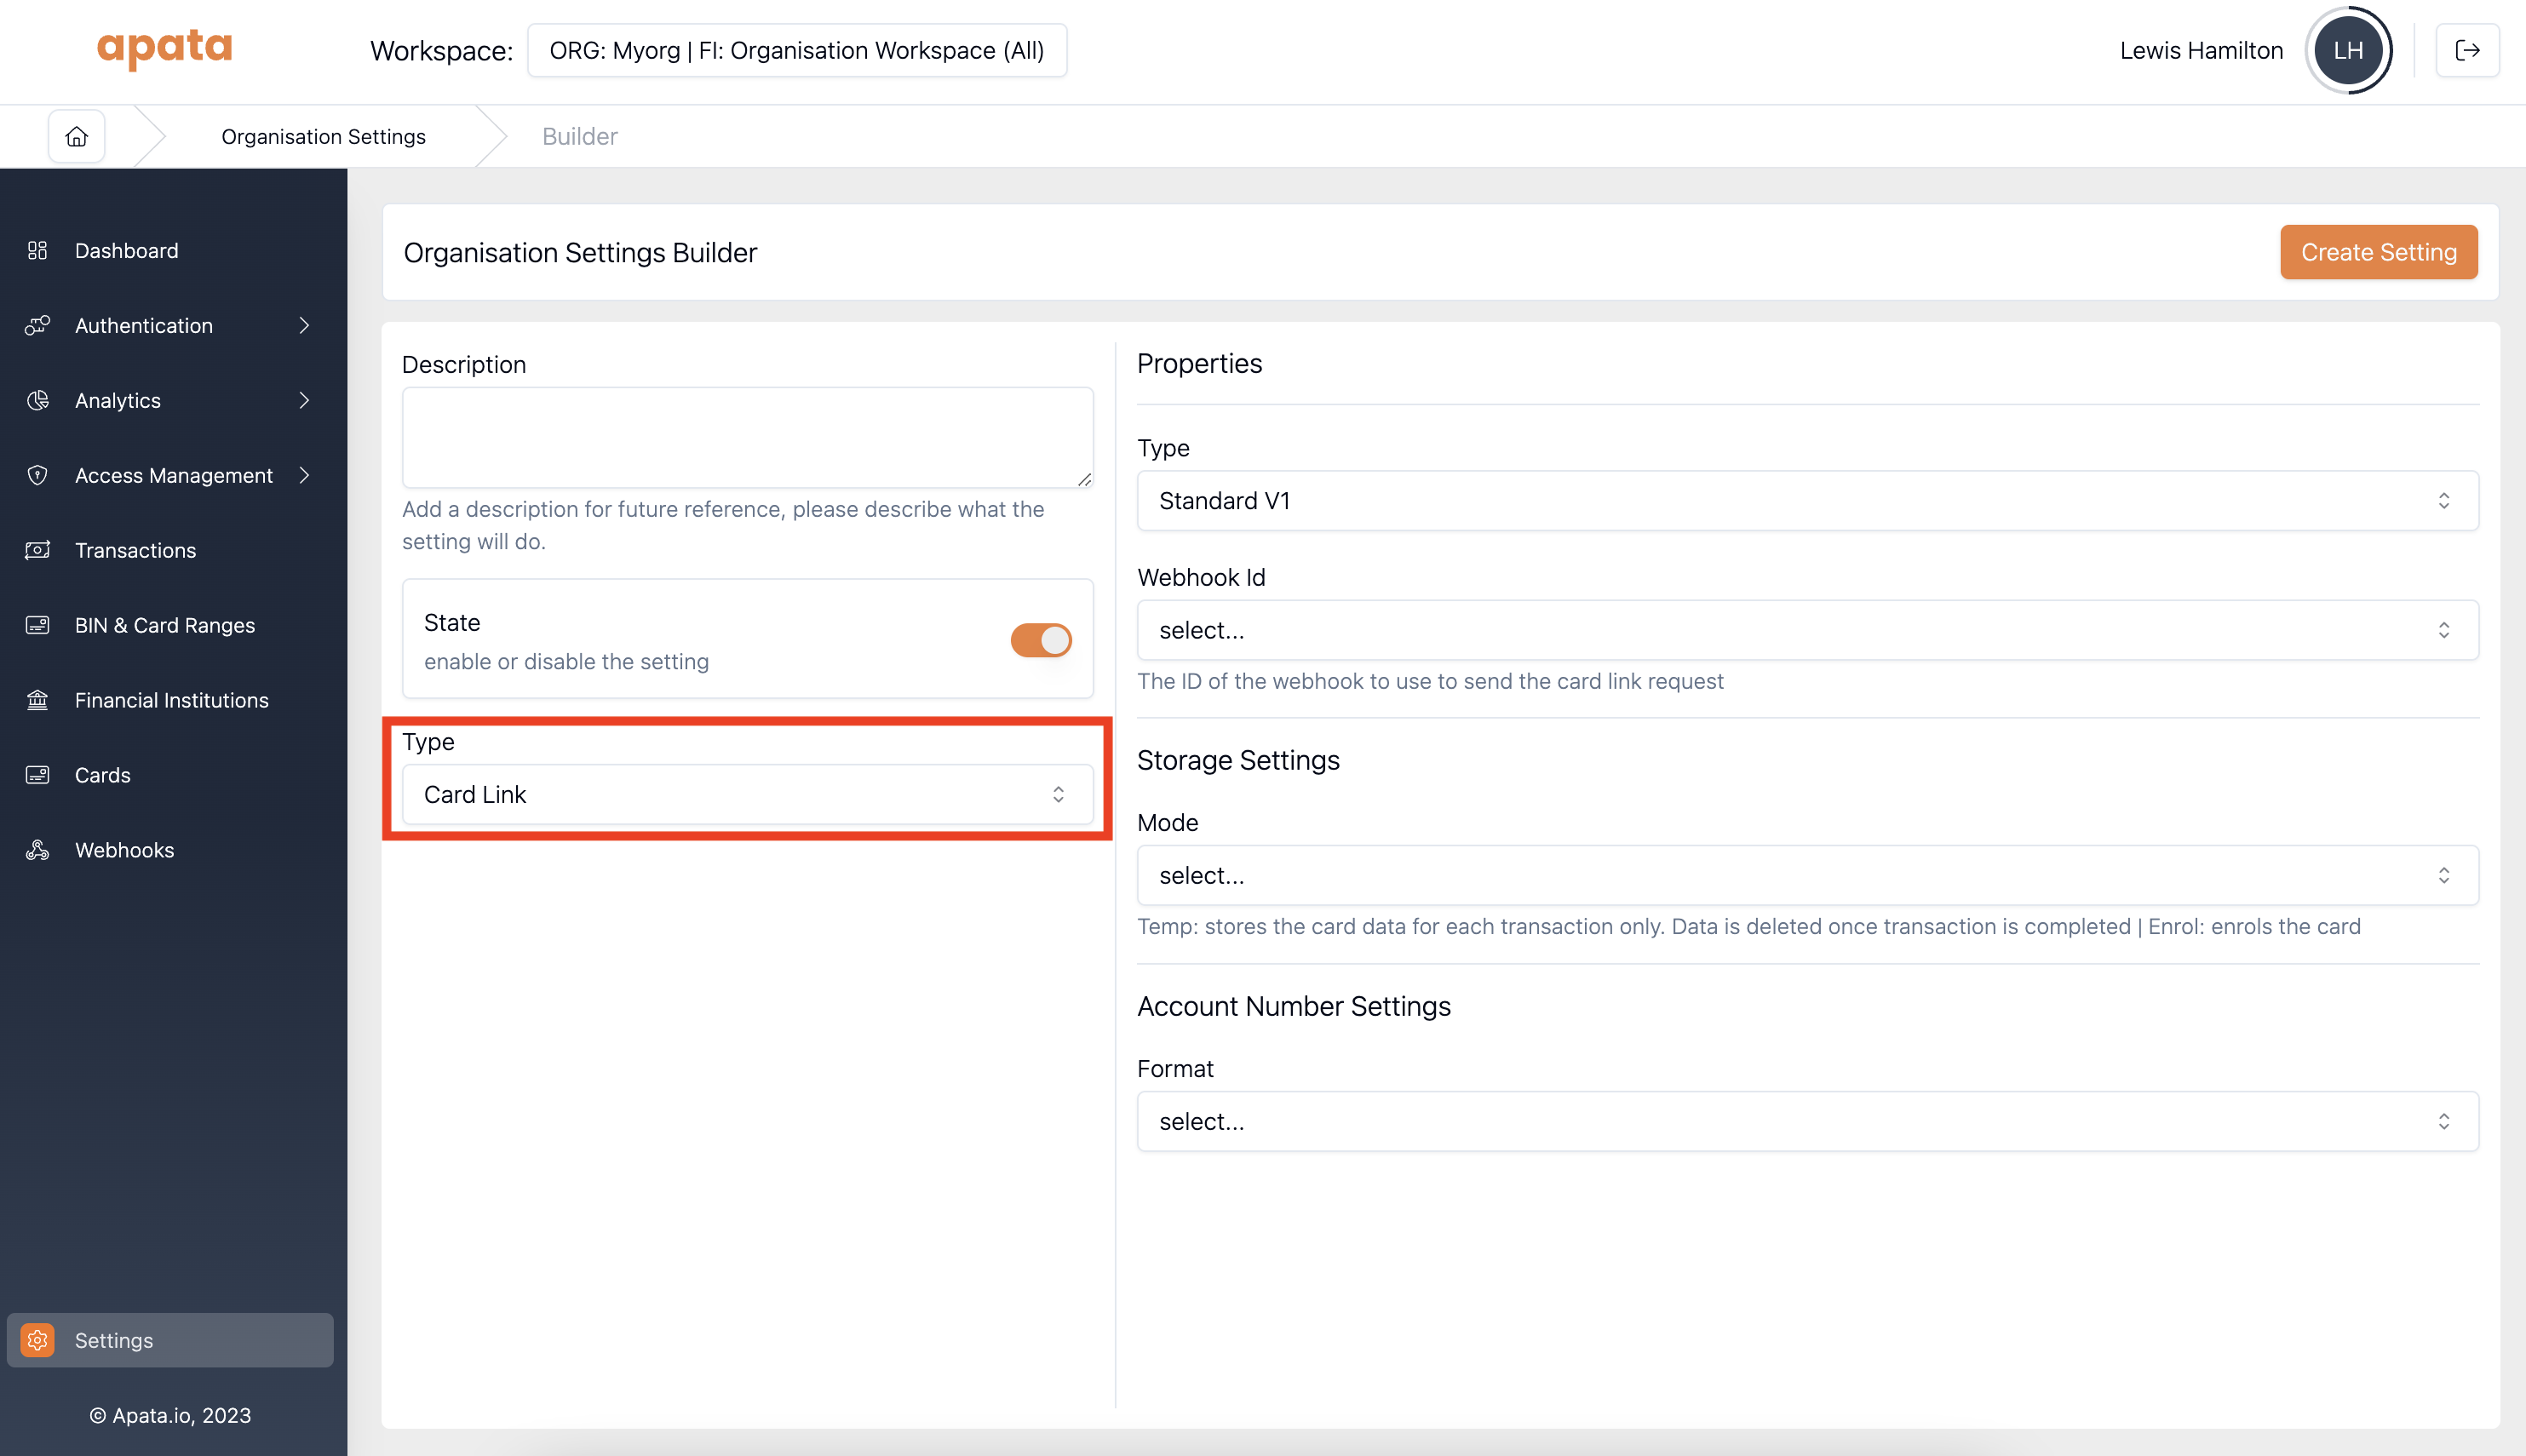
Step 4. Fill in the Card Link Type, Webhook, PAN Format, and Storage Mode fields as described in the Configuration Options section above, then click Create Setting.
For Individual BINs / Card Ranges
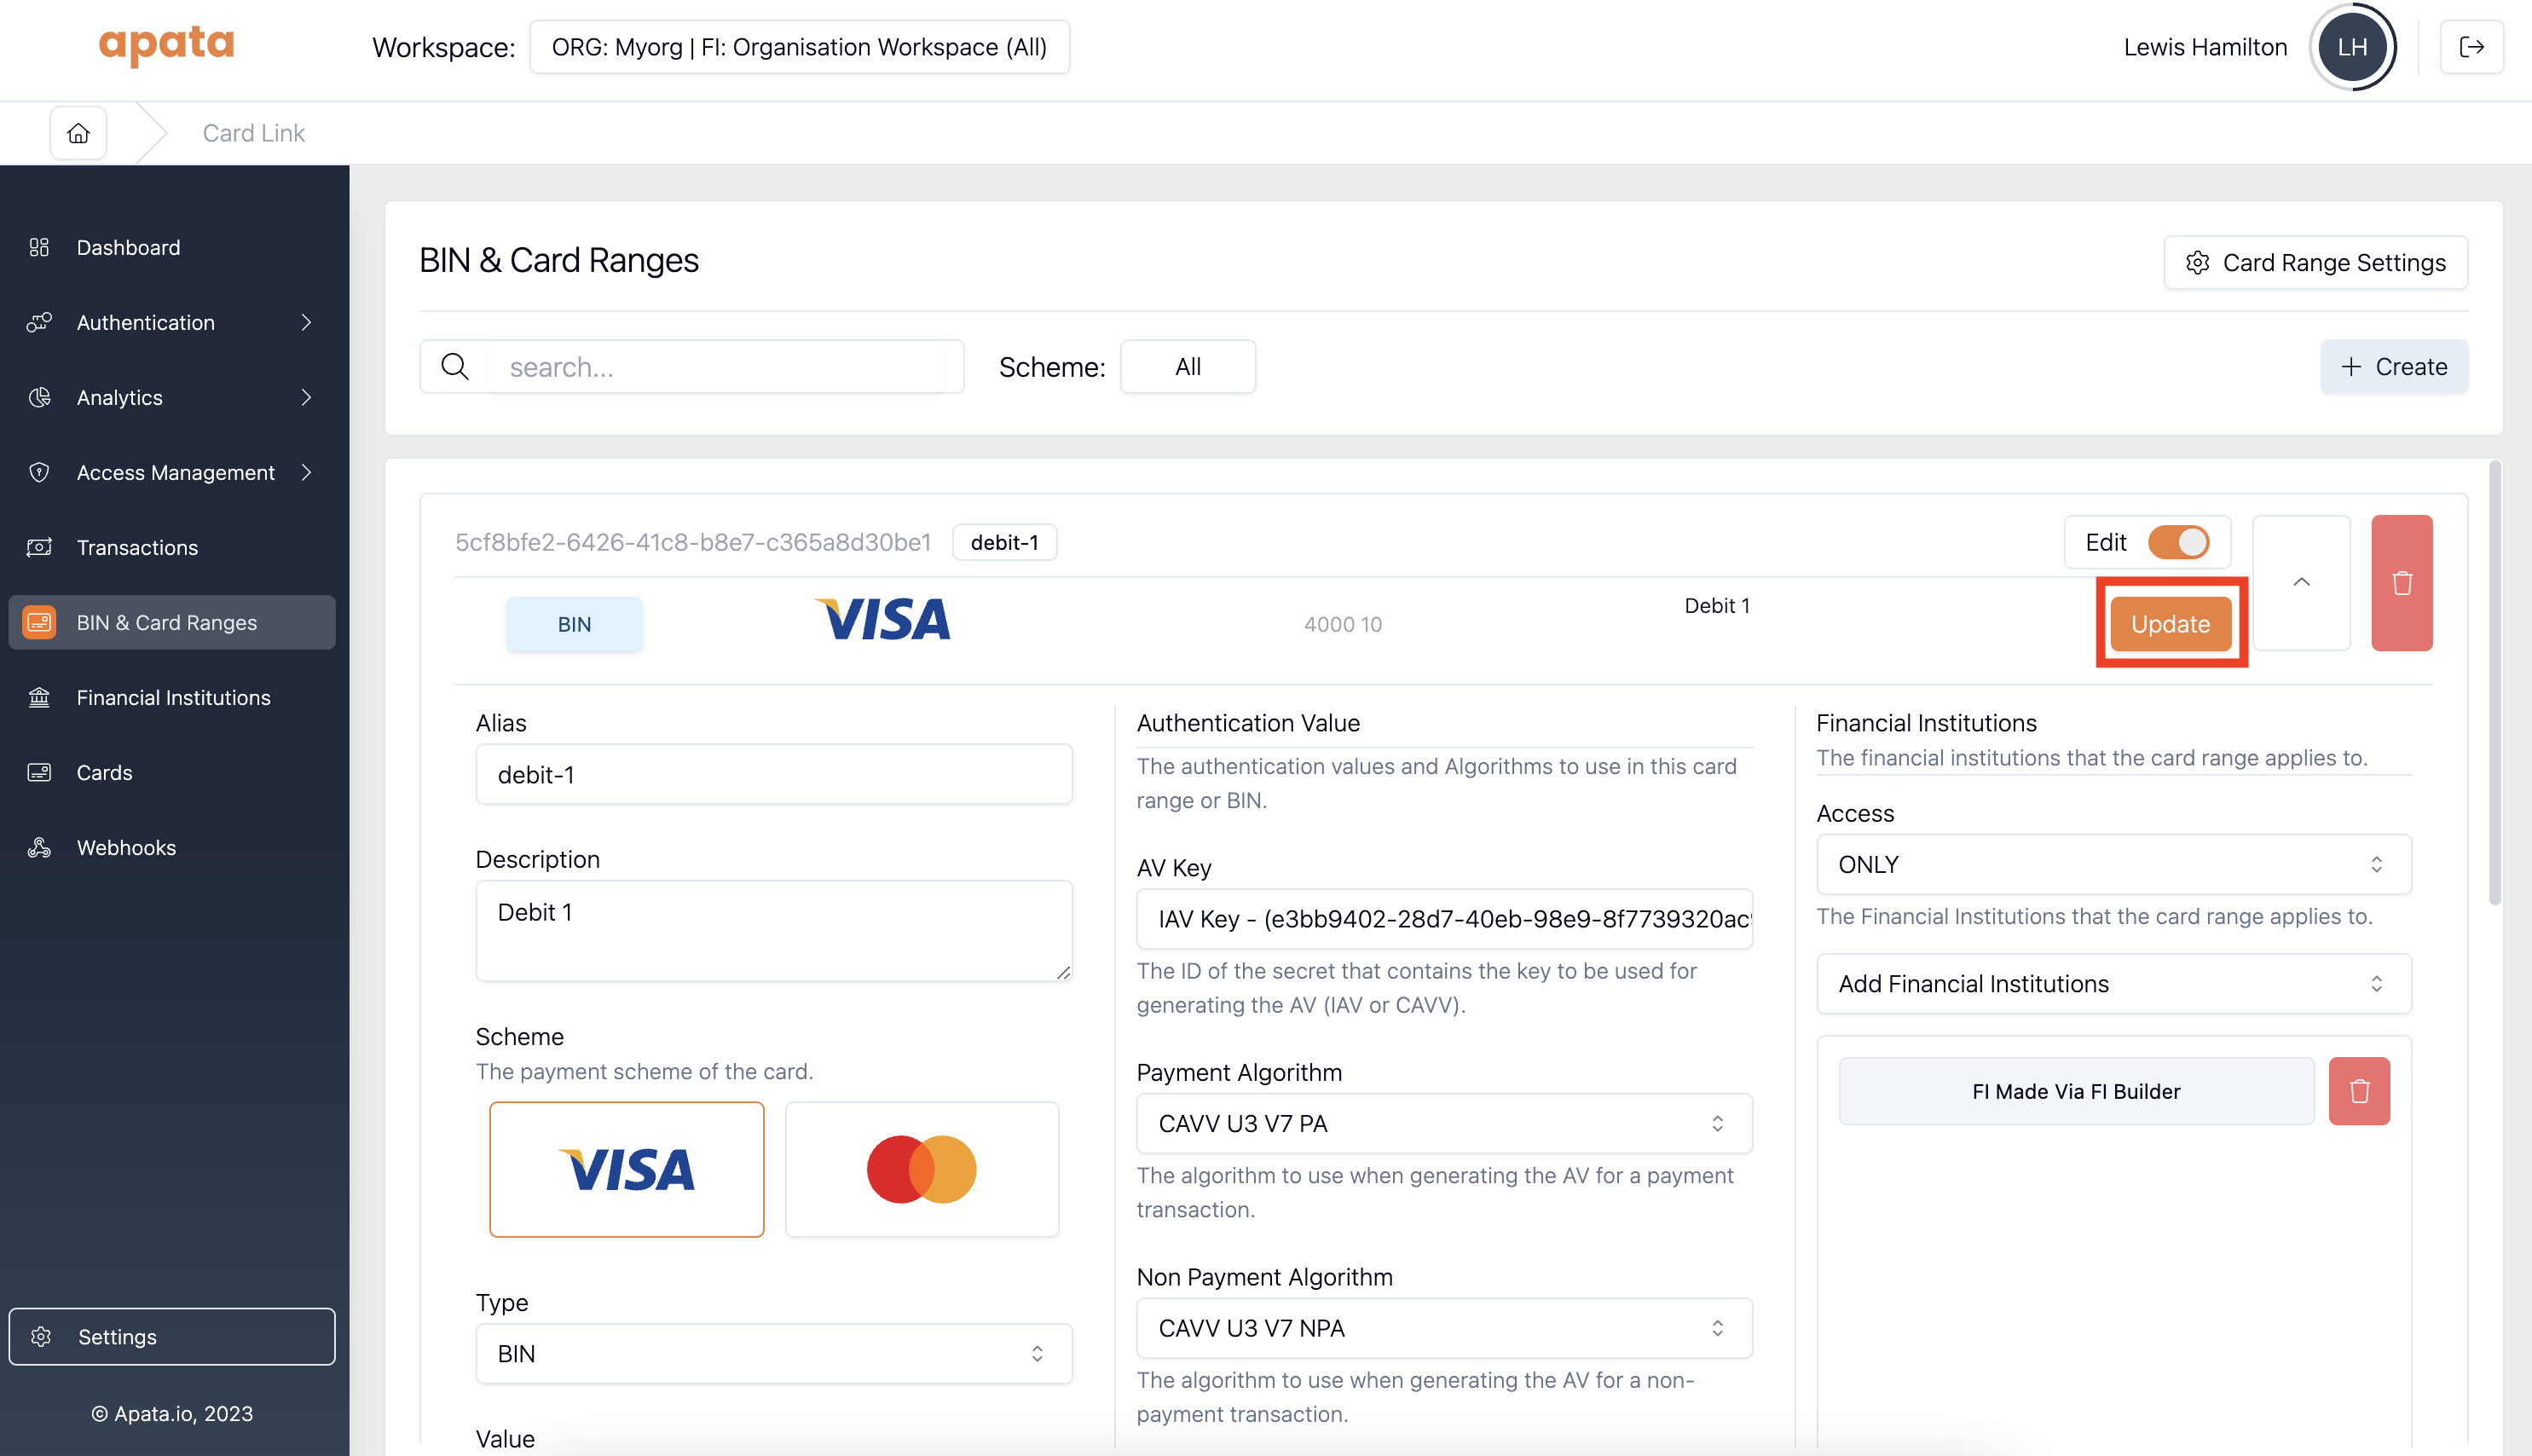
Enabling Card Link at the BIN range level involves two parts: creating a Card Range Setting, then applying it to the desired ranges.
Once saved, Apata immediately applies the Card Link setting to transactions for cards in the configured range. If you are not ready to go live for a range, disable the setting using the toggle in step 8 before saving.
Part 1 - Create the Card Range Setting
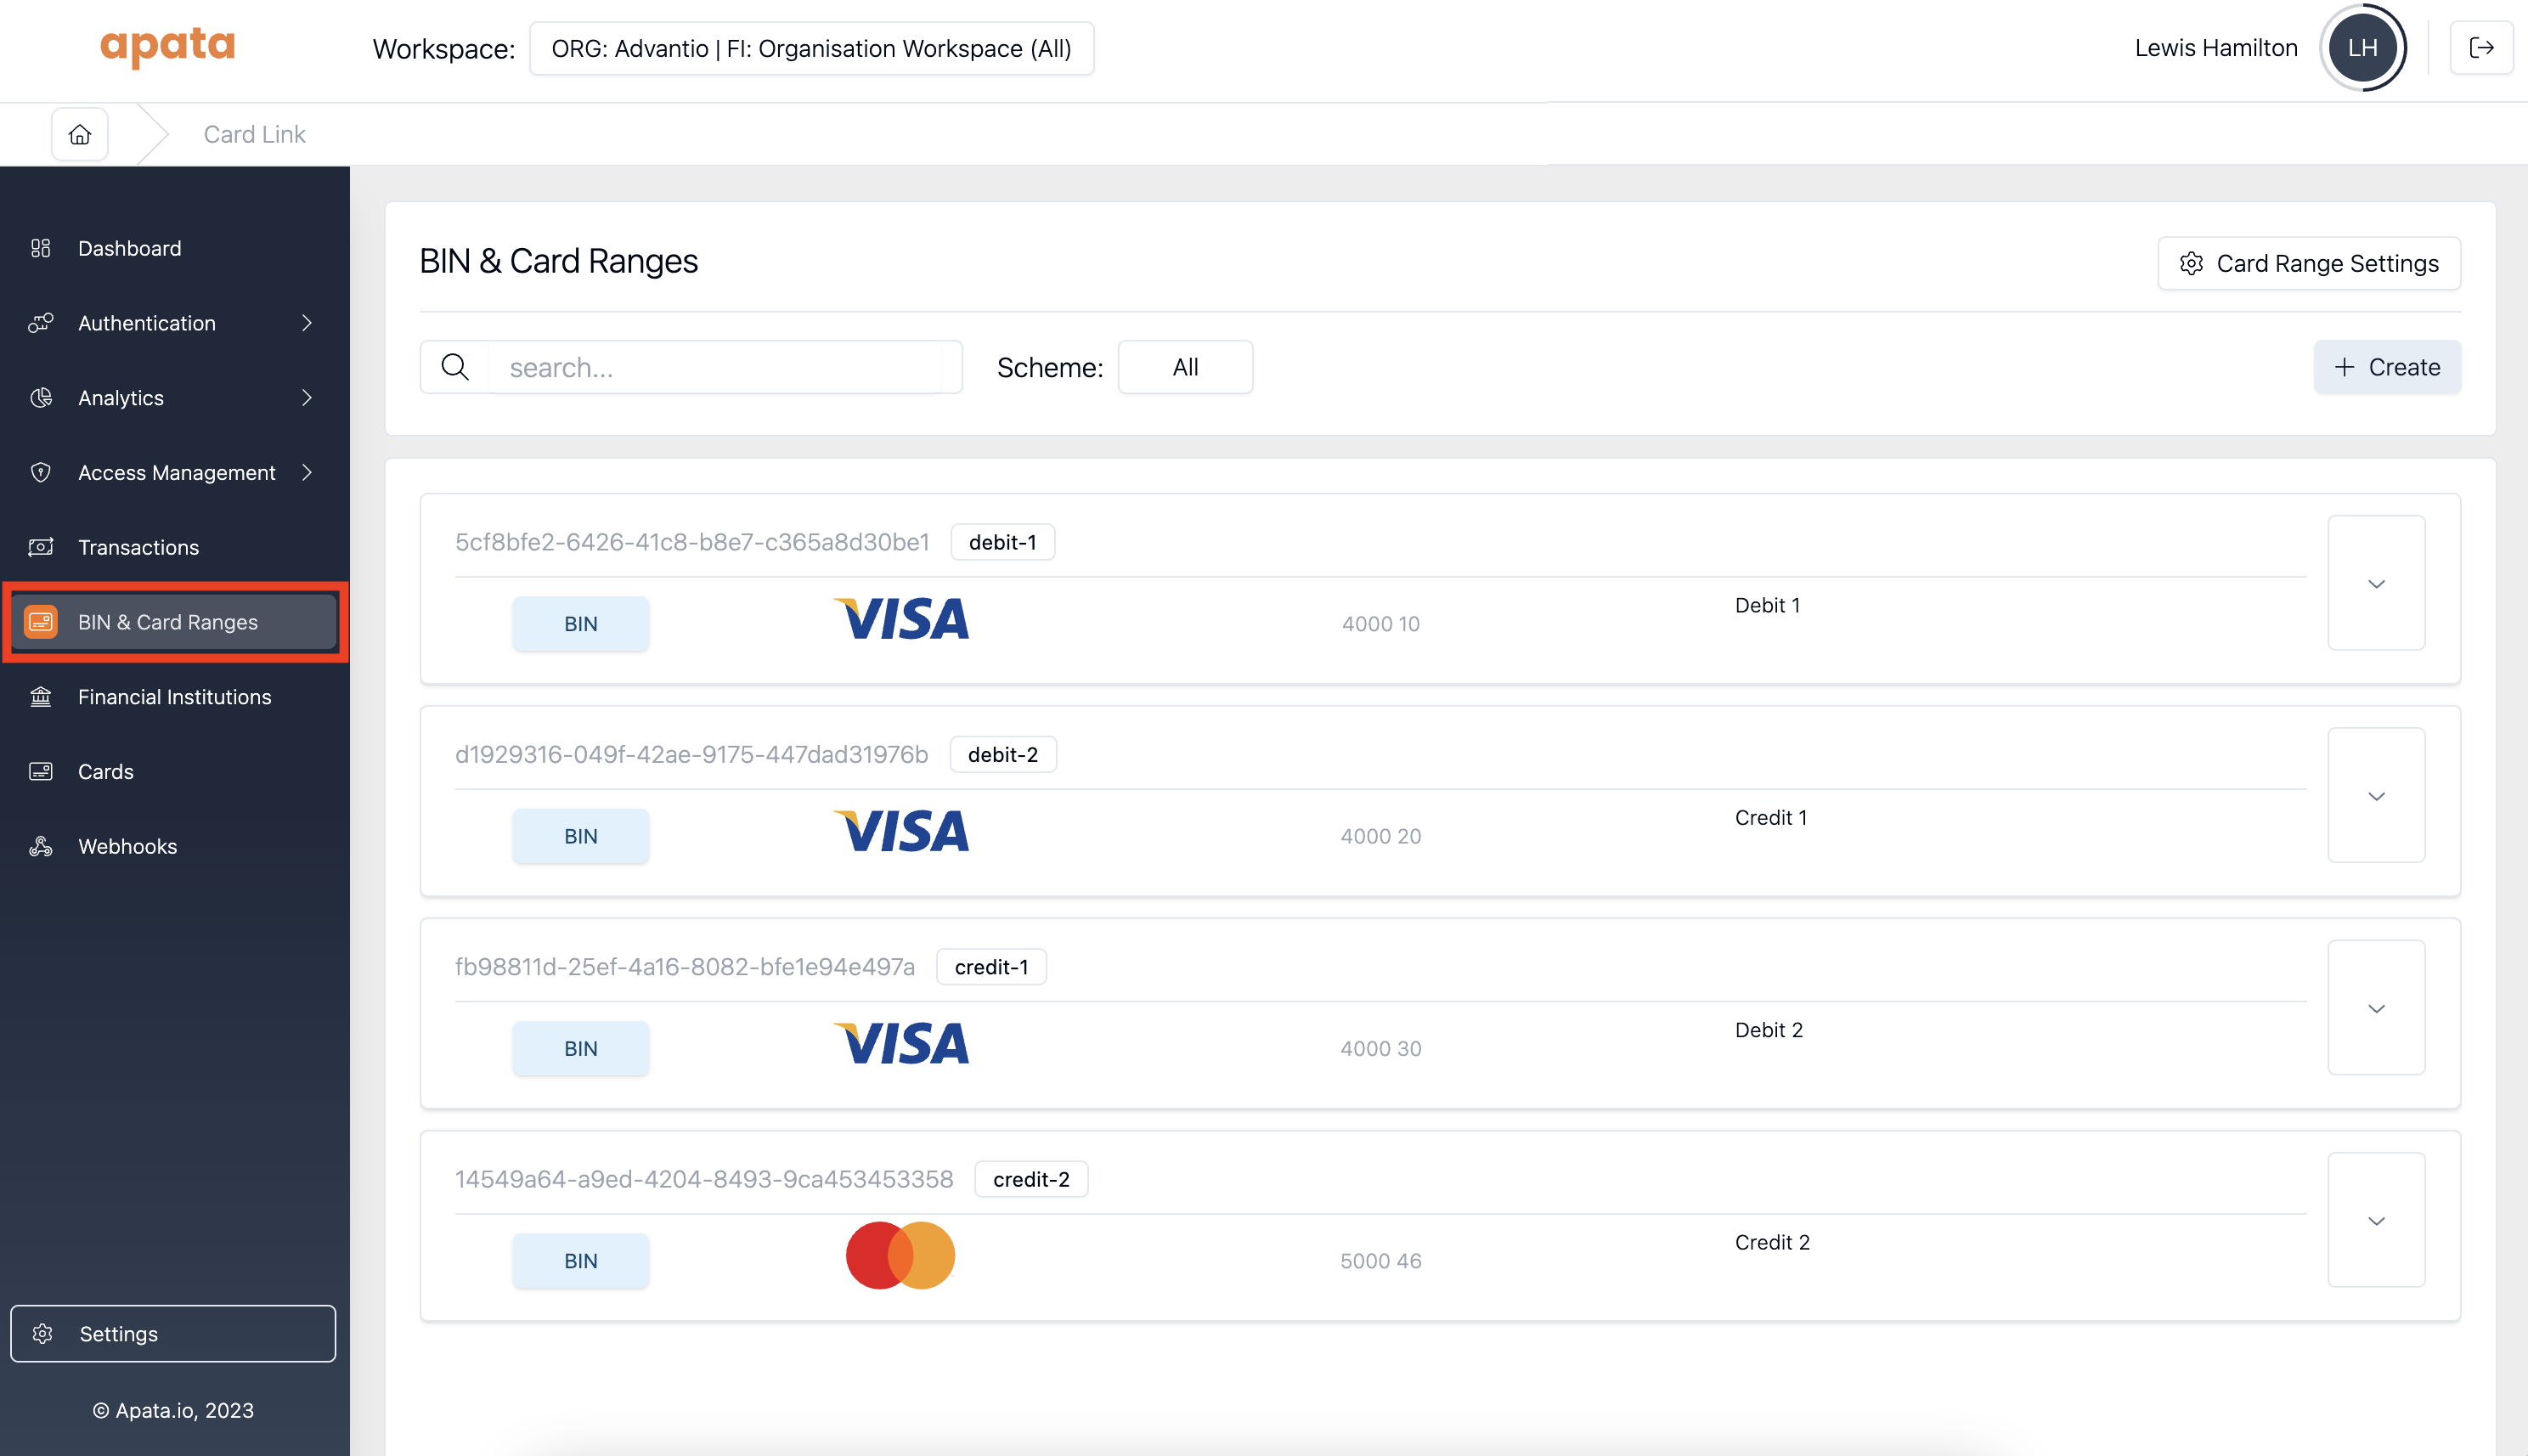
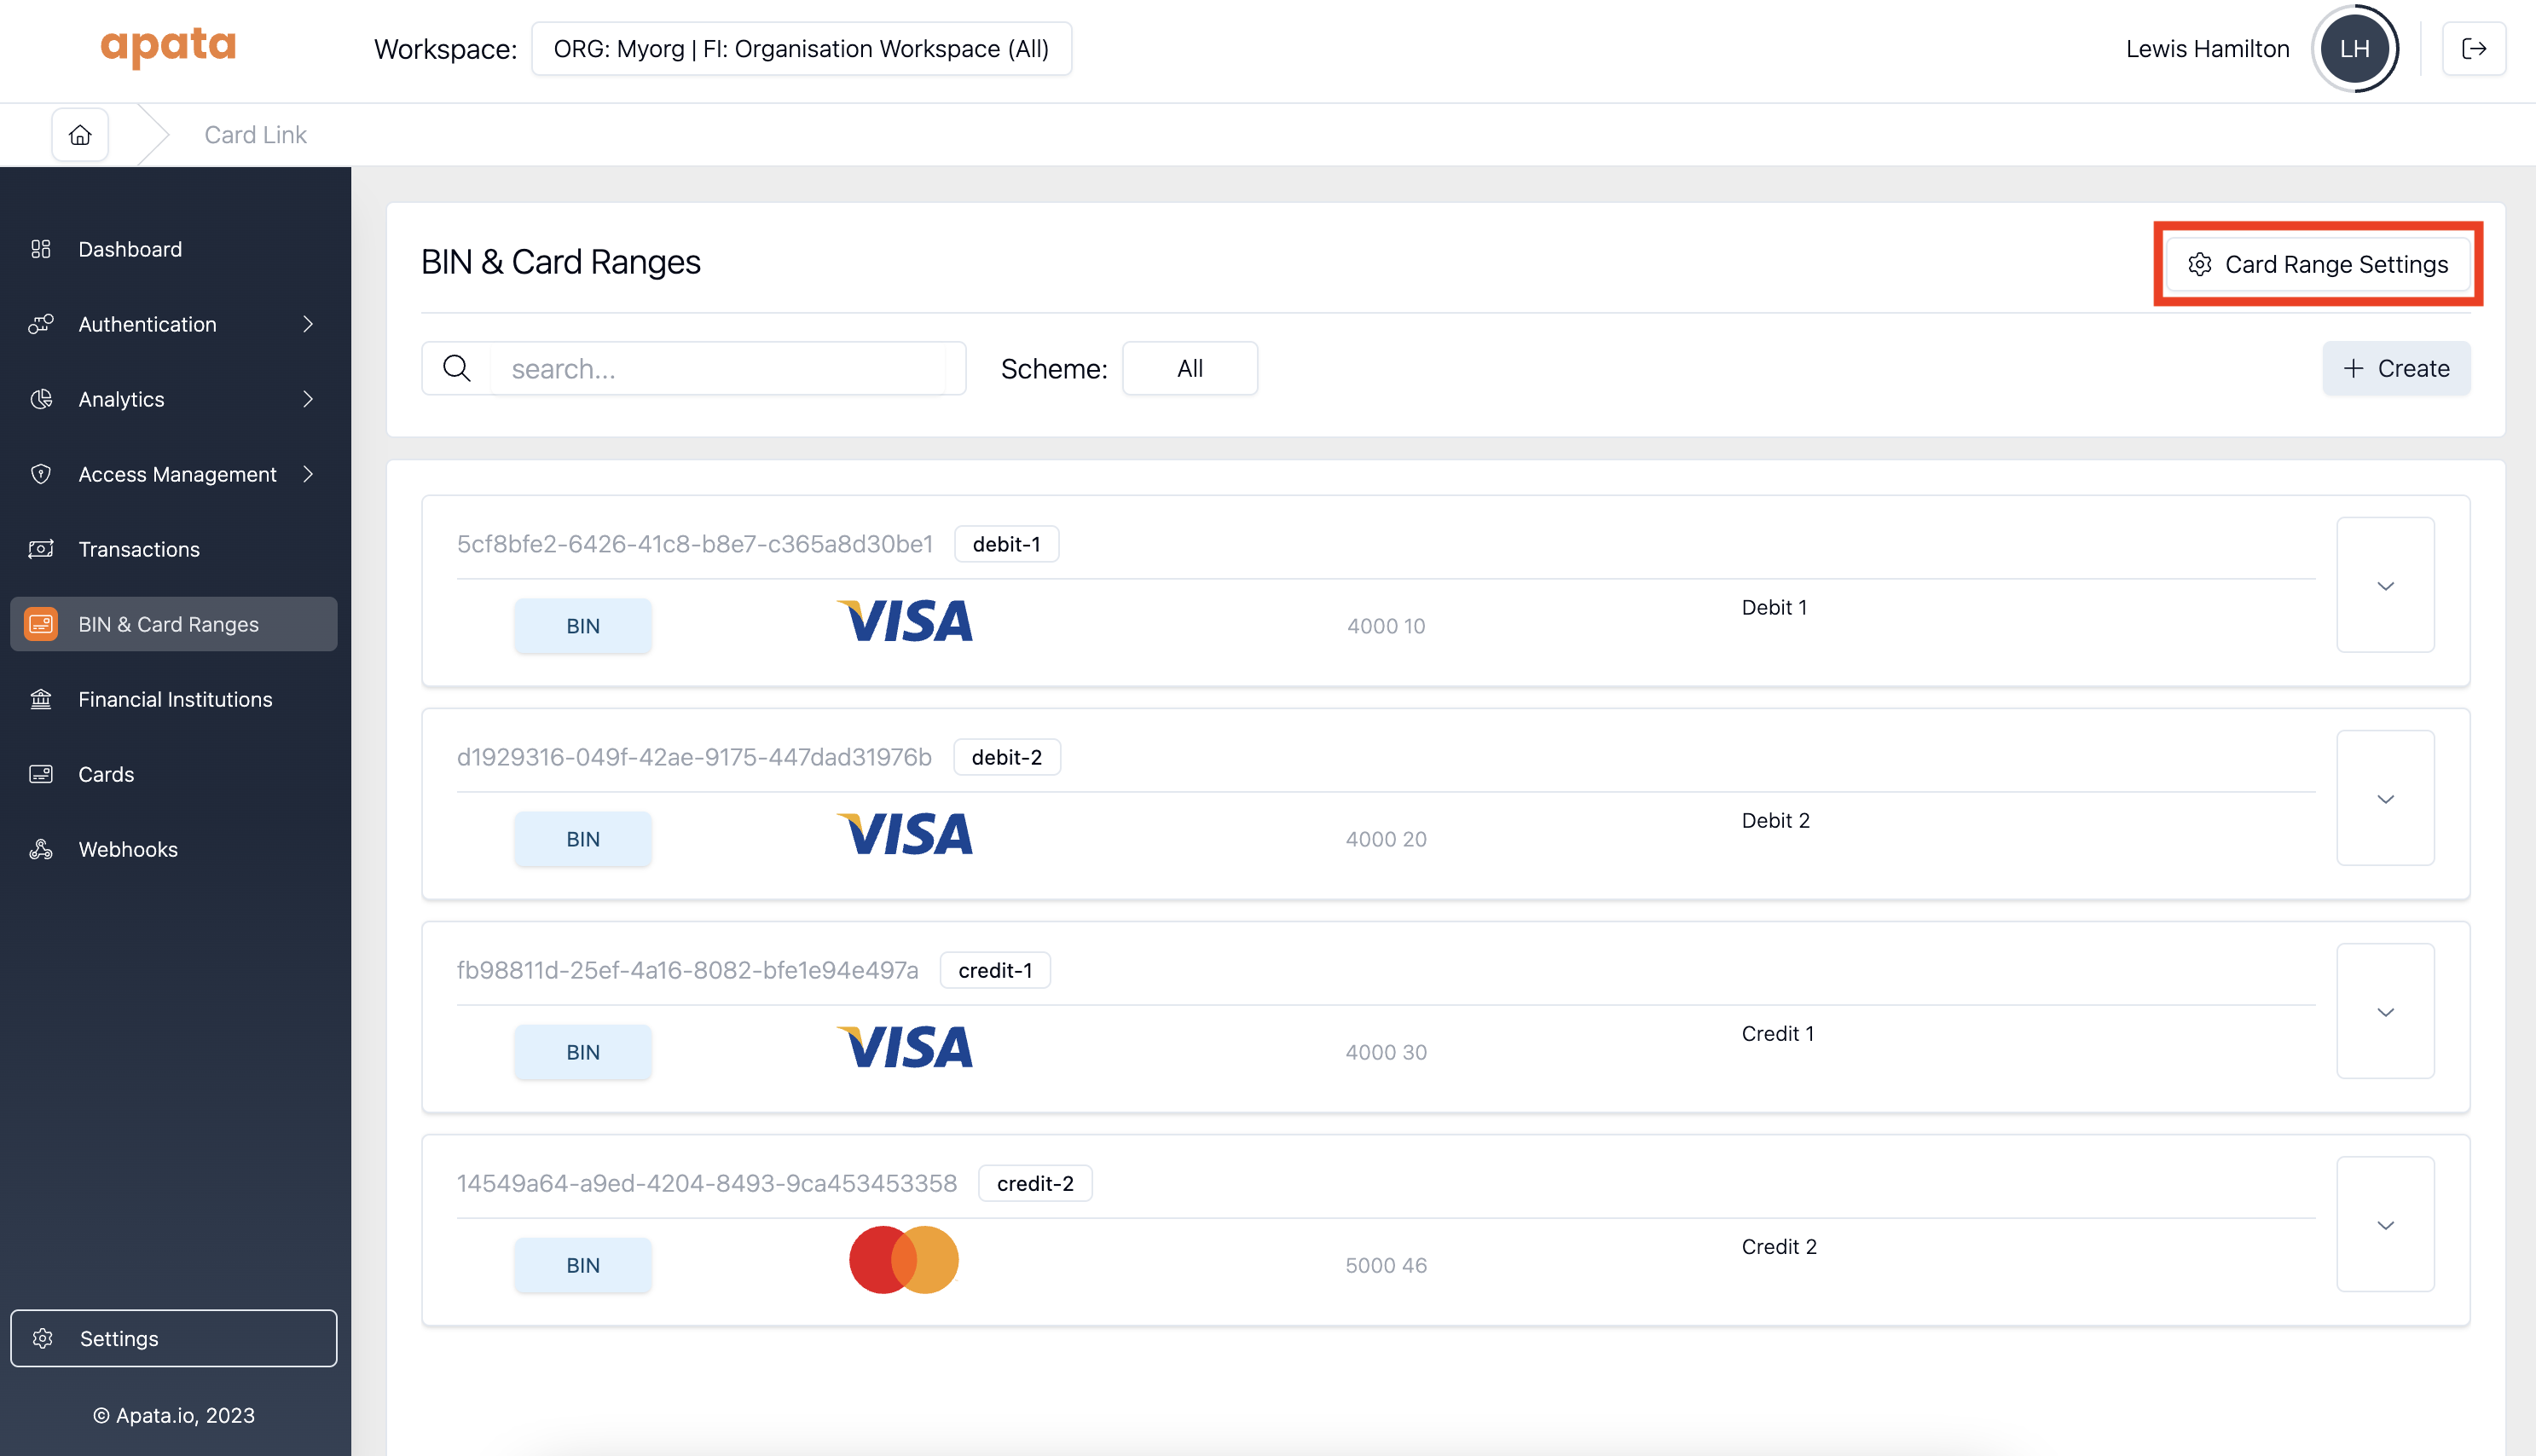
Step 1. Navigate to the BINs & Card Ranges section of the Portal.

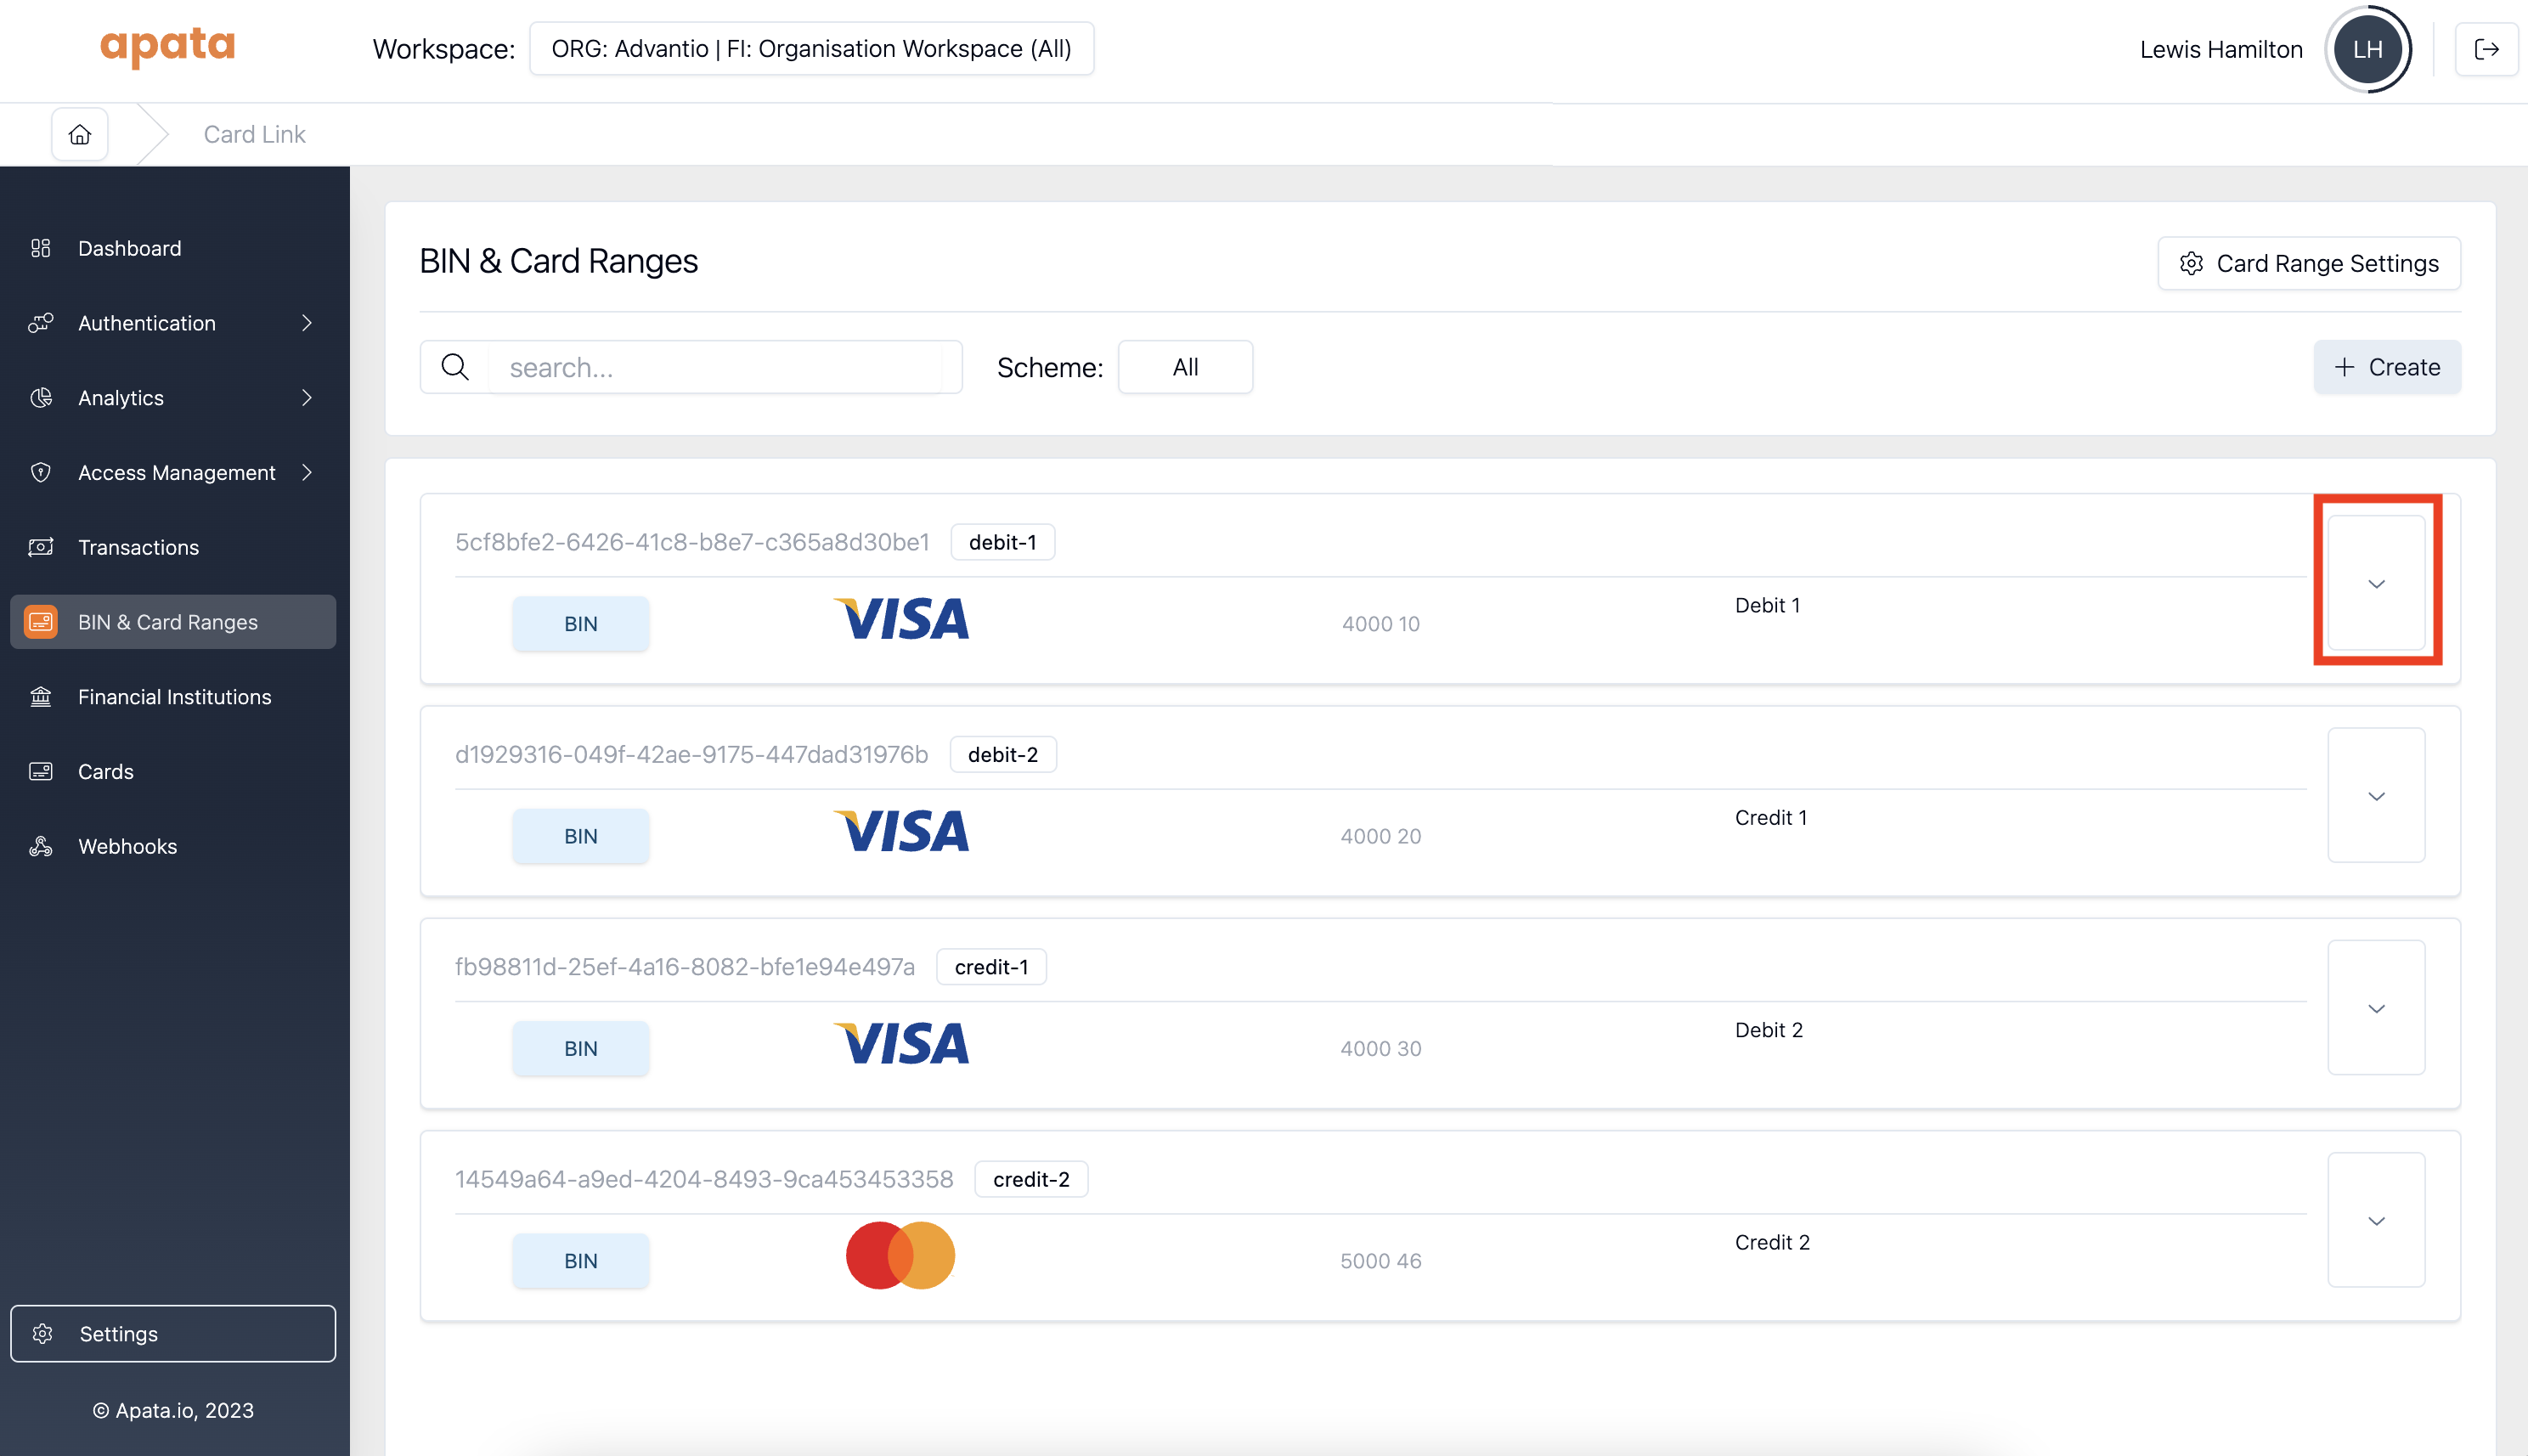
Step 2. Click the chevron on the range you want to enable Card Link for to expand its configuration.

Step 3. Enable the edit toggle to allow changes to the range.

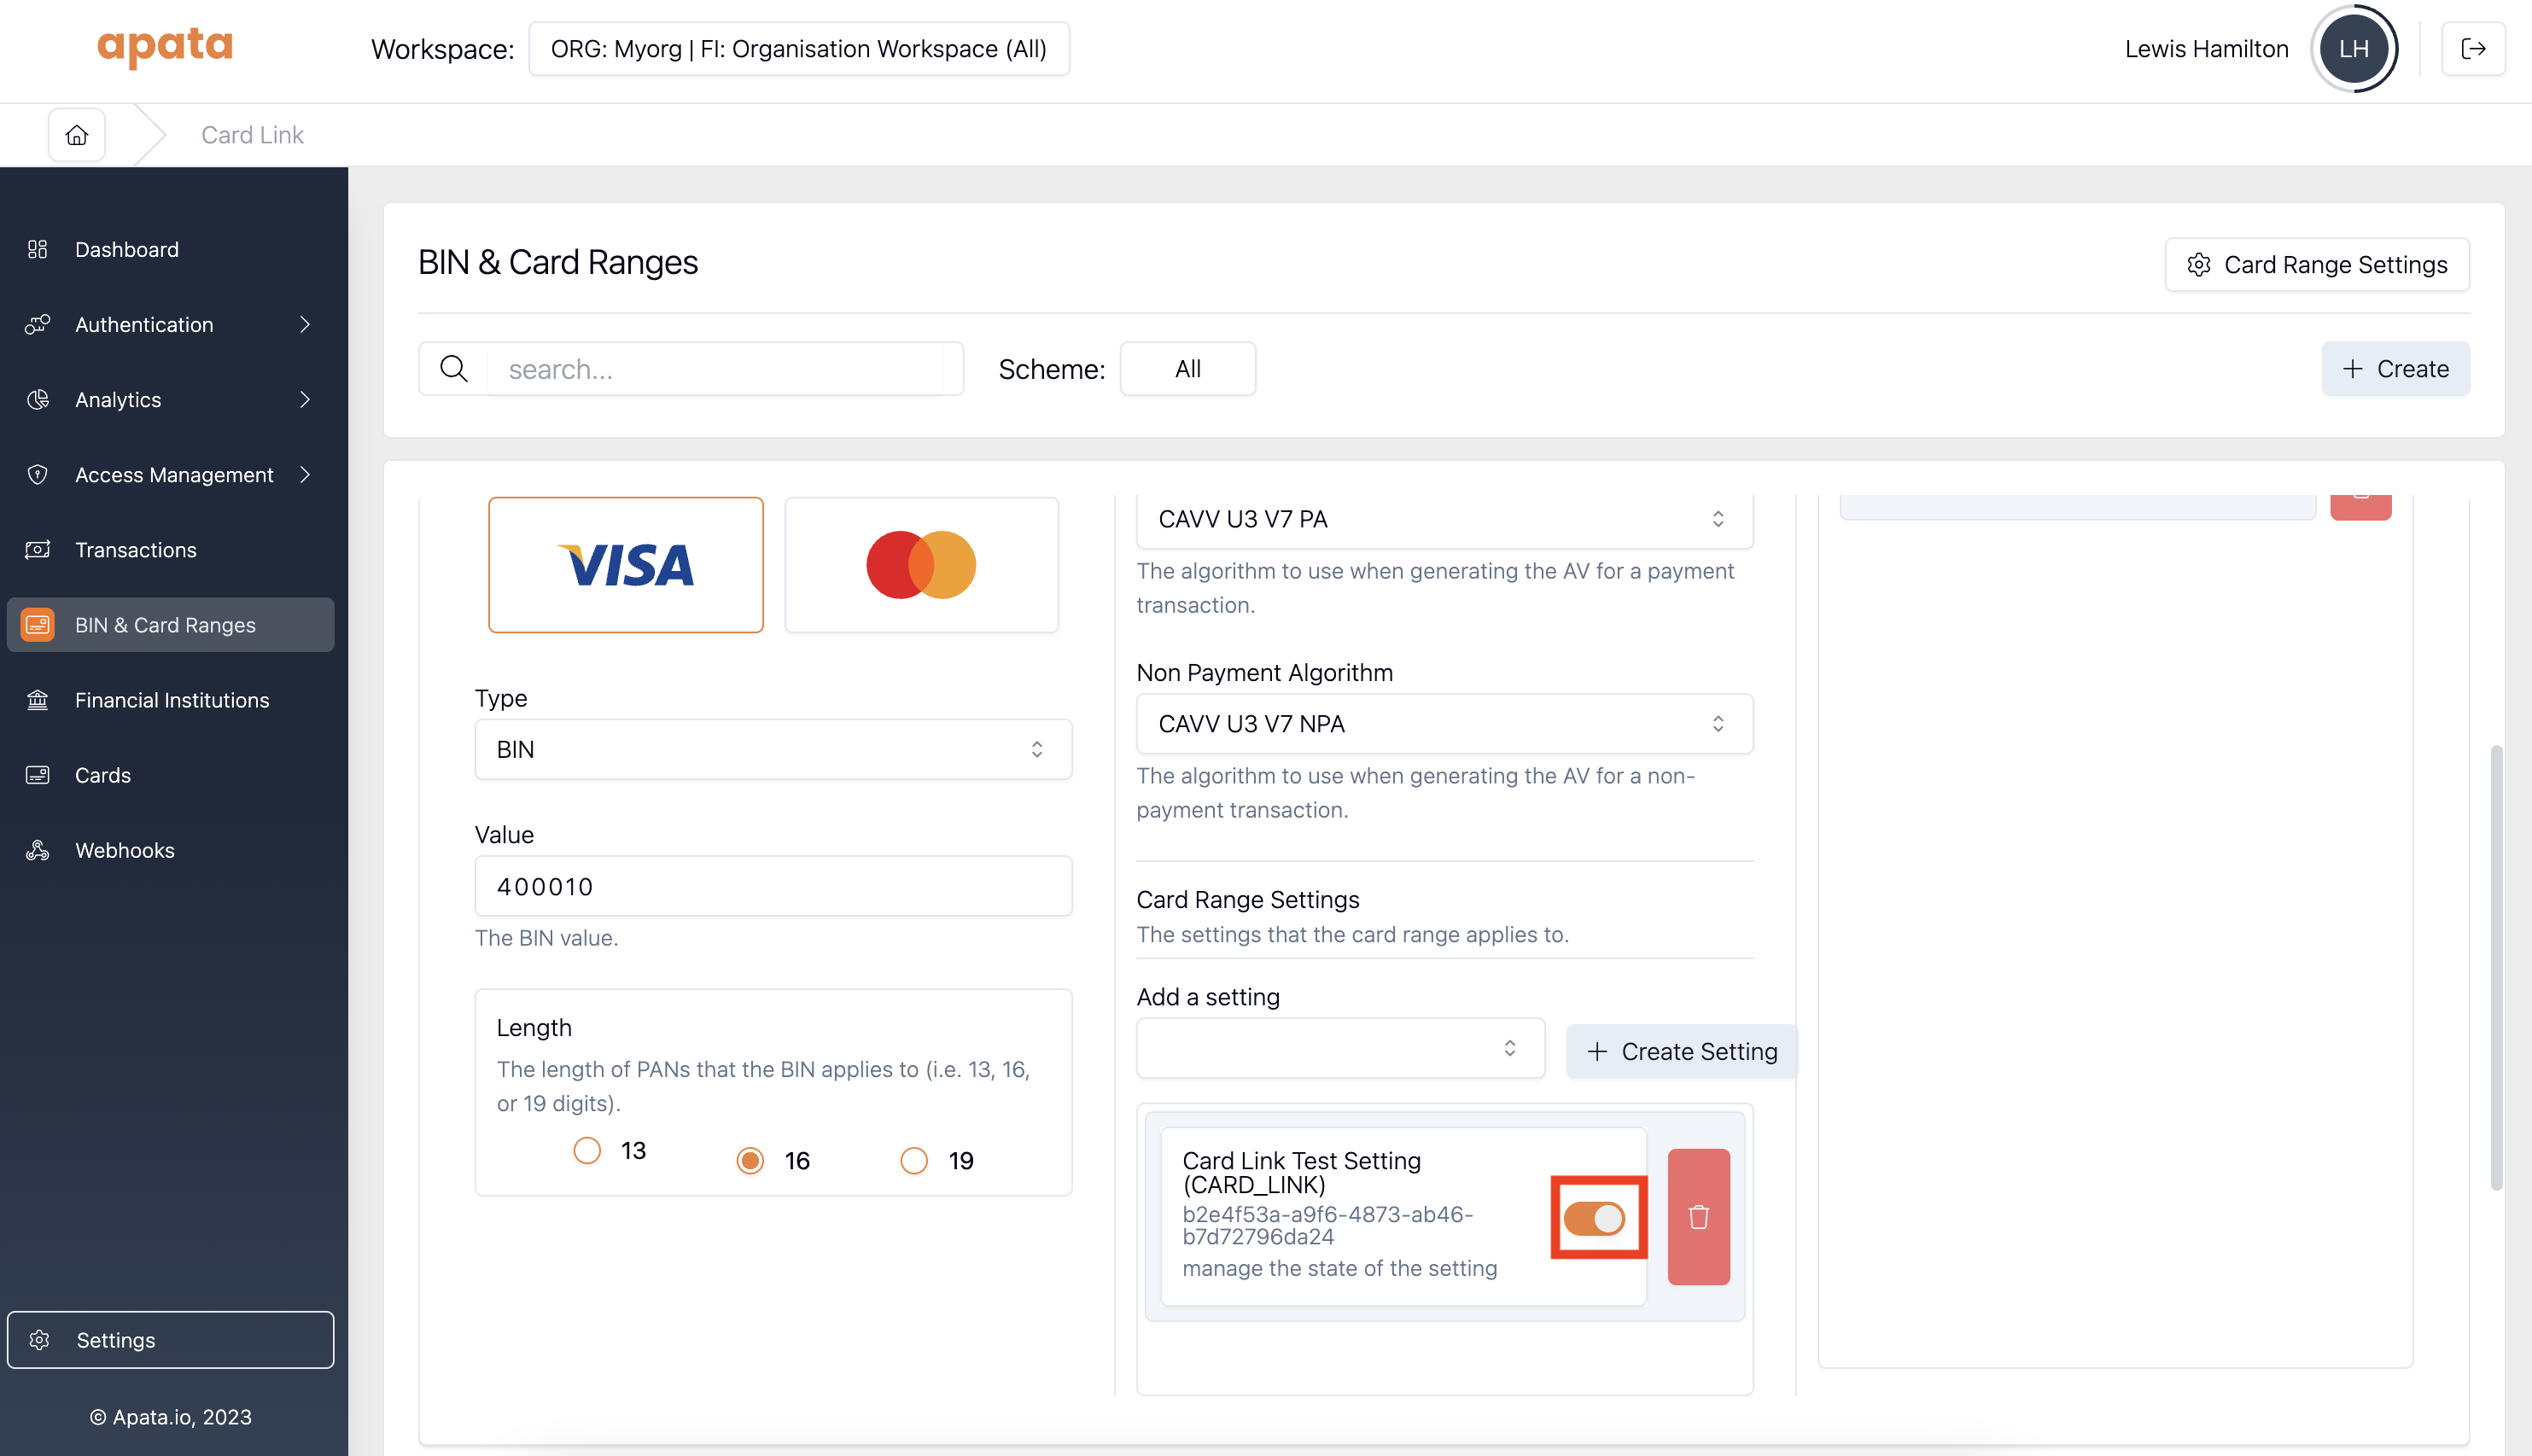
Step 4. Configure the Card Link Type, Webhook, PAN Format, and Storage Mode as described in the Configuration Options section above, then click Create Setting.
Part 2 - Apply the Setting to BIN Ranges
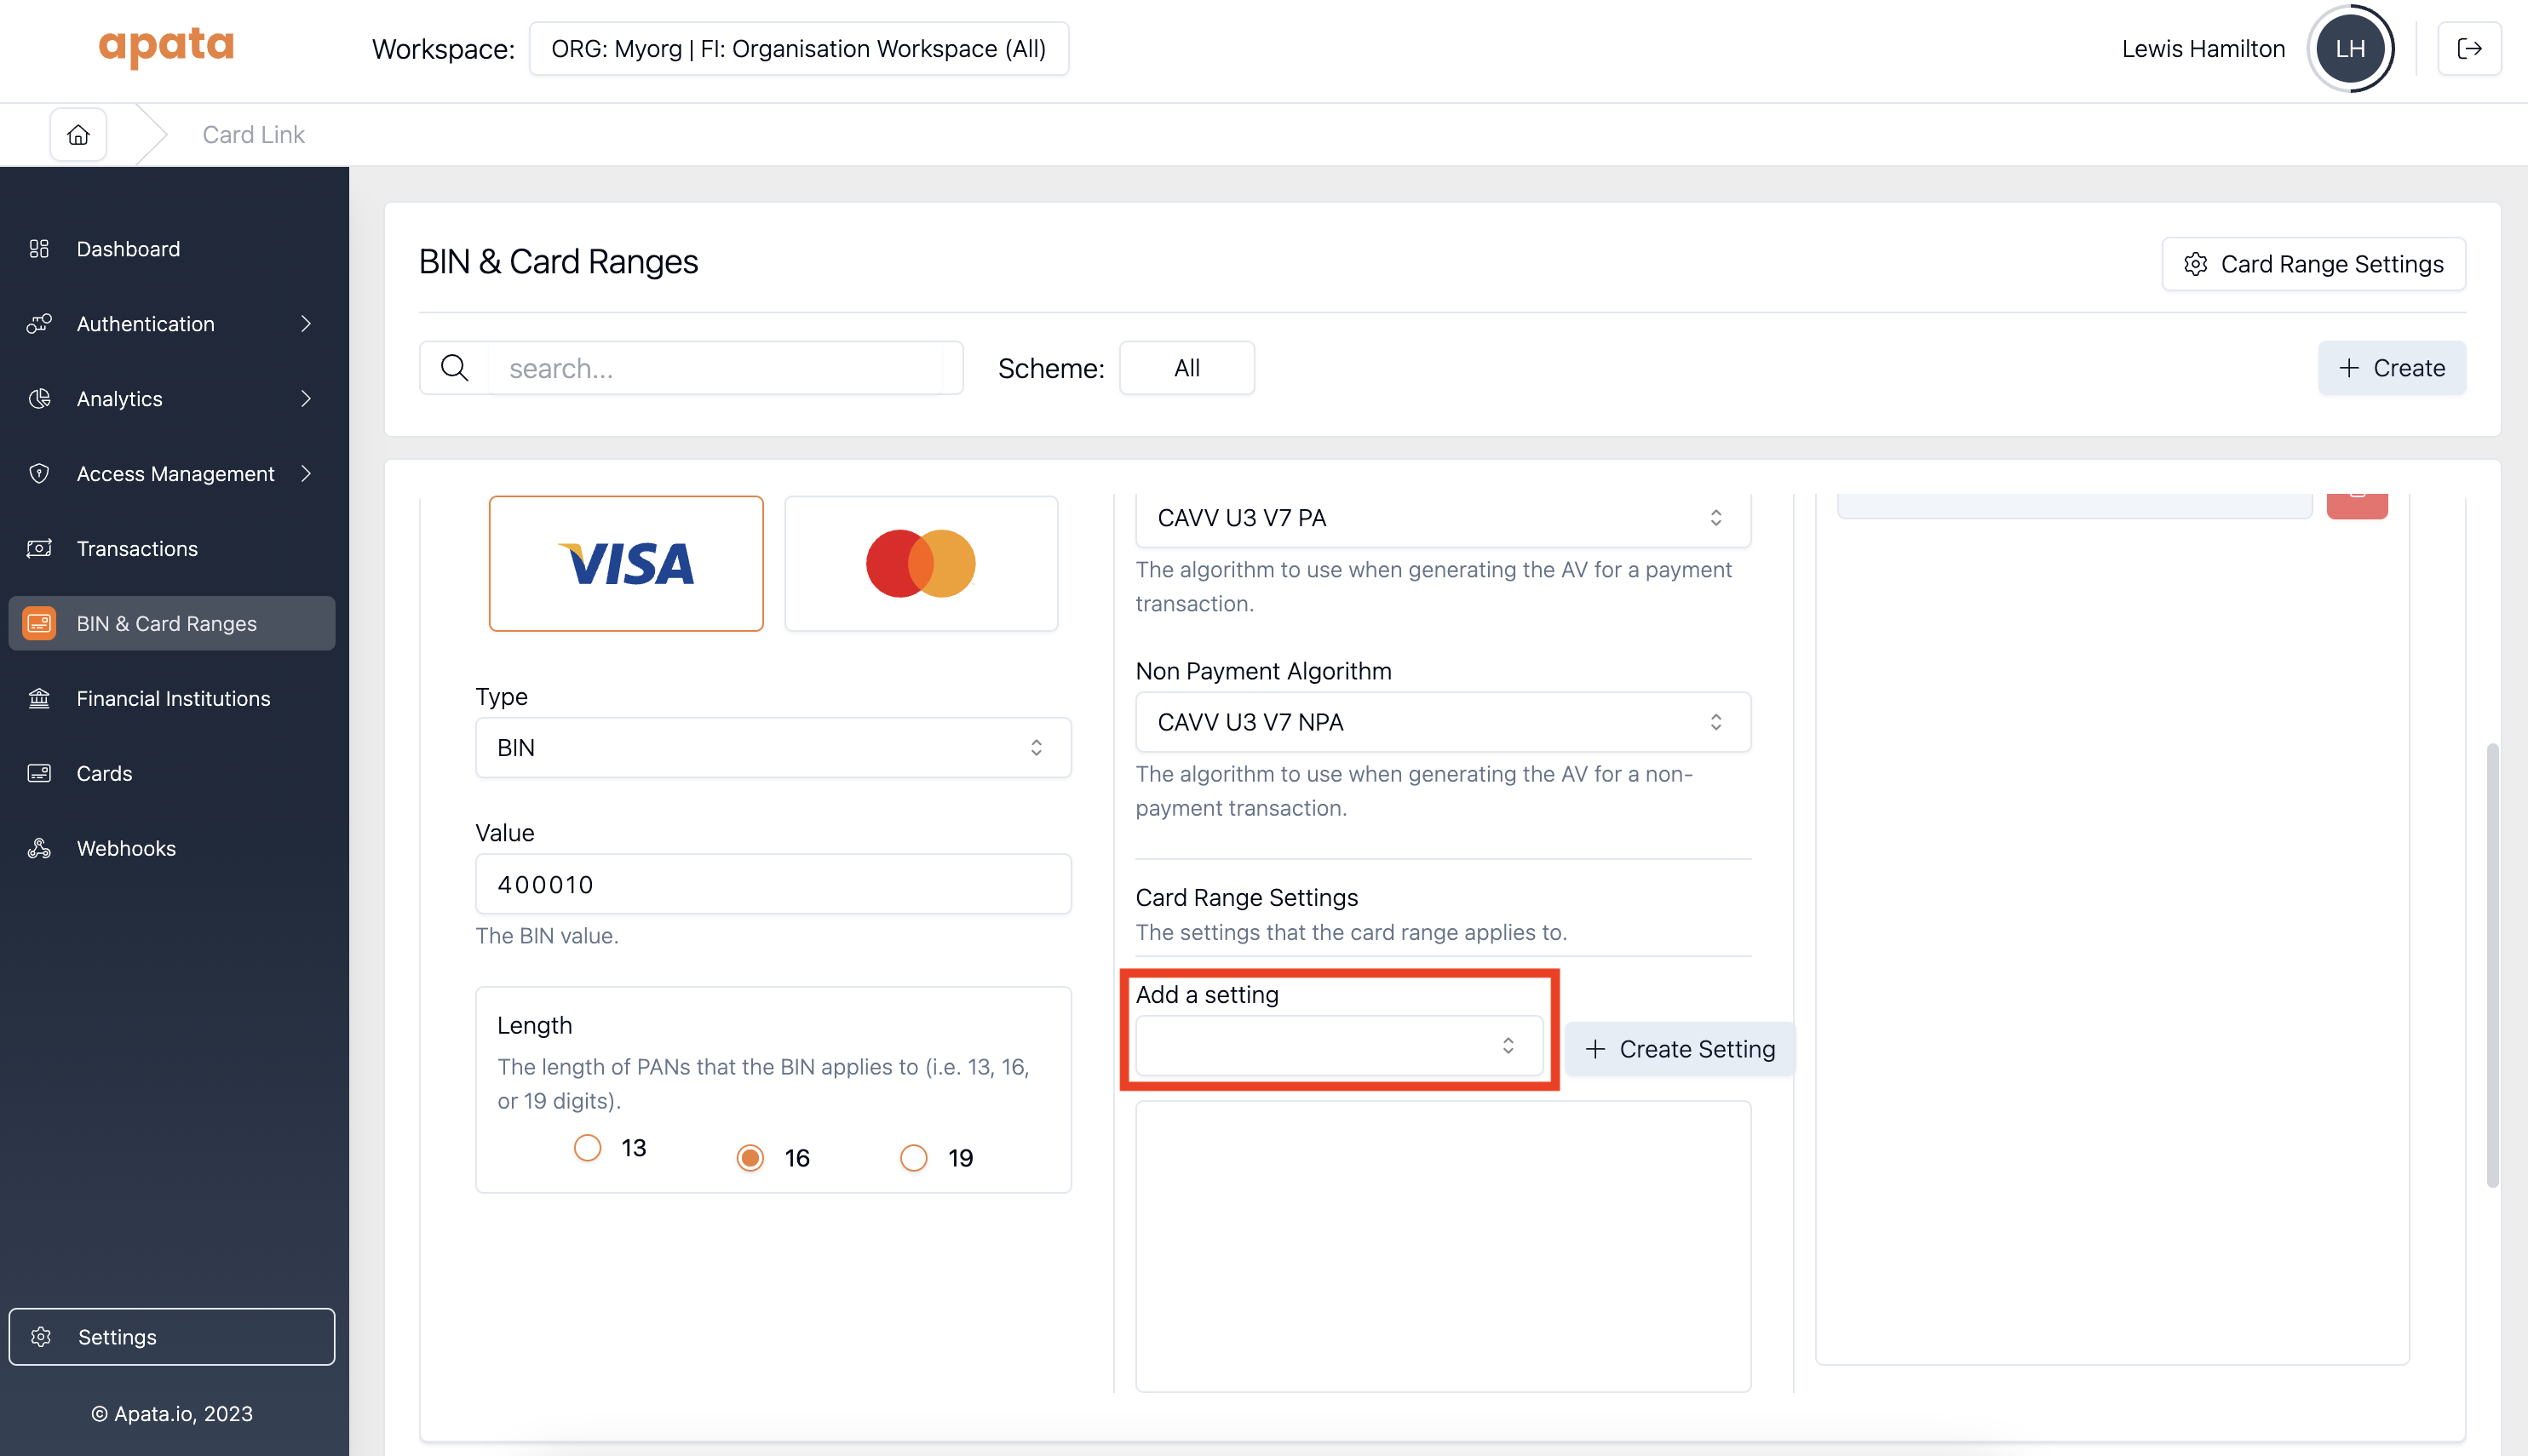
Once selected, the setting will appear in the Settings section.
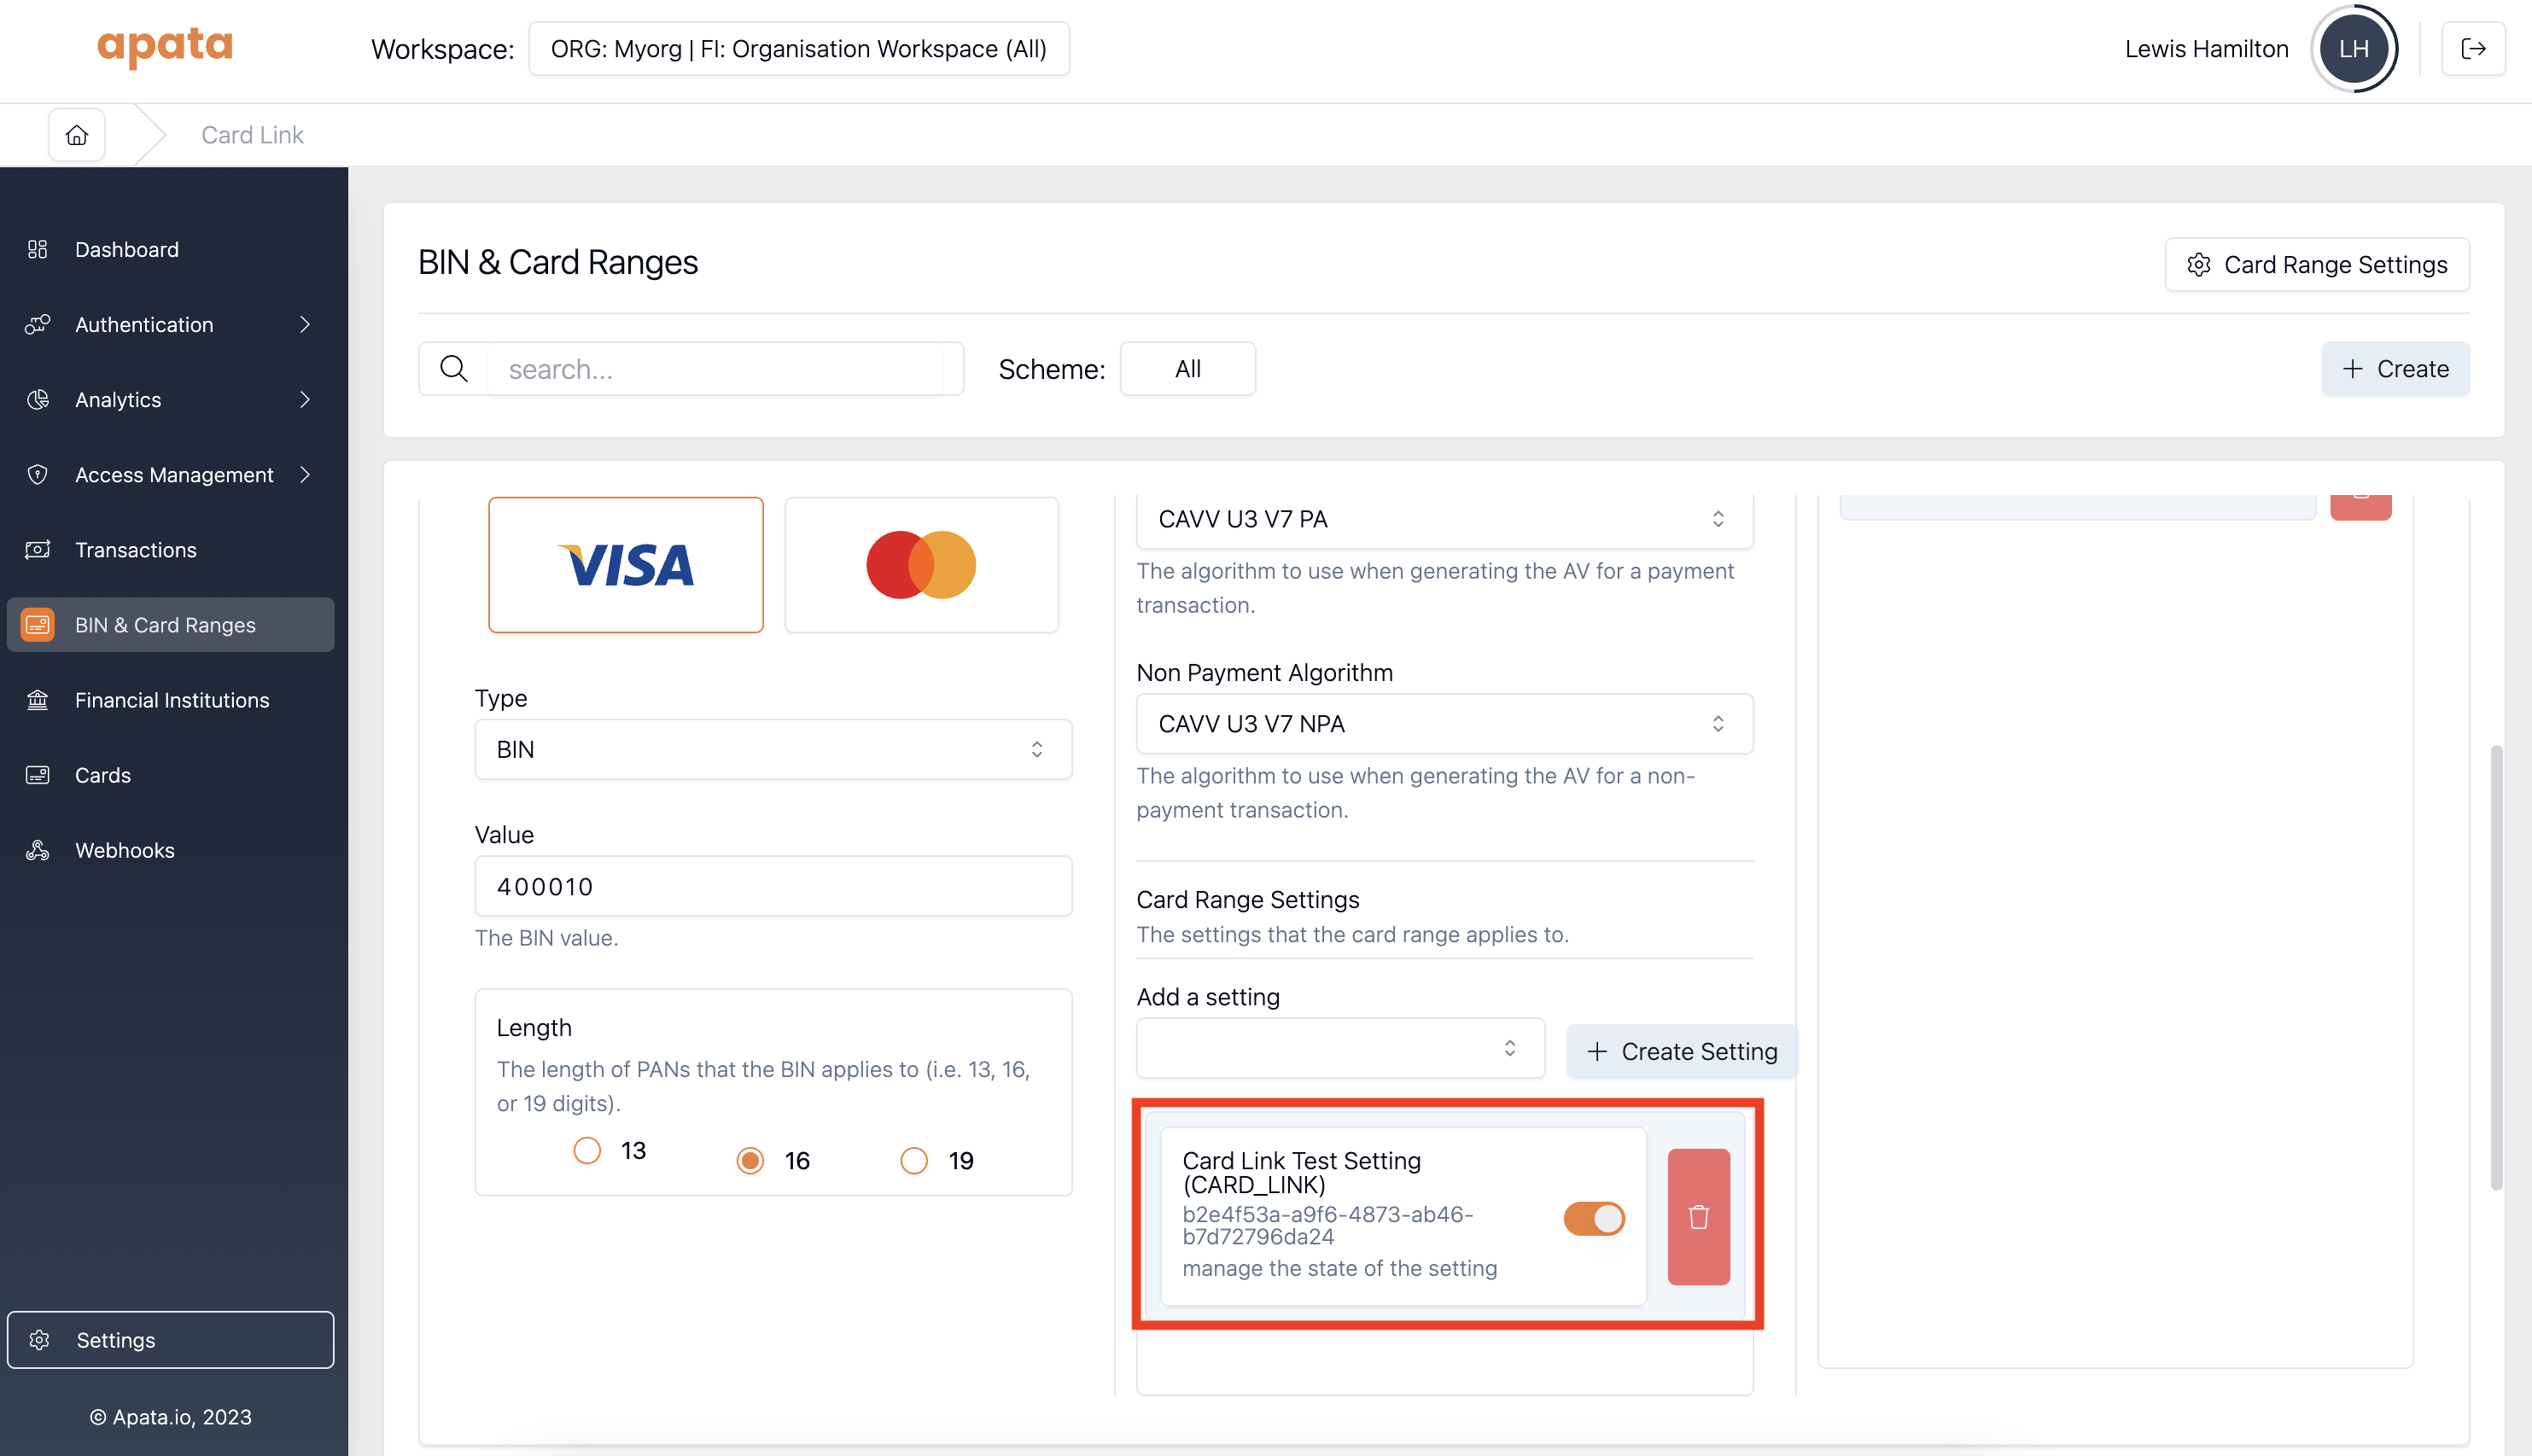
If you want to attach the setting to a range but not activate it yet, use the toggle to disable it. The setting remains attached and can be re-enabled at any time without reconfiguration.

Step 9. Click Update in the top right corner to save the changes.

Disabling Card Link
For an Entire Organisation
Once saved, Apata will no longer call your endpoint for any transactions received for the organisation. Transactions for cards that are already enrolled will continue to work. Transactions for cards that have not been enrolled will fail with acard_not_enrollederror returned to the scheme Directory Server.
Step 1. Navigate to the Organisation Settings section of the Portal.
Step 2. Click the Card Link setting from the list.
Step 3. Click Edit in the top right corner.
Step 4. Toggle the state to Disabled.
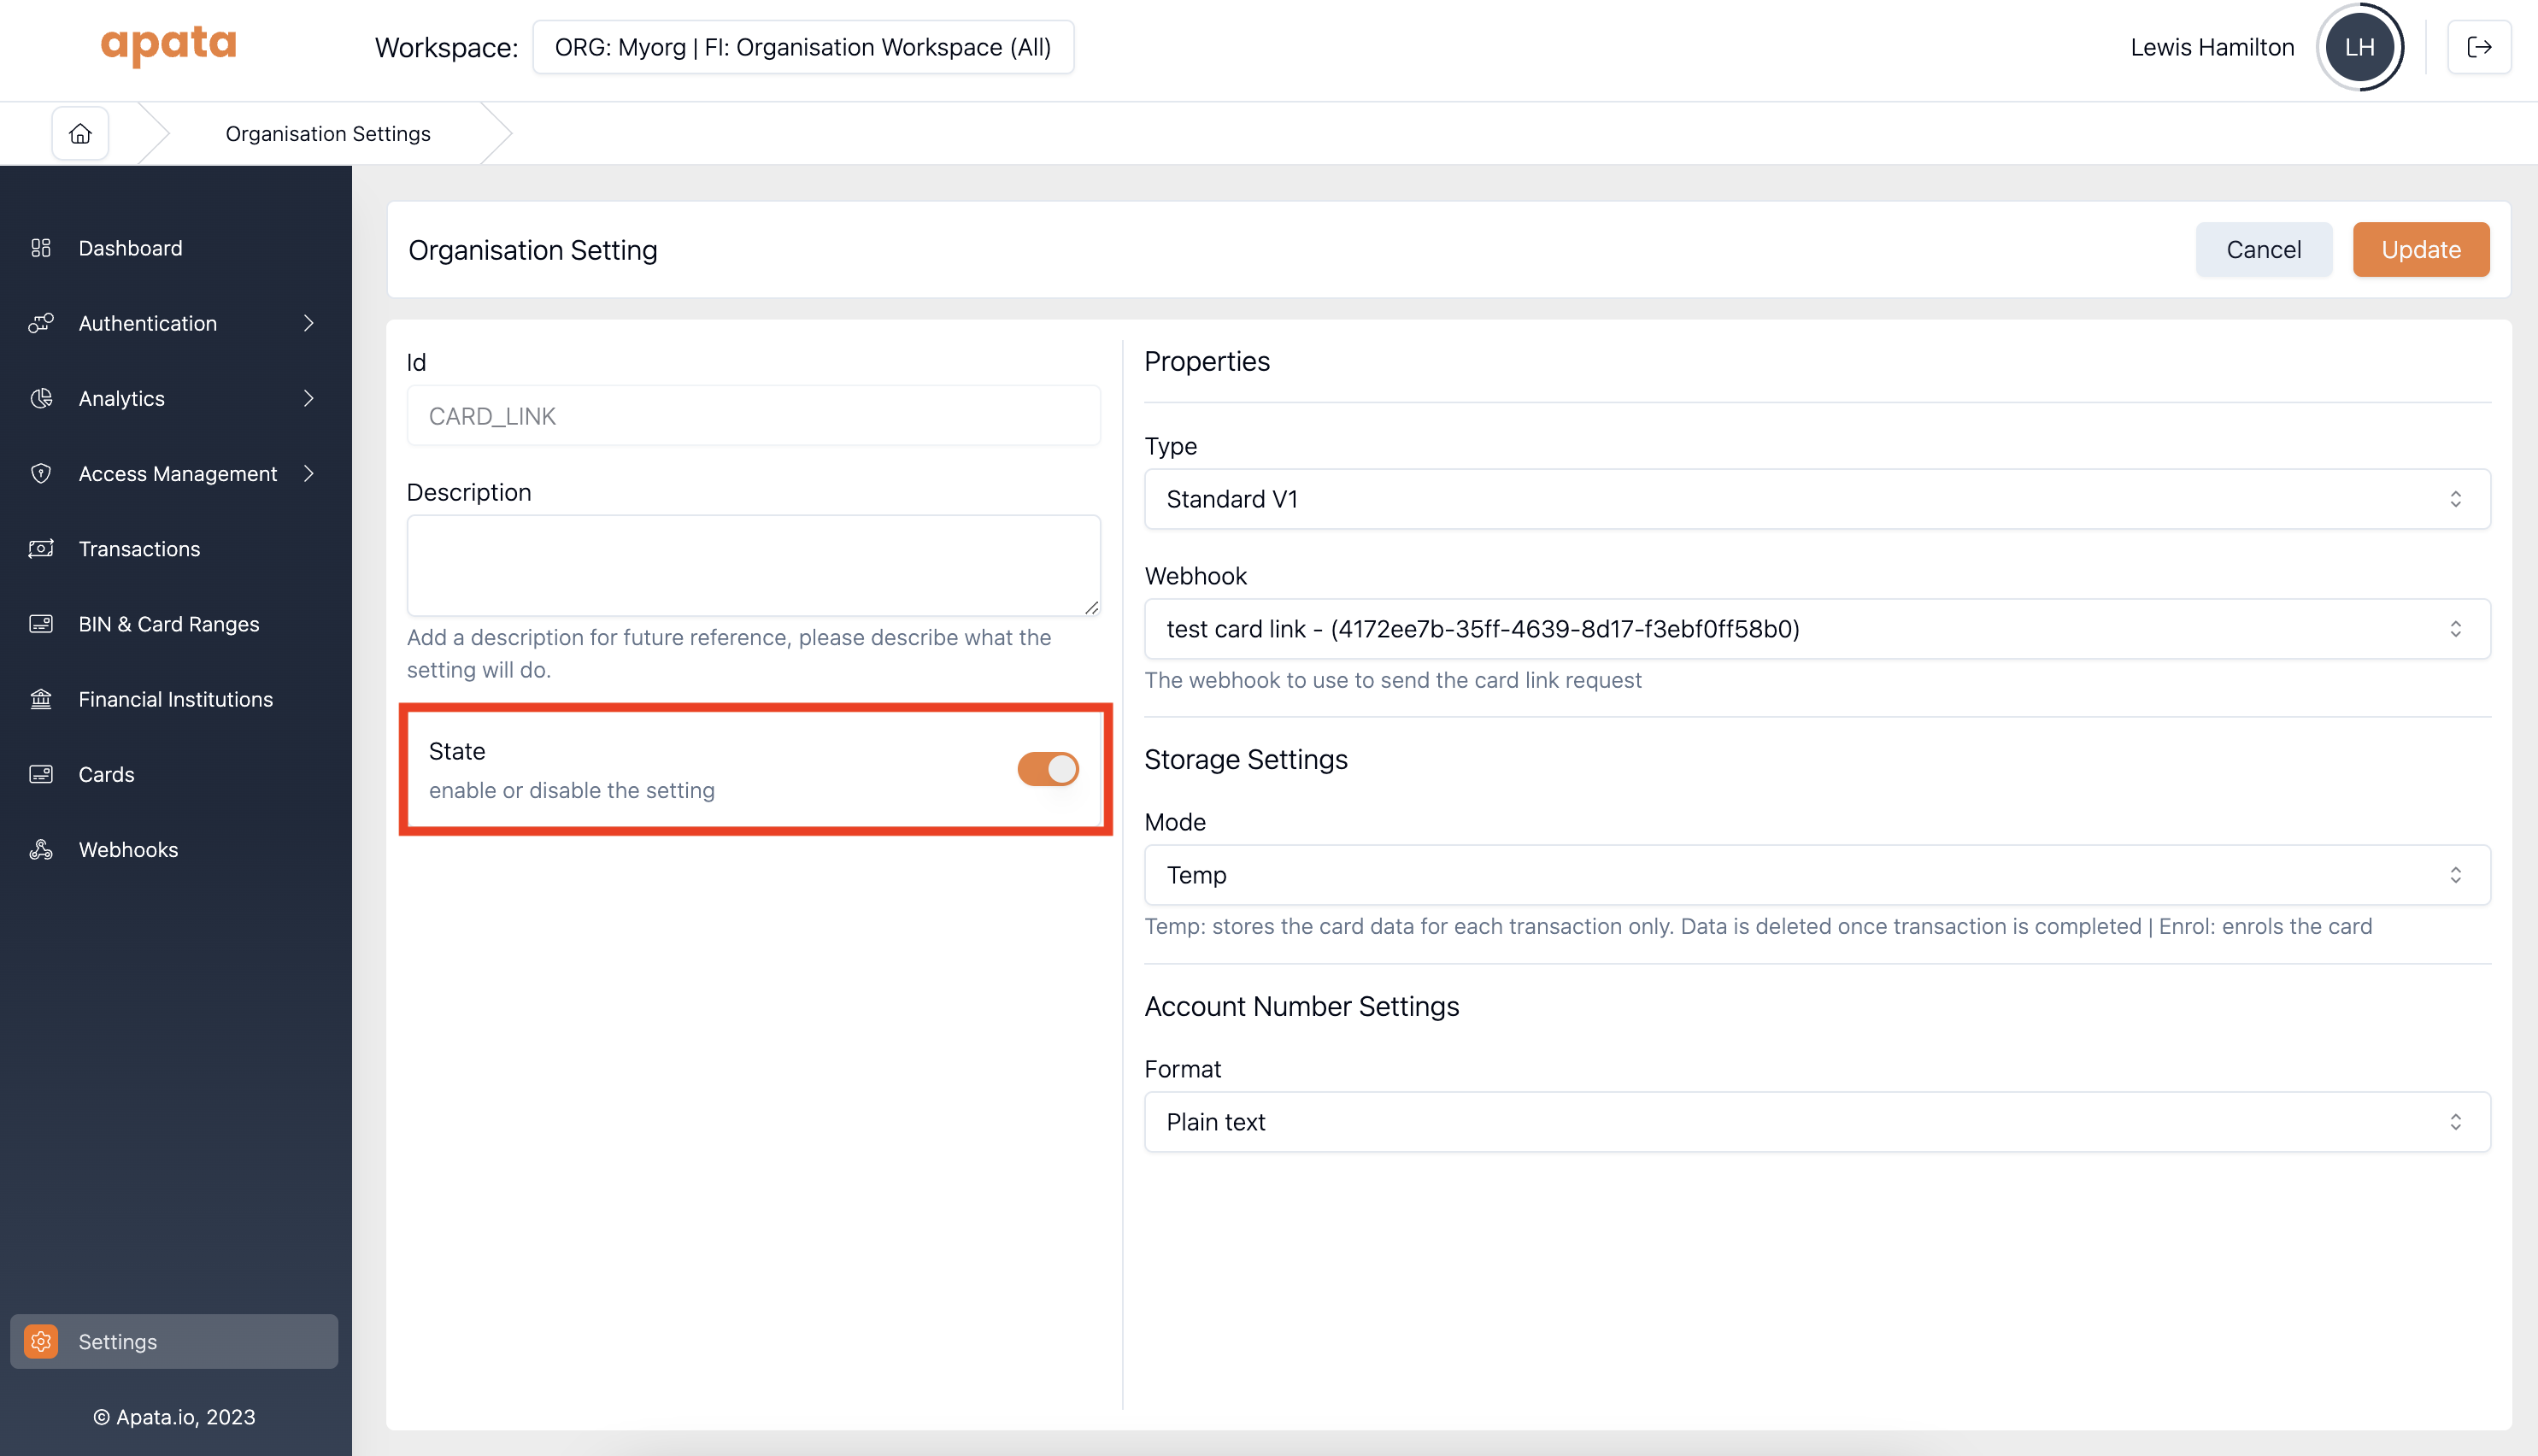
Step 5. Click Update in the top right corner to save the changes.
Step 6 (Optional). If you want to remove the setting entirely, click Remove in the top right corner. We recommend leaving the setting in a disabled state for a period before deleting it.

You will be asked to confirm before deletion proceeds. This action cannot be undone.
For Individual BINs / Card Ranges
Once saved, Apata will no longer call your endpoint for transactions within the affected range. Transactions for already-enrolled cards will continue to work. Transactions for cards that have not been enrolled will fail with acard_not_enrollederror.
Step 1. Navigate to the BINs & Card Ranges section of the Portal.
Step 2. Expand the range you want to disable Card Link for by clicking the chevron.
Step 3. Enable the edit toggle.

Step 4. In the Settings section, toggle the Card Link setting to disabled.
Step 5. Click Update to save the changes.
Repeat for each range you want to disable Card Link on.
Step 6 (Optional). To remove the setting from a range entirely rather than disabling it, click the delete icon next to the setting in the Settings section. We recommend leaving settings in a disabled state for a period before removing them.

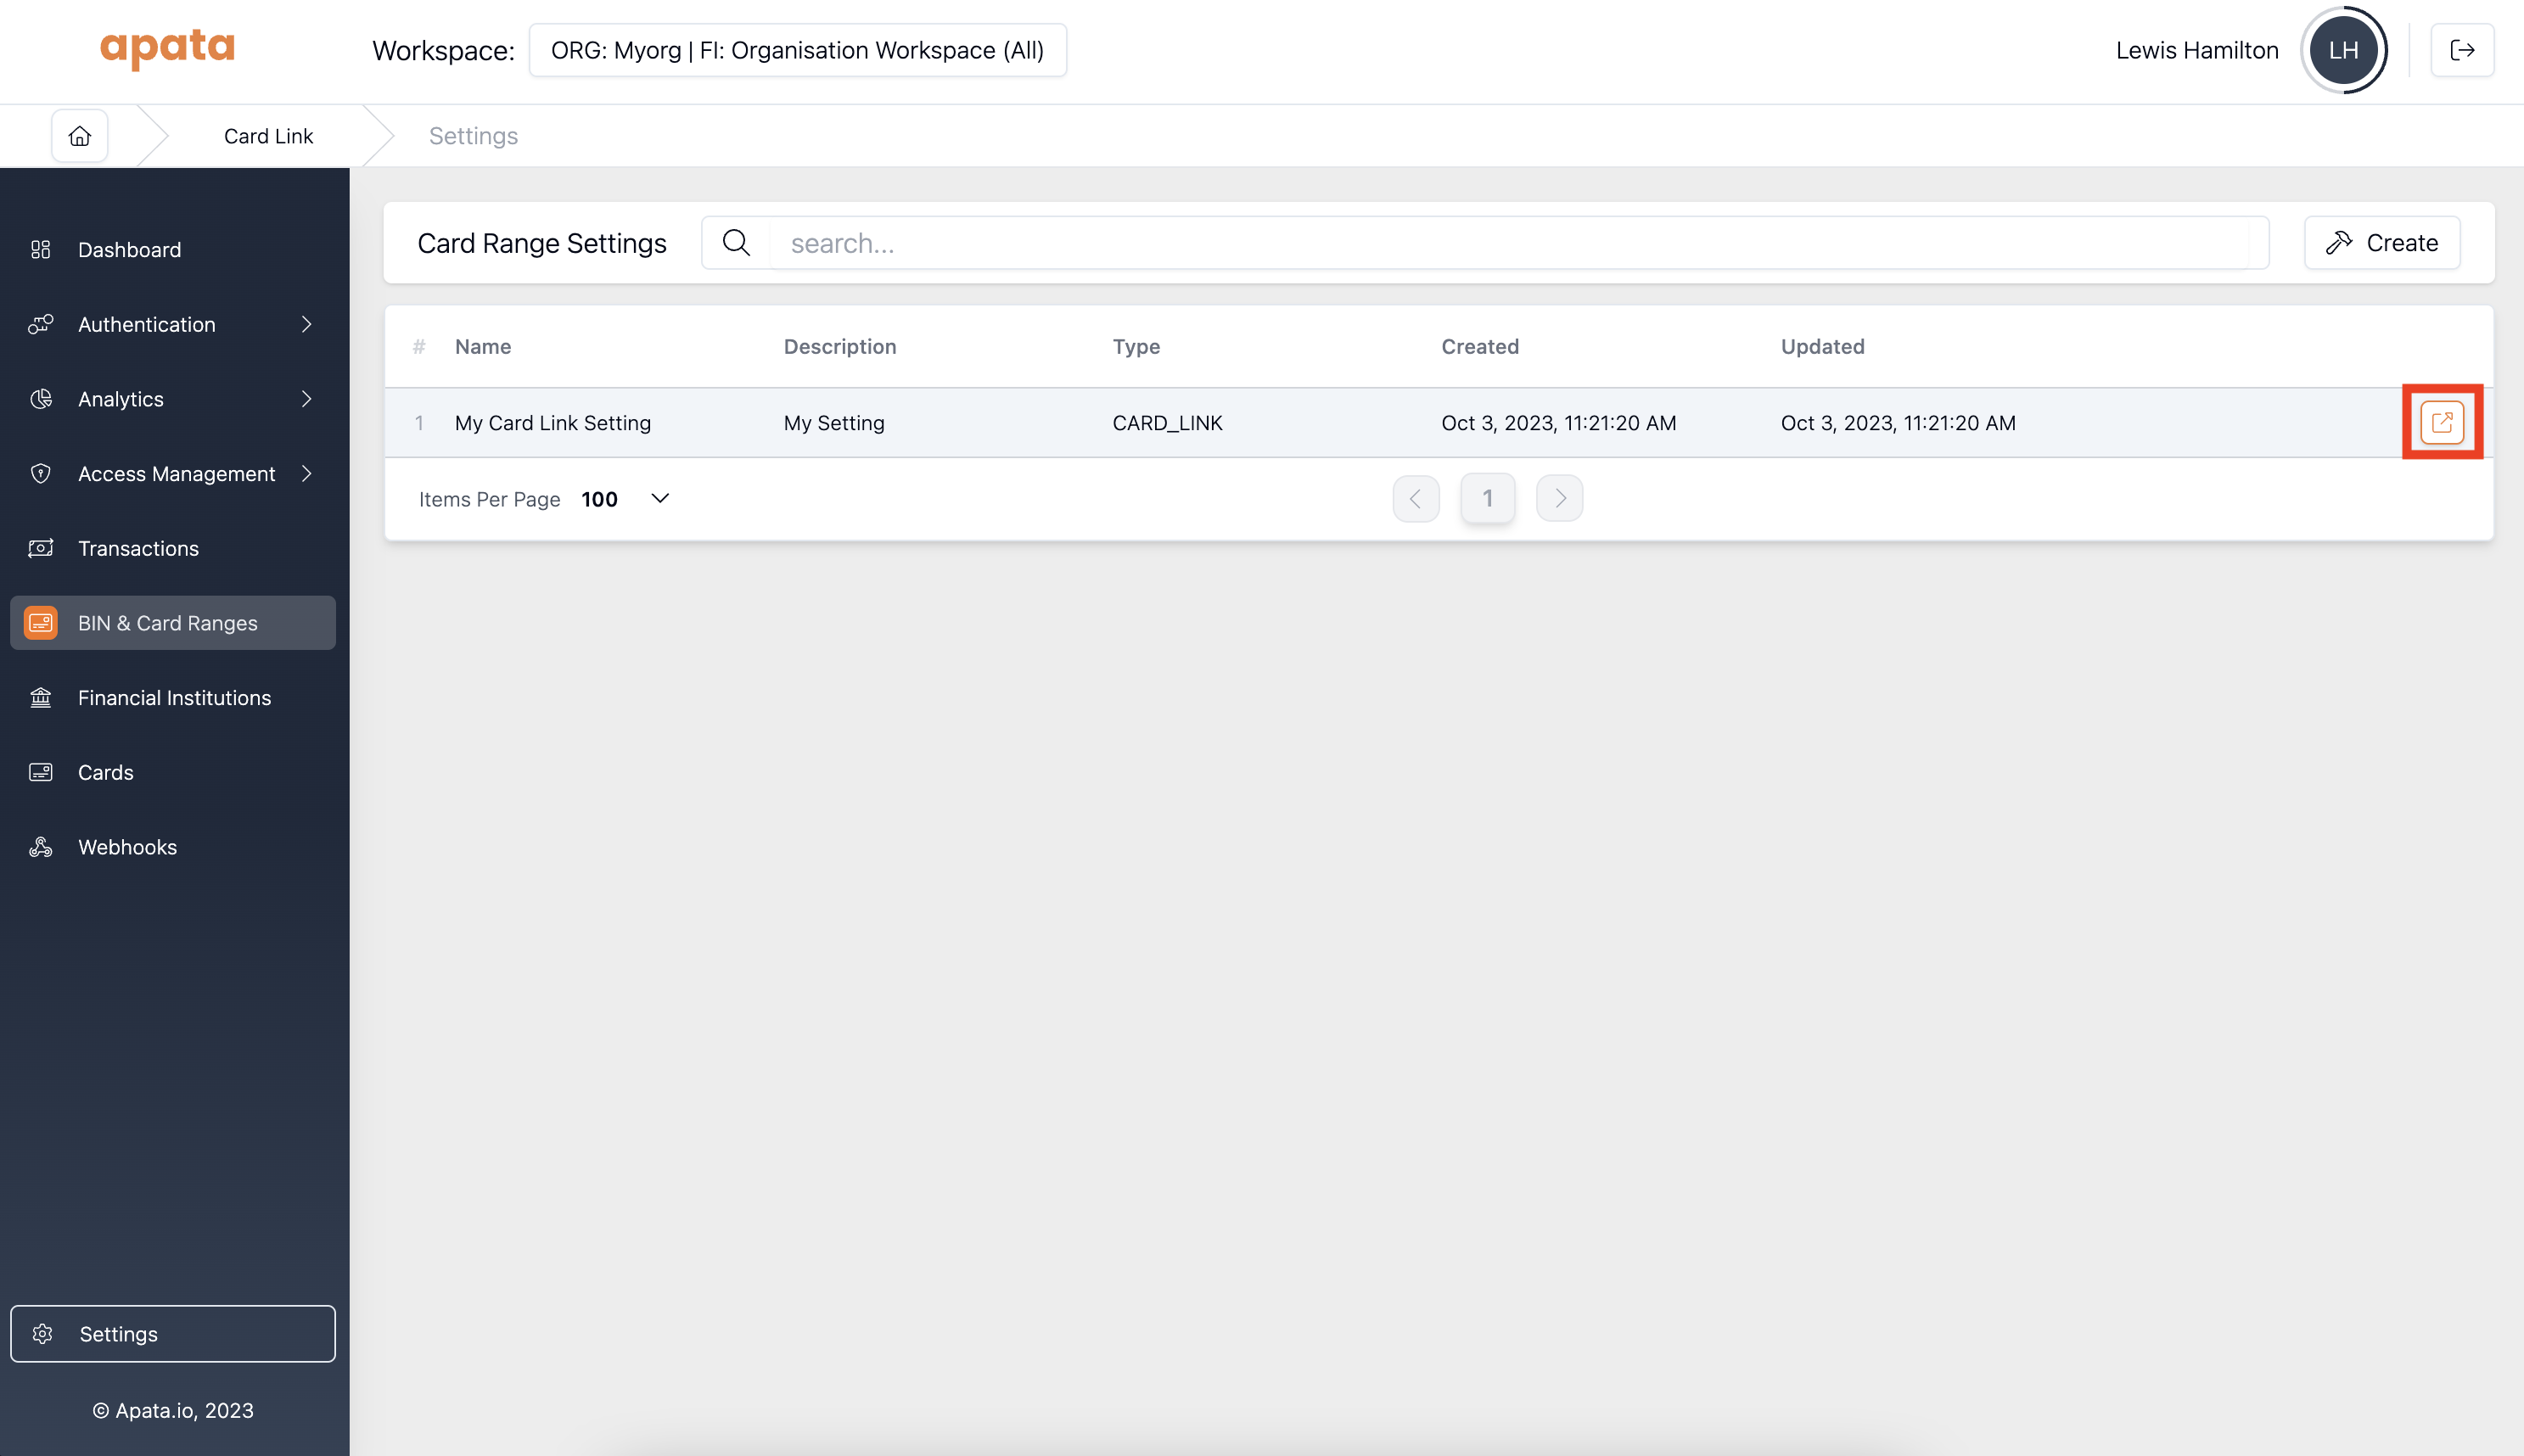
Deleting a Card Range Setting
To delete a setting so it can no longer be applied to any ranges:
Step 1. Navigate to BINs & Card Ranges and click Card Range Settings.
Step 2. Click the Card Link setting you want to delete.
Step 3. Click Remove in the top right corner. You will be asked to confirm. This action cannot be undone.

Unsuccessful Response Codes
When a card cannot be resolved, your endpoint should return one of the following error codes. Apata maps these to the corresponding ARes fields returned to the payment scheme.
| Code | Meaning | transStatus | transStatusReason |
|---|---|---|---|
CARD_NOT_ENROLLED | The card exists but is not enrolled in the 3DS service. | N | 13 - Cardholder not enrolled in service |
CARD_DOES_NOT_EXIST | No card with this PAN exists in your system. | R | 08 - No card record |
CARD_DISABLED | The card is currently disabled. | R | 15 - Low confidence |
ReturningCARD_NOT_ENROLLEDfor a non-existent card may cause schemes to invoke a stand-in service, which can incur charges. ReturnCARD_DOES_NOT_EXISTinstead when the card does not exist in your system.
When returning an error code, include the following fields in the response body:
Response Fields
| Field | Required | Description |
|---|---|---|
code | Required | One of CARD_NOT_ENROLLED, CARD_DOES_NOT_EXIST, CARD_DISABLED. |
financialInstitutionId | Required for CARD_DISABLED. Optional for others. | The Financial Institution ID or alias. If omitted, the institution is recorded as UNKNOWN on the transaction. |
externalId | Optional | Your own identifier for the card. Used for filtering and linking the card to a PAN. |