User Management
In Apata, users and organisations are independent. A single user can be granted access to multiple Organisations or Financial Institutions without needing separate accounts.
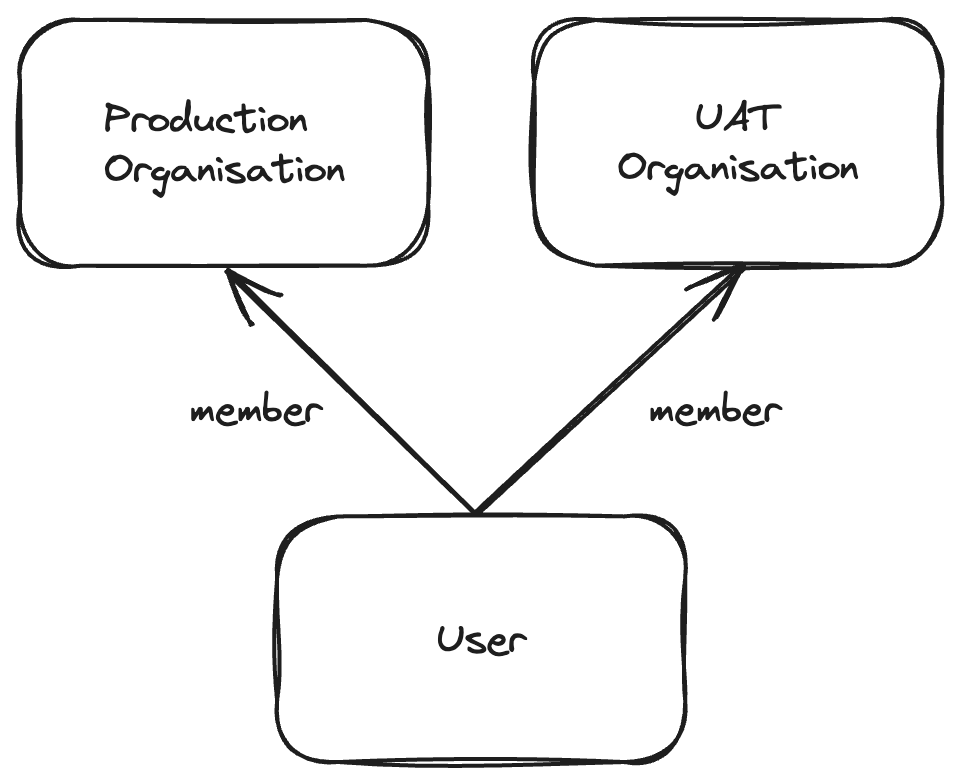
One account can access production, staging, and UAT environments.
Granular control over what each user can view or manage.
Group permissions into reusable roles for easy assignment.
User & Membership Model
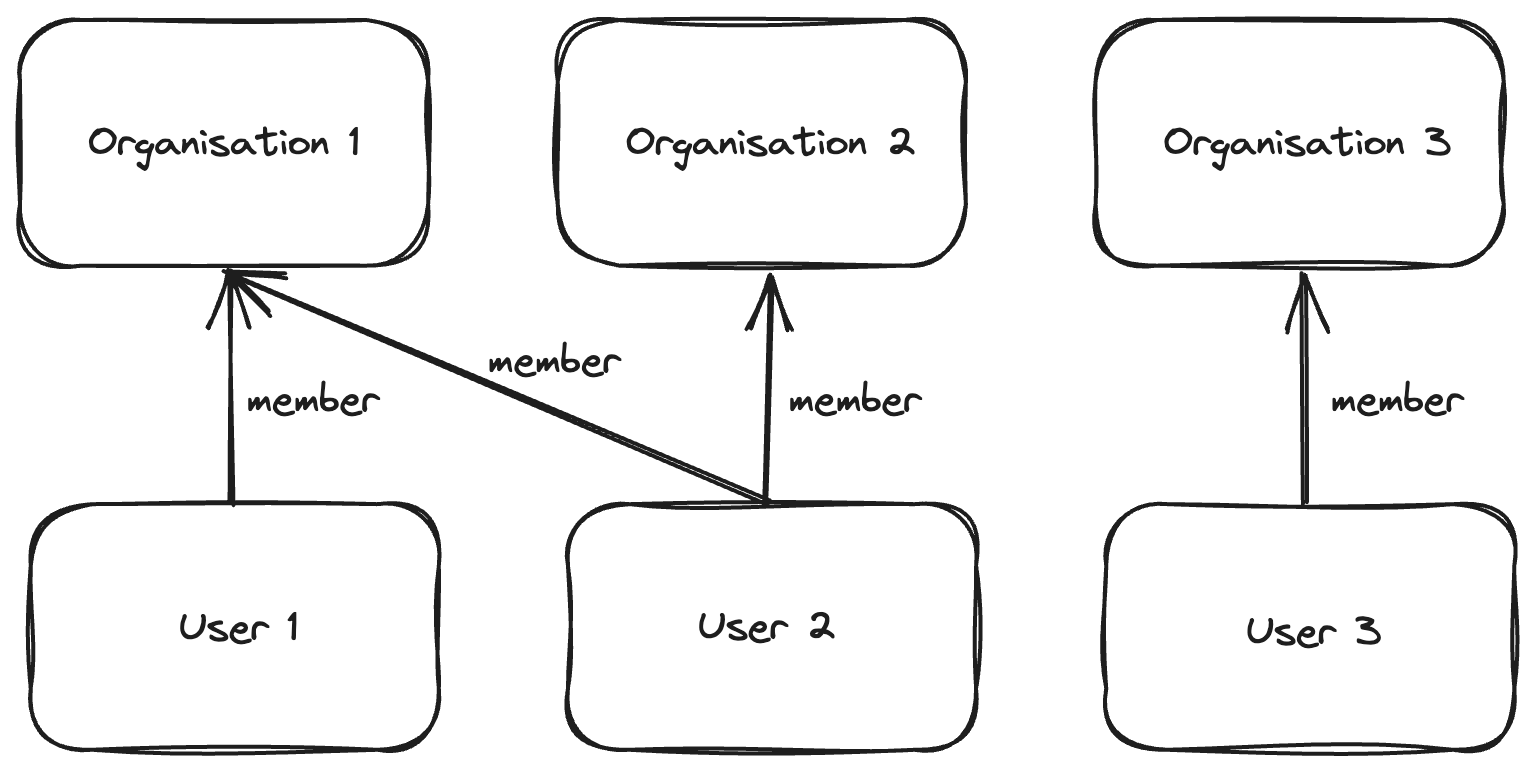
A user can access both production and UAT/staging organisations with one account.
Membership Levels
Organisation Membership
Users with organisation-level membership:
- Can access org-level and FI-level resources (with permissions)
- Can view a list of all FIs in the organisation
- Cannot access FI resources without explicit permissions
Typical users: Developers, account managers, organisation employees
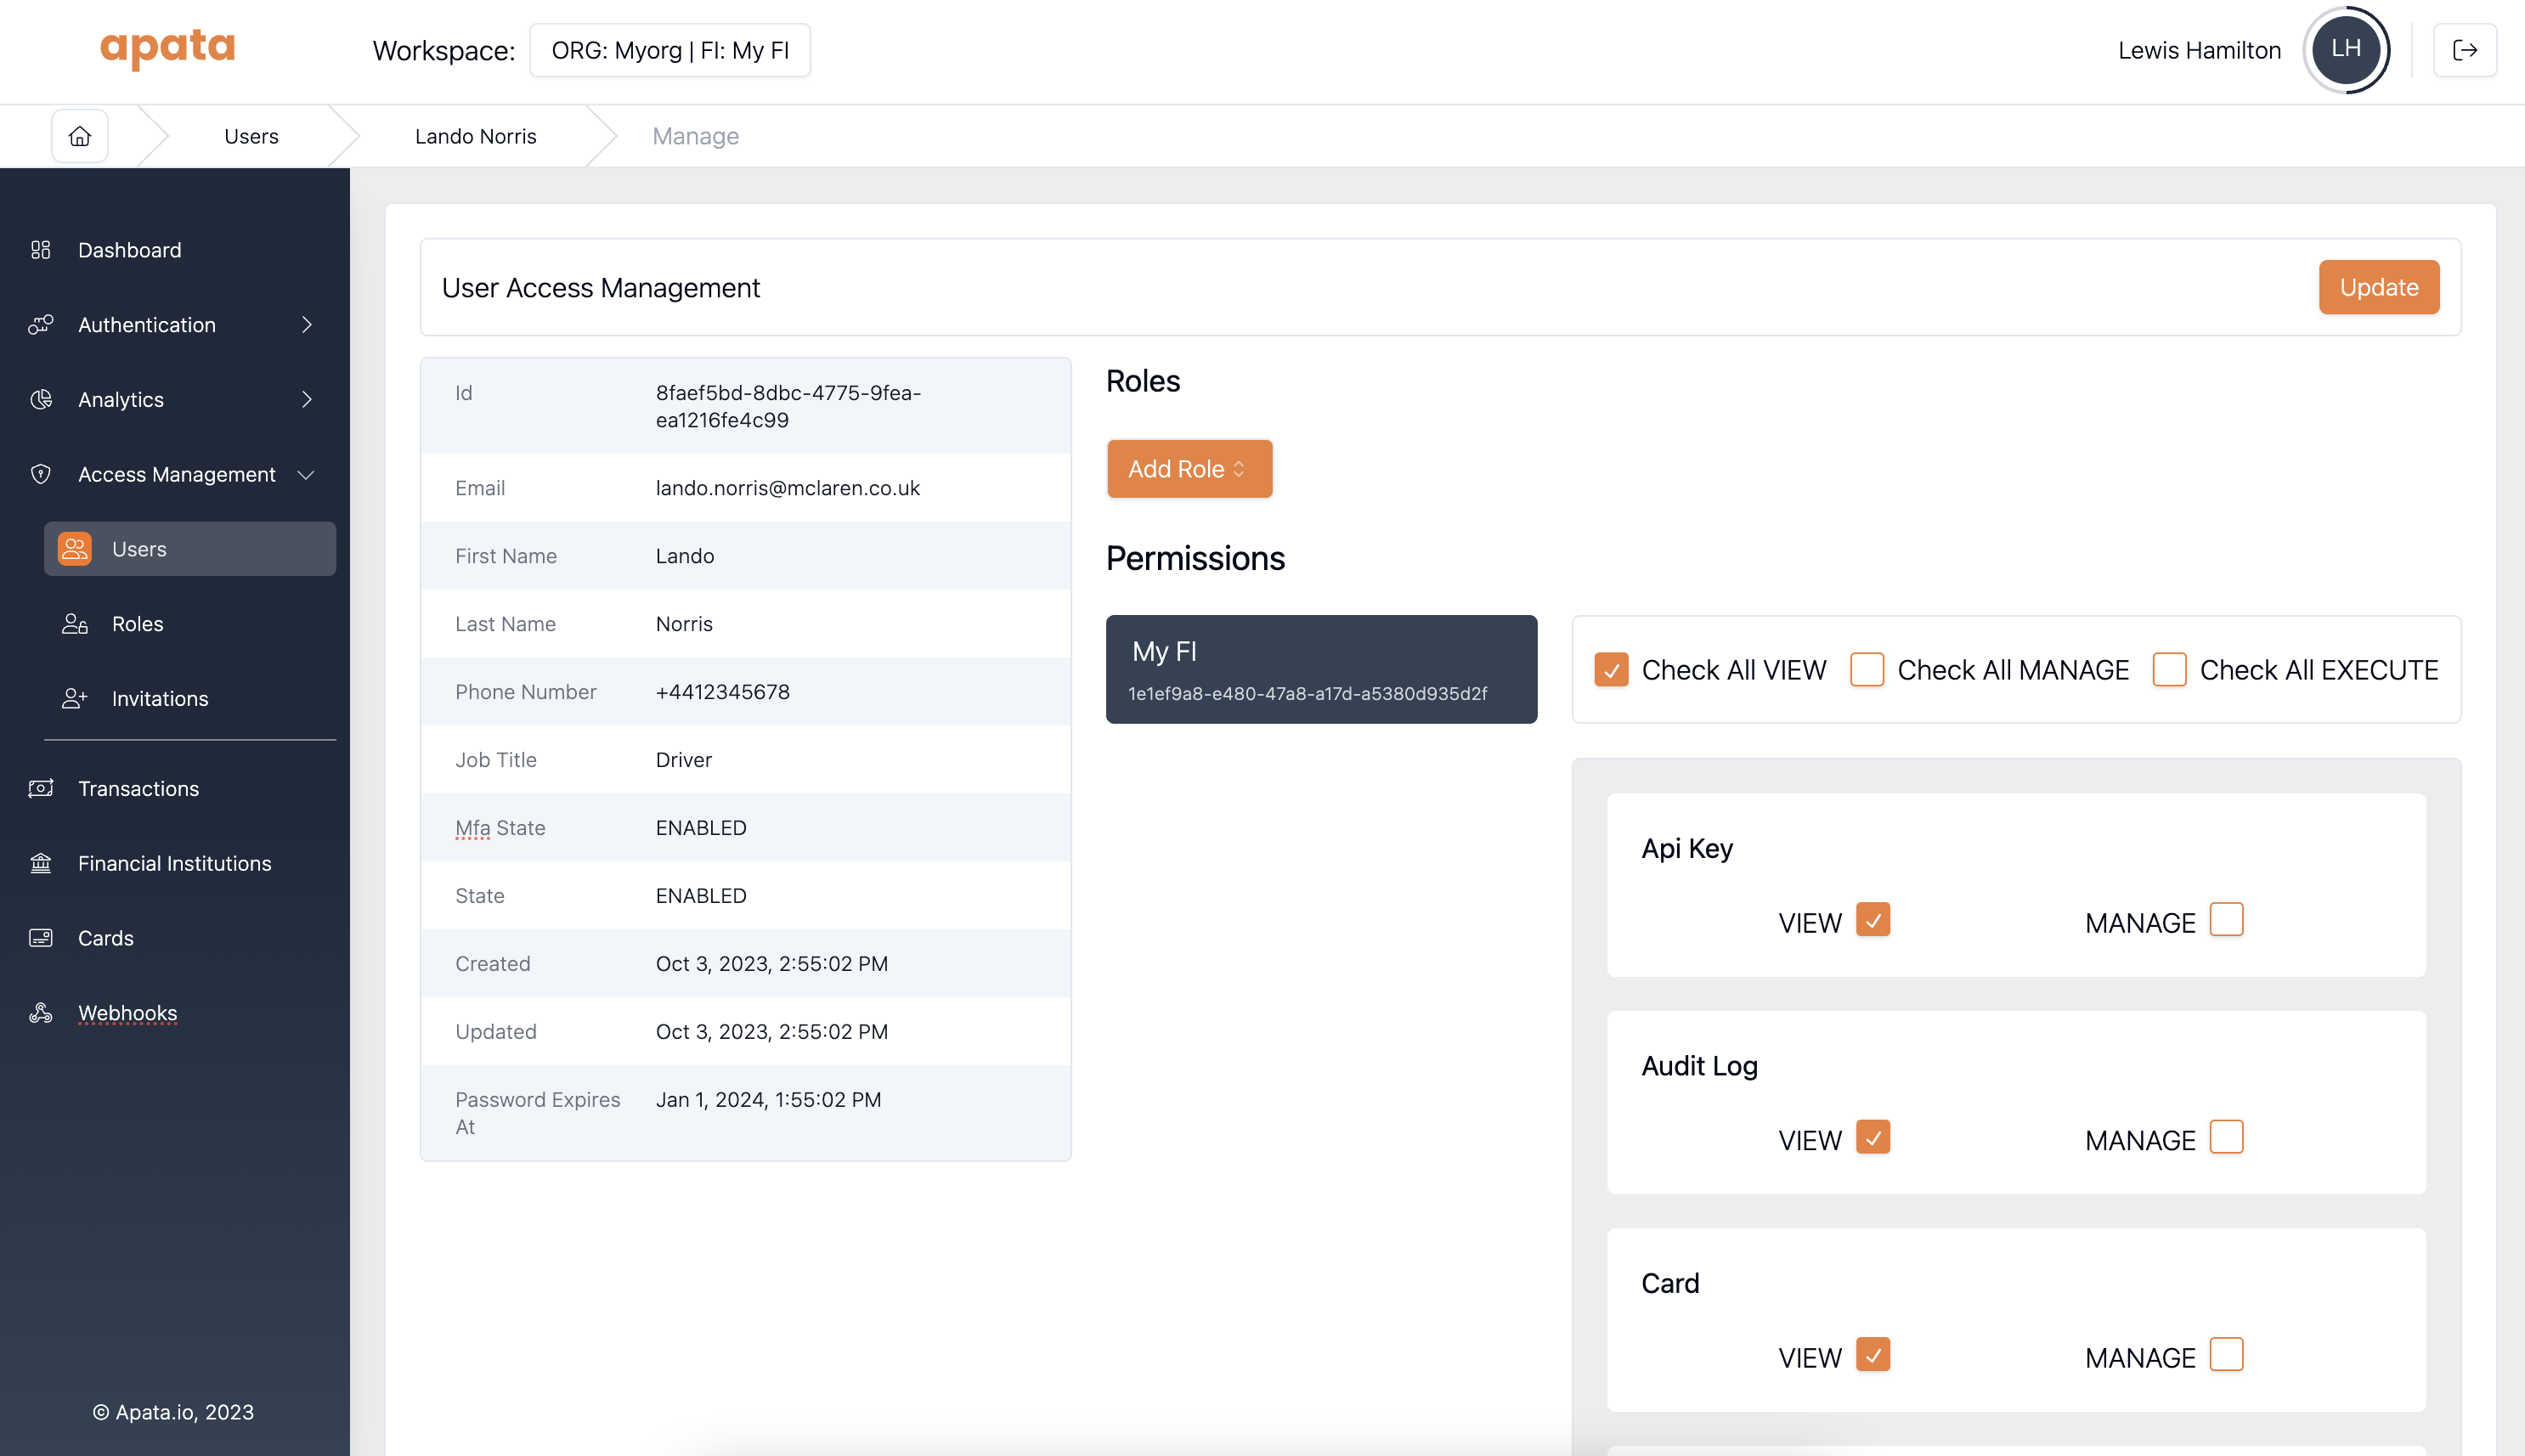
Financial Institution Membership
Users with FI-level membership:
- Can access FI-level resources only
- Can only see the FI they have access to
- Cannot see other FIs or organisation-level resources
Typical users: FI employees, external partners
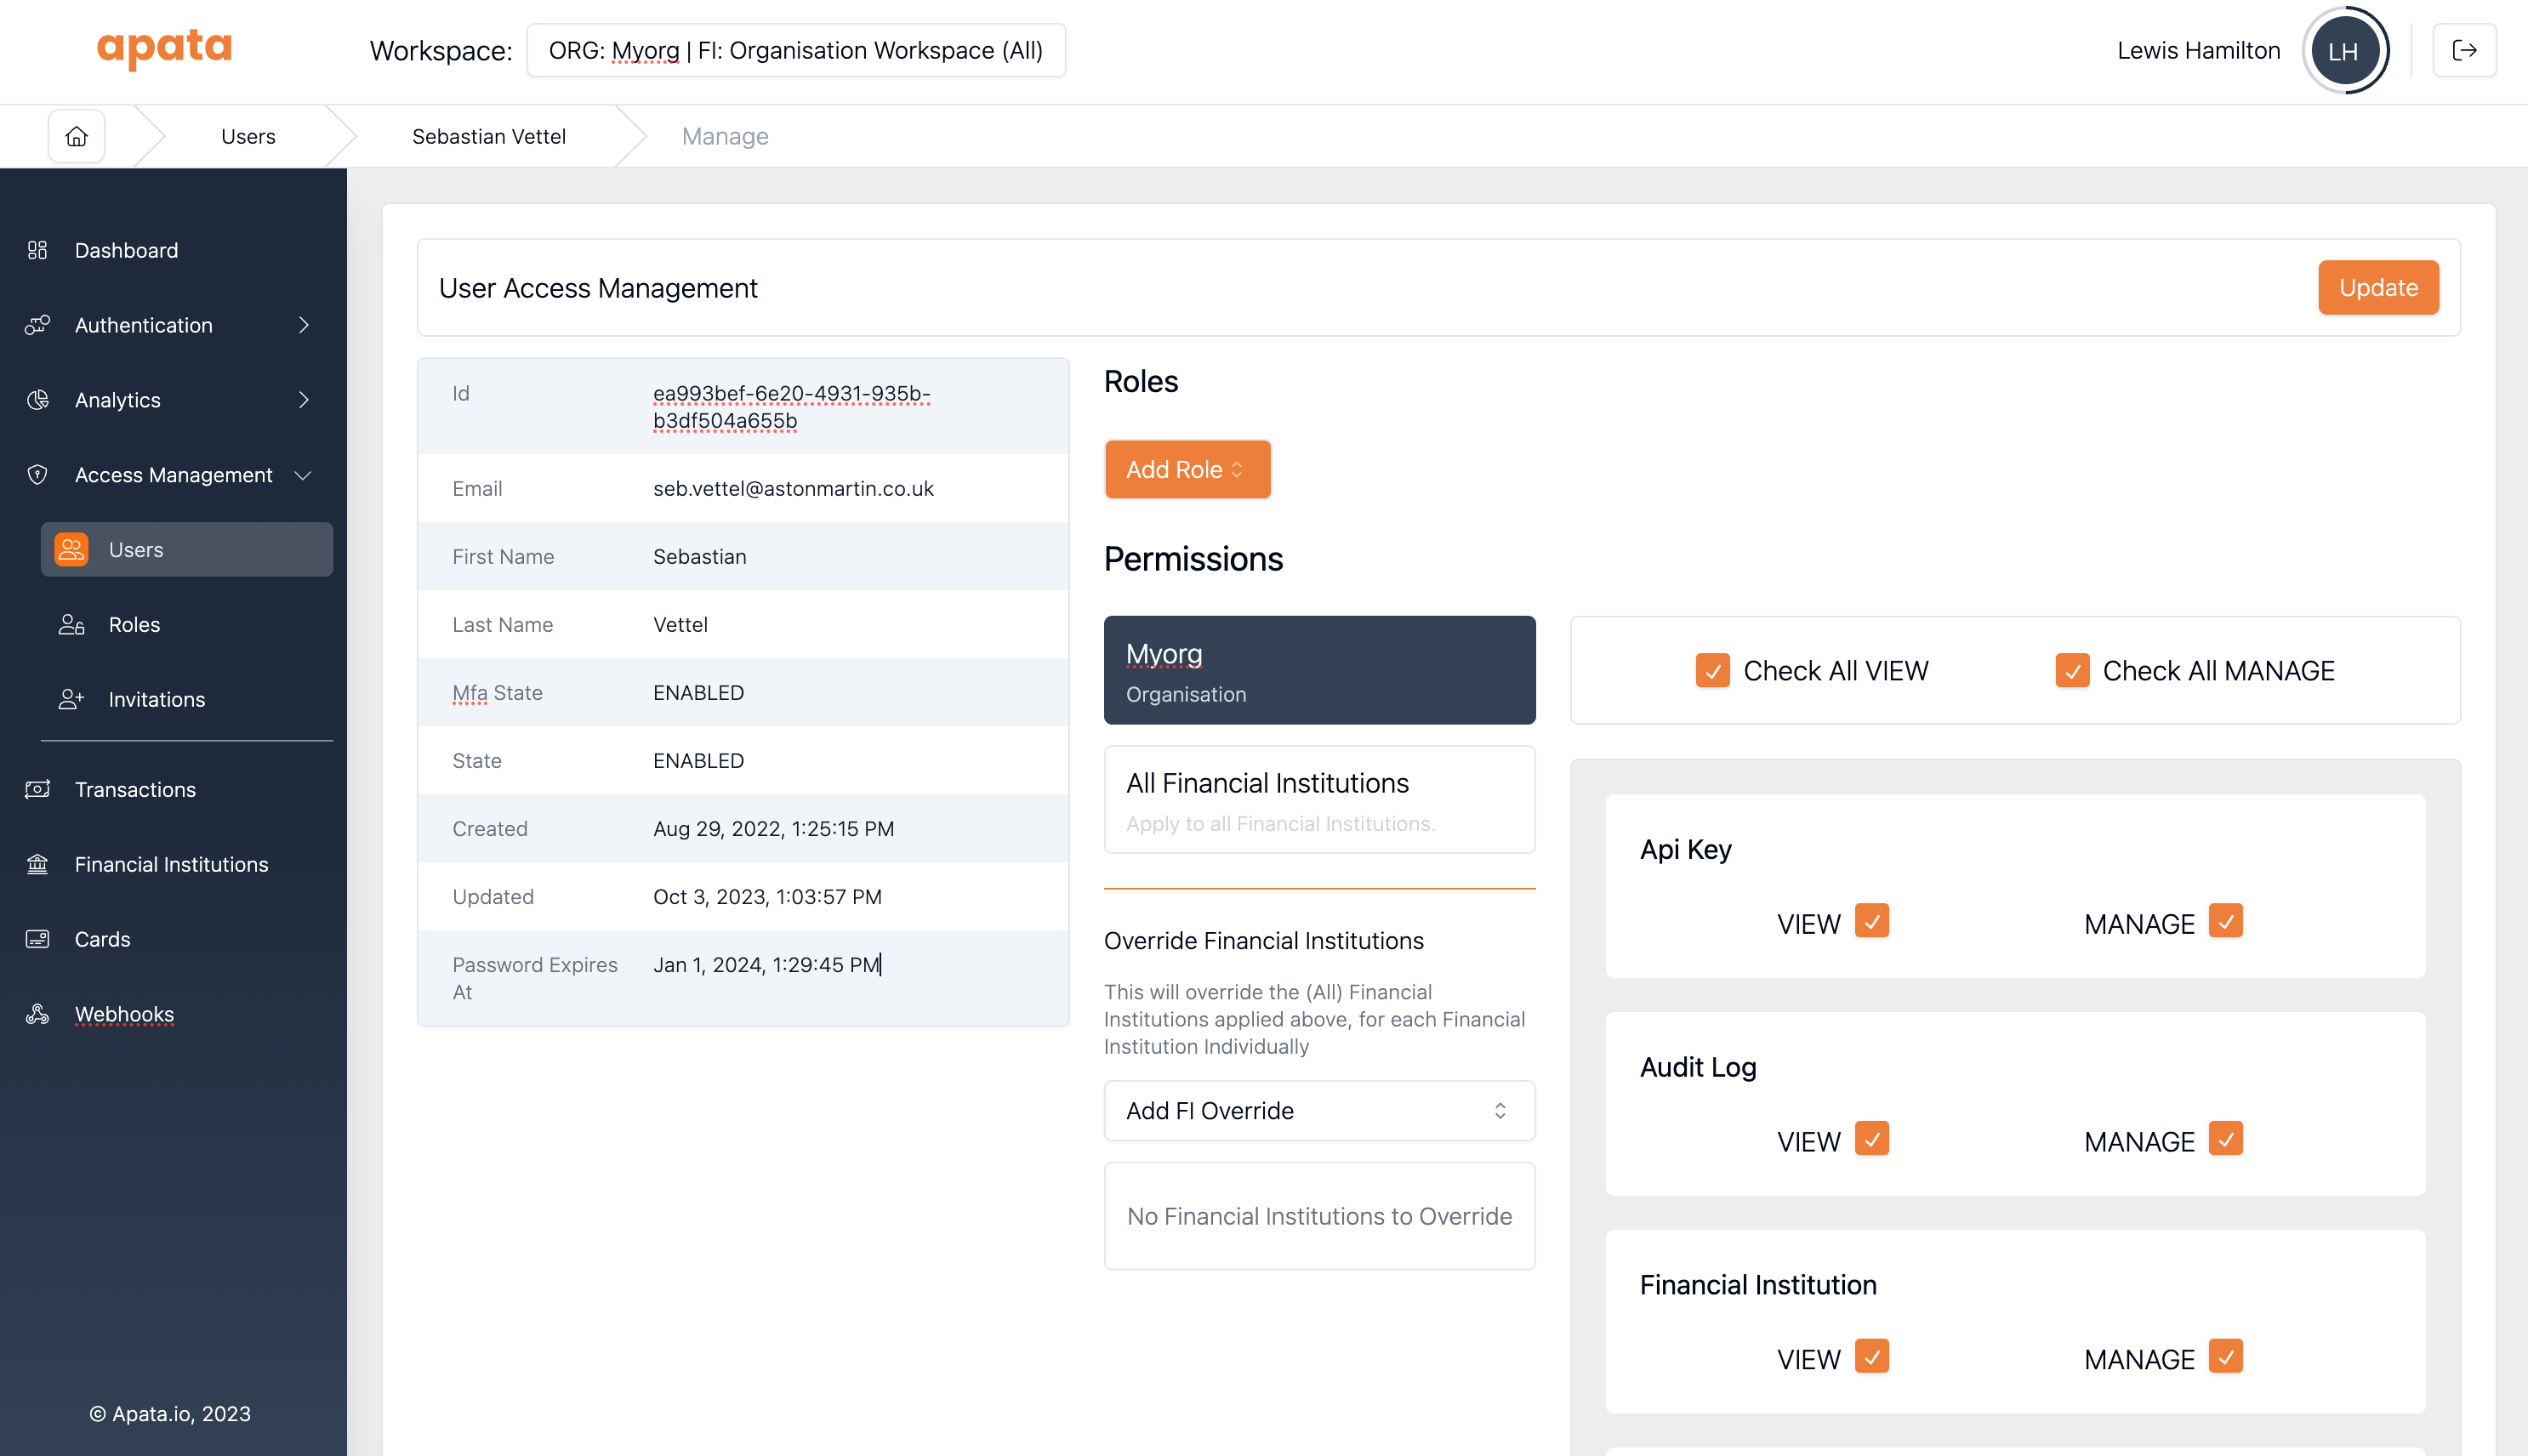
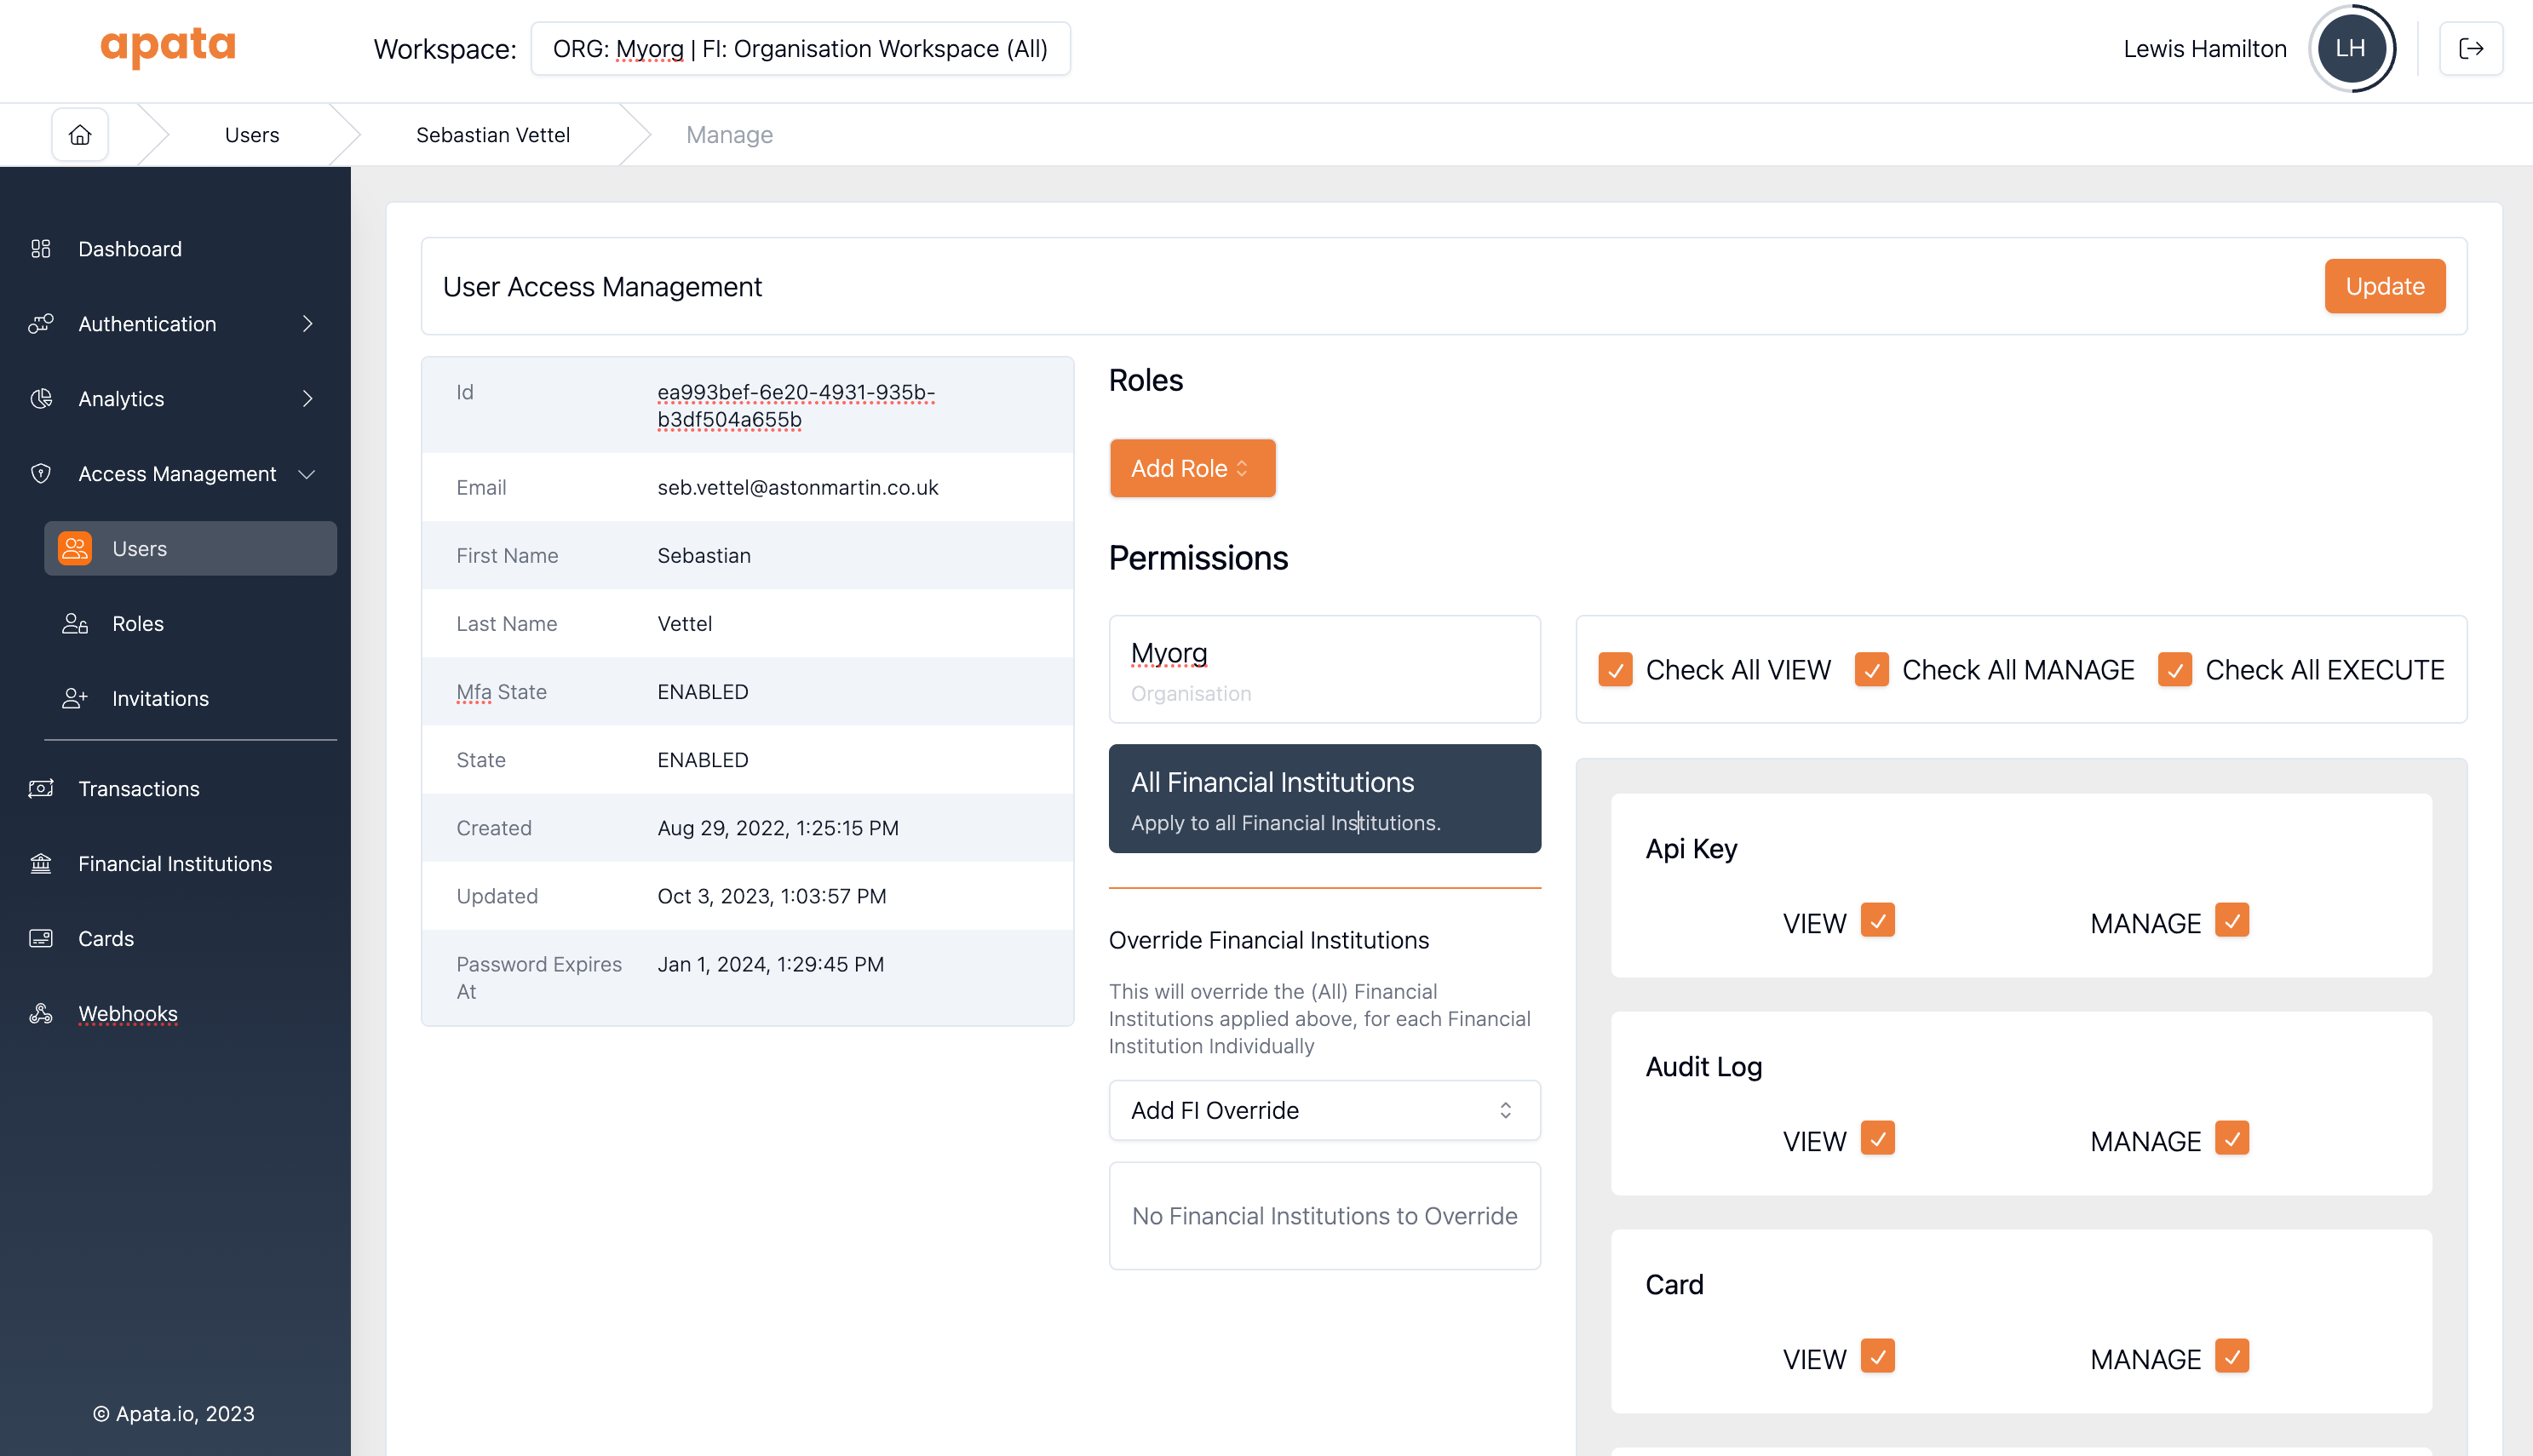
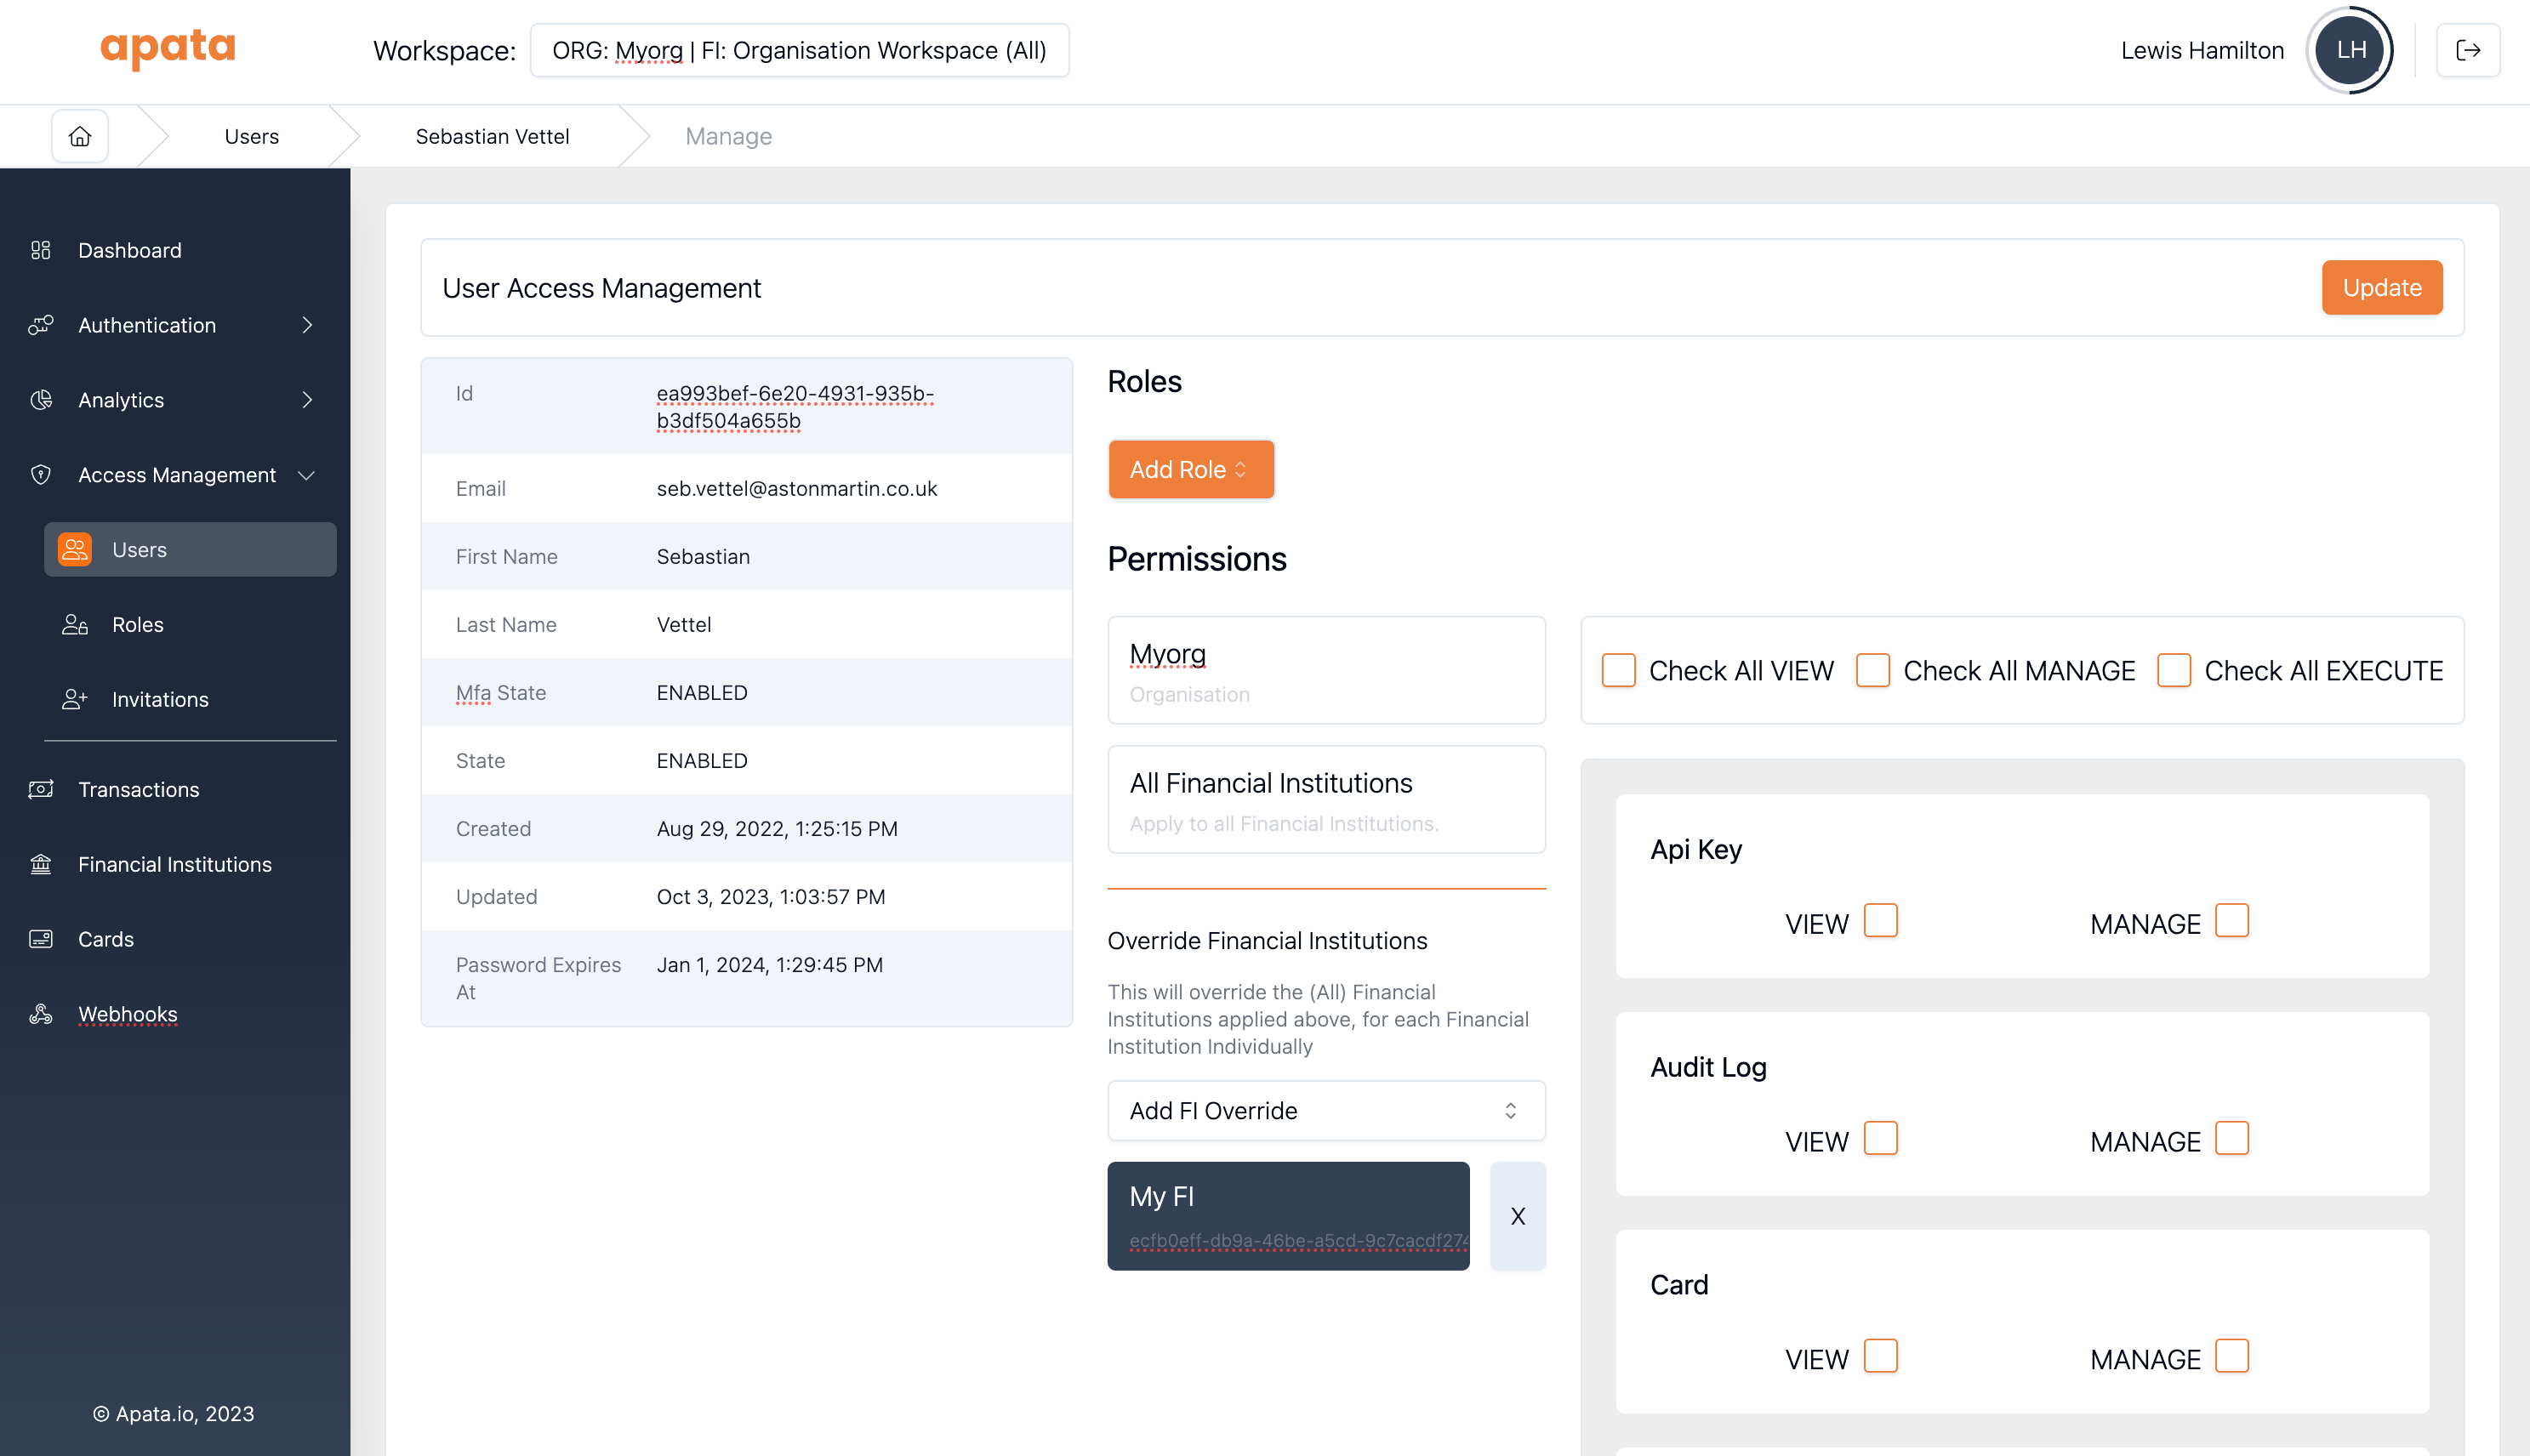
Permissions
Permissions control what resources a user can View or Manage.
- View – Read-only access to the resource
- Manage – Create, view, update, and delete the resource
| Resource | View | Manage |
|---|---|---|
| API Key | List and view API keys | Create, update, delete API keys |
| Financial Institution | List and view FIs | Create, update, delete FIs |
| Card Range | View card ranges | Add, modify card ranges and FI access |
| Organisation Setting | List and view settings | Create, update, delete settings |
Organisation Membership Permissions
Organisation-Level Permissions
Grant permissions for resources that belong to the Organisation (not FI resources).
To configure:
- Navigate to the user in organisation scope
- Click Organisation in the left tab bar
All FIs Permissions
Grant permissions across all Financial Institutions in the organisation.
Useful for permissions like "View all risk profiles in all FIs" without configuring each FI individually.
To configure:
- Navigate to the user in organisation scope
- Click All financial institutions in the left tab bar
Specific FI Permissions
Grant permissions for specific Financial Institutions only.
Useful for account managers who need access to a subset of FIs.
To configure:
- Navigate to the user in organisation scope
- Select the specific FI tab
FI Membership Permissions
FI-level memberships can only grant permissions for that specific Financial Institution.
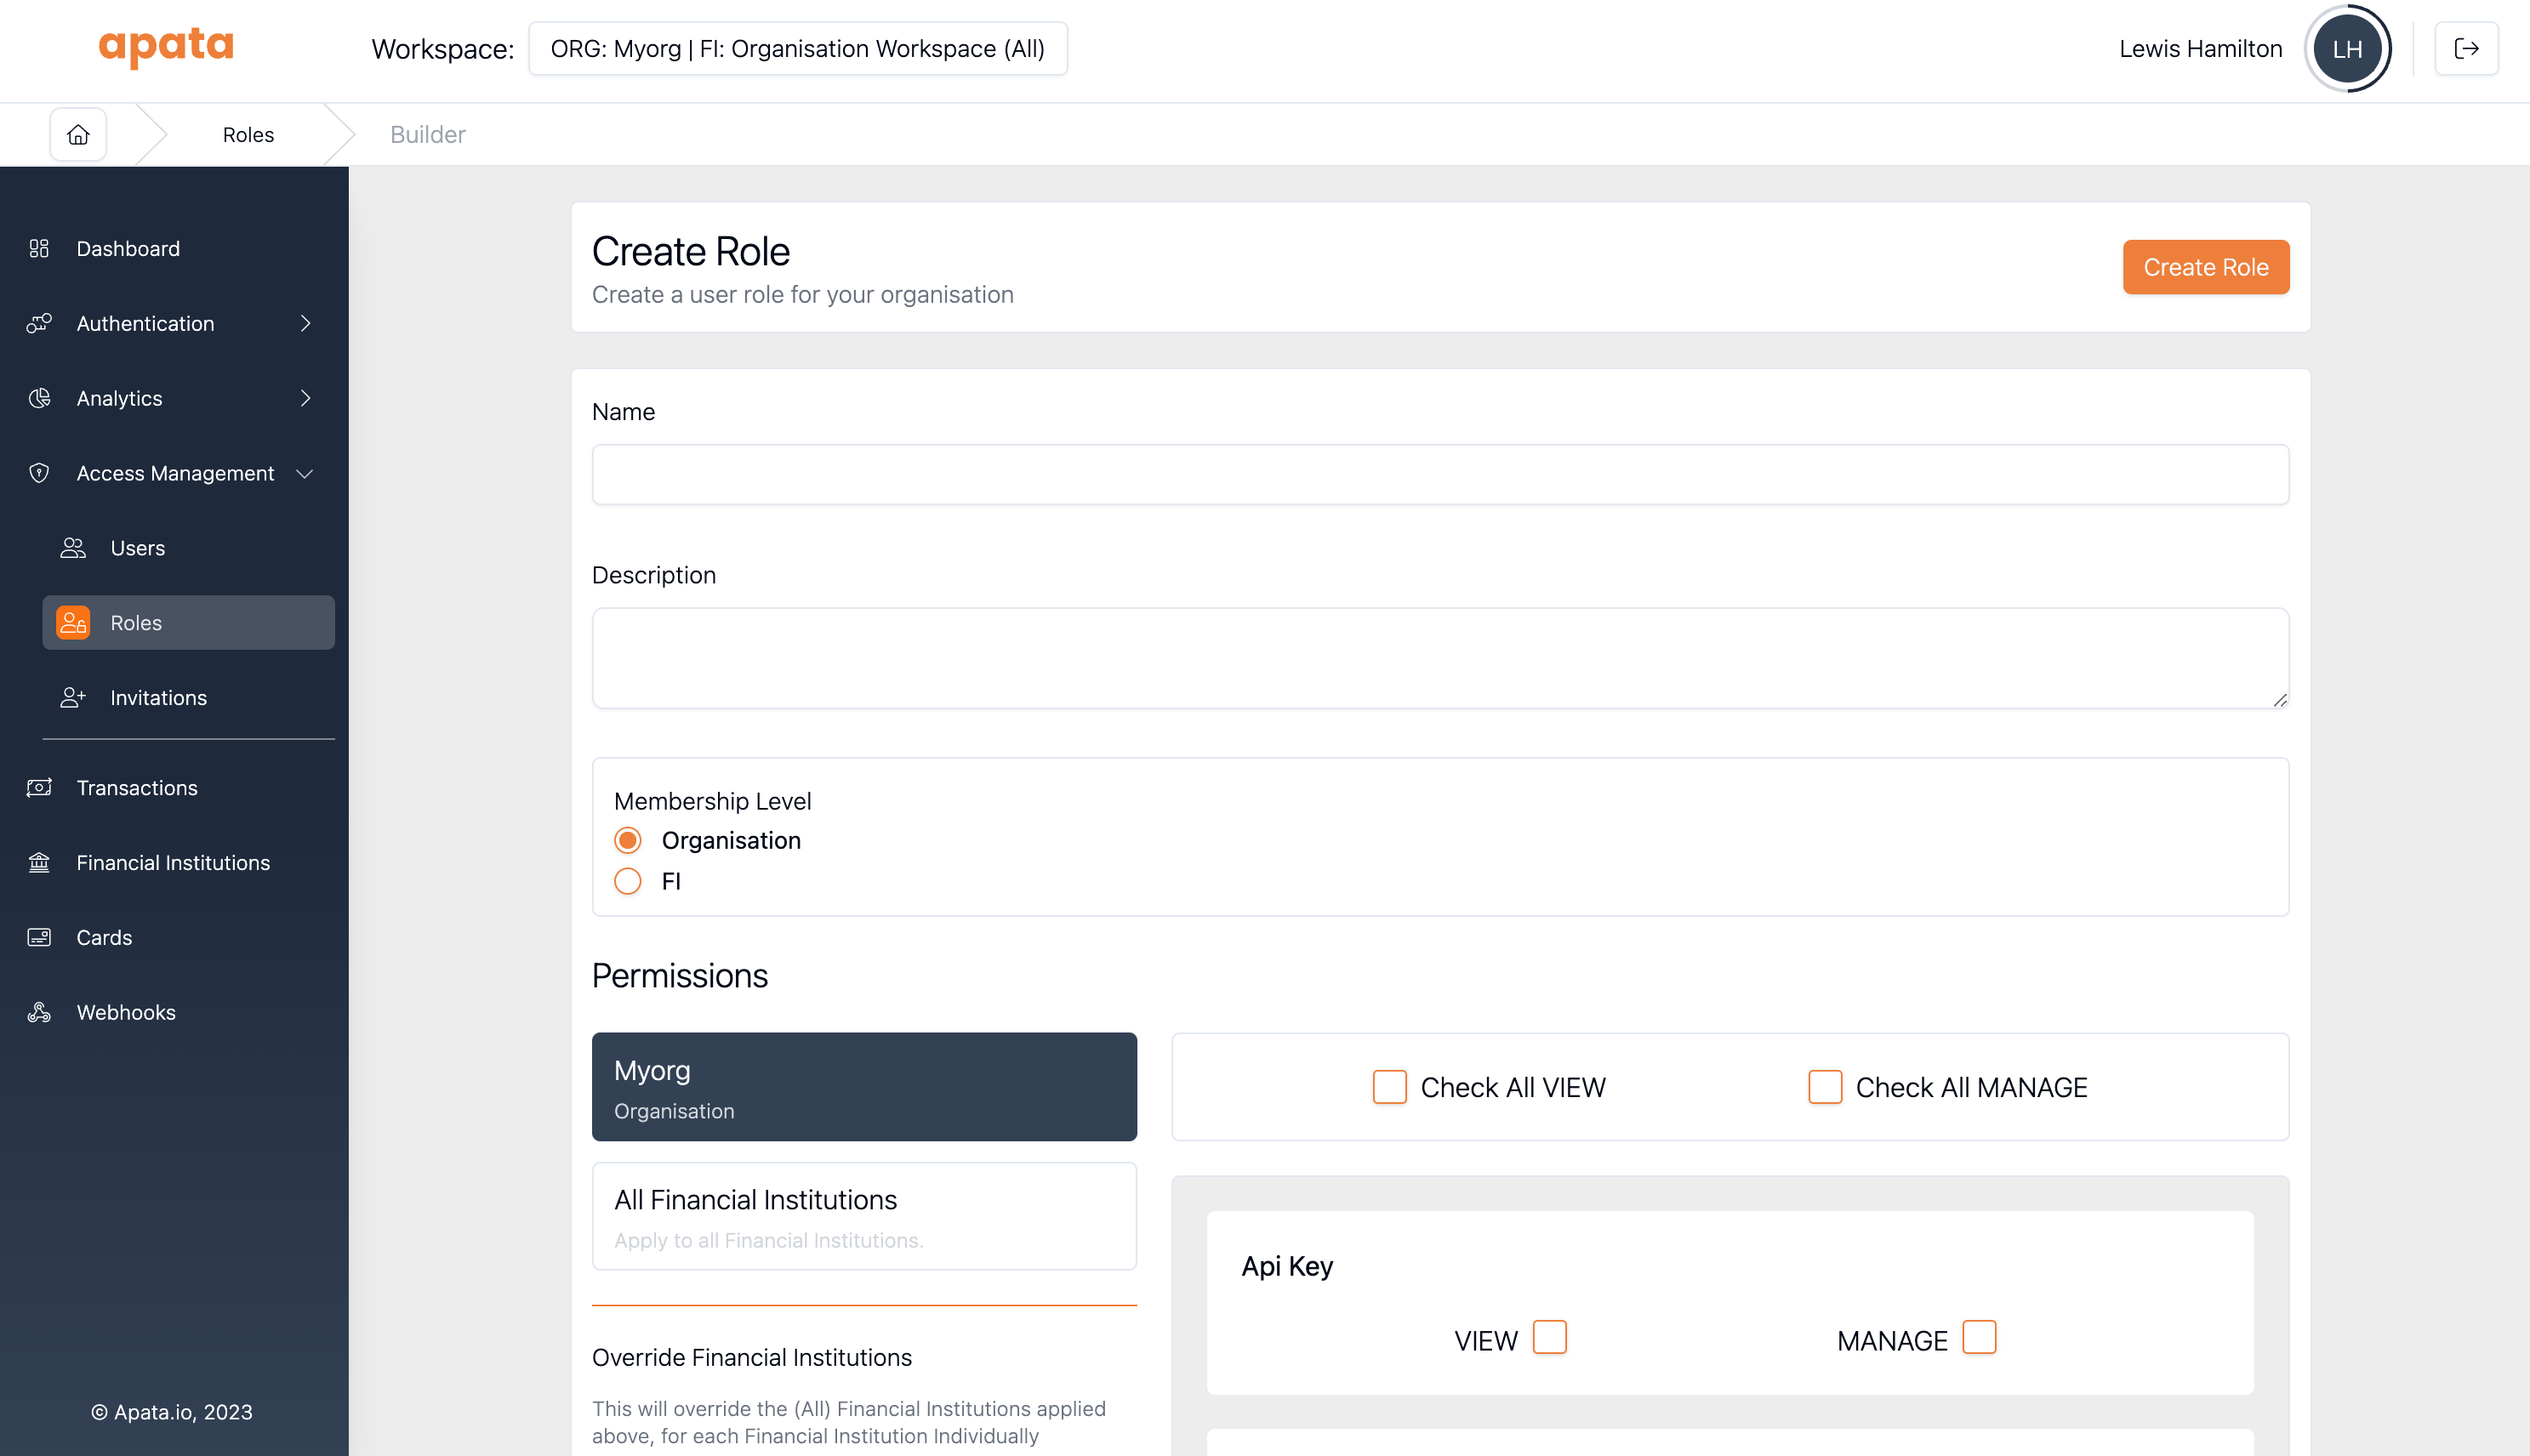
Roles
Roles are collections of permissions that simplify user management. Instead of assigning permissions individually, assign a role that includes all needed permissions.
Roles add permissions but cannot remove them. Users can have multiple roles.
Org-level roles work at org level. FI-level roles work at FI level only.
Creating a Role
- Navigate to Access Management → Roles
- Click Create Role
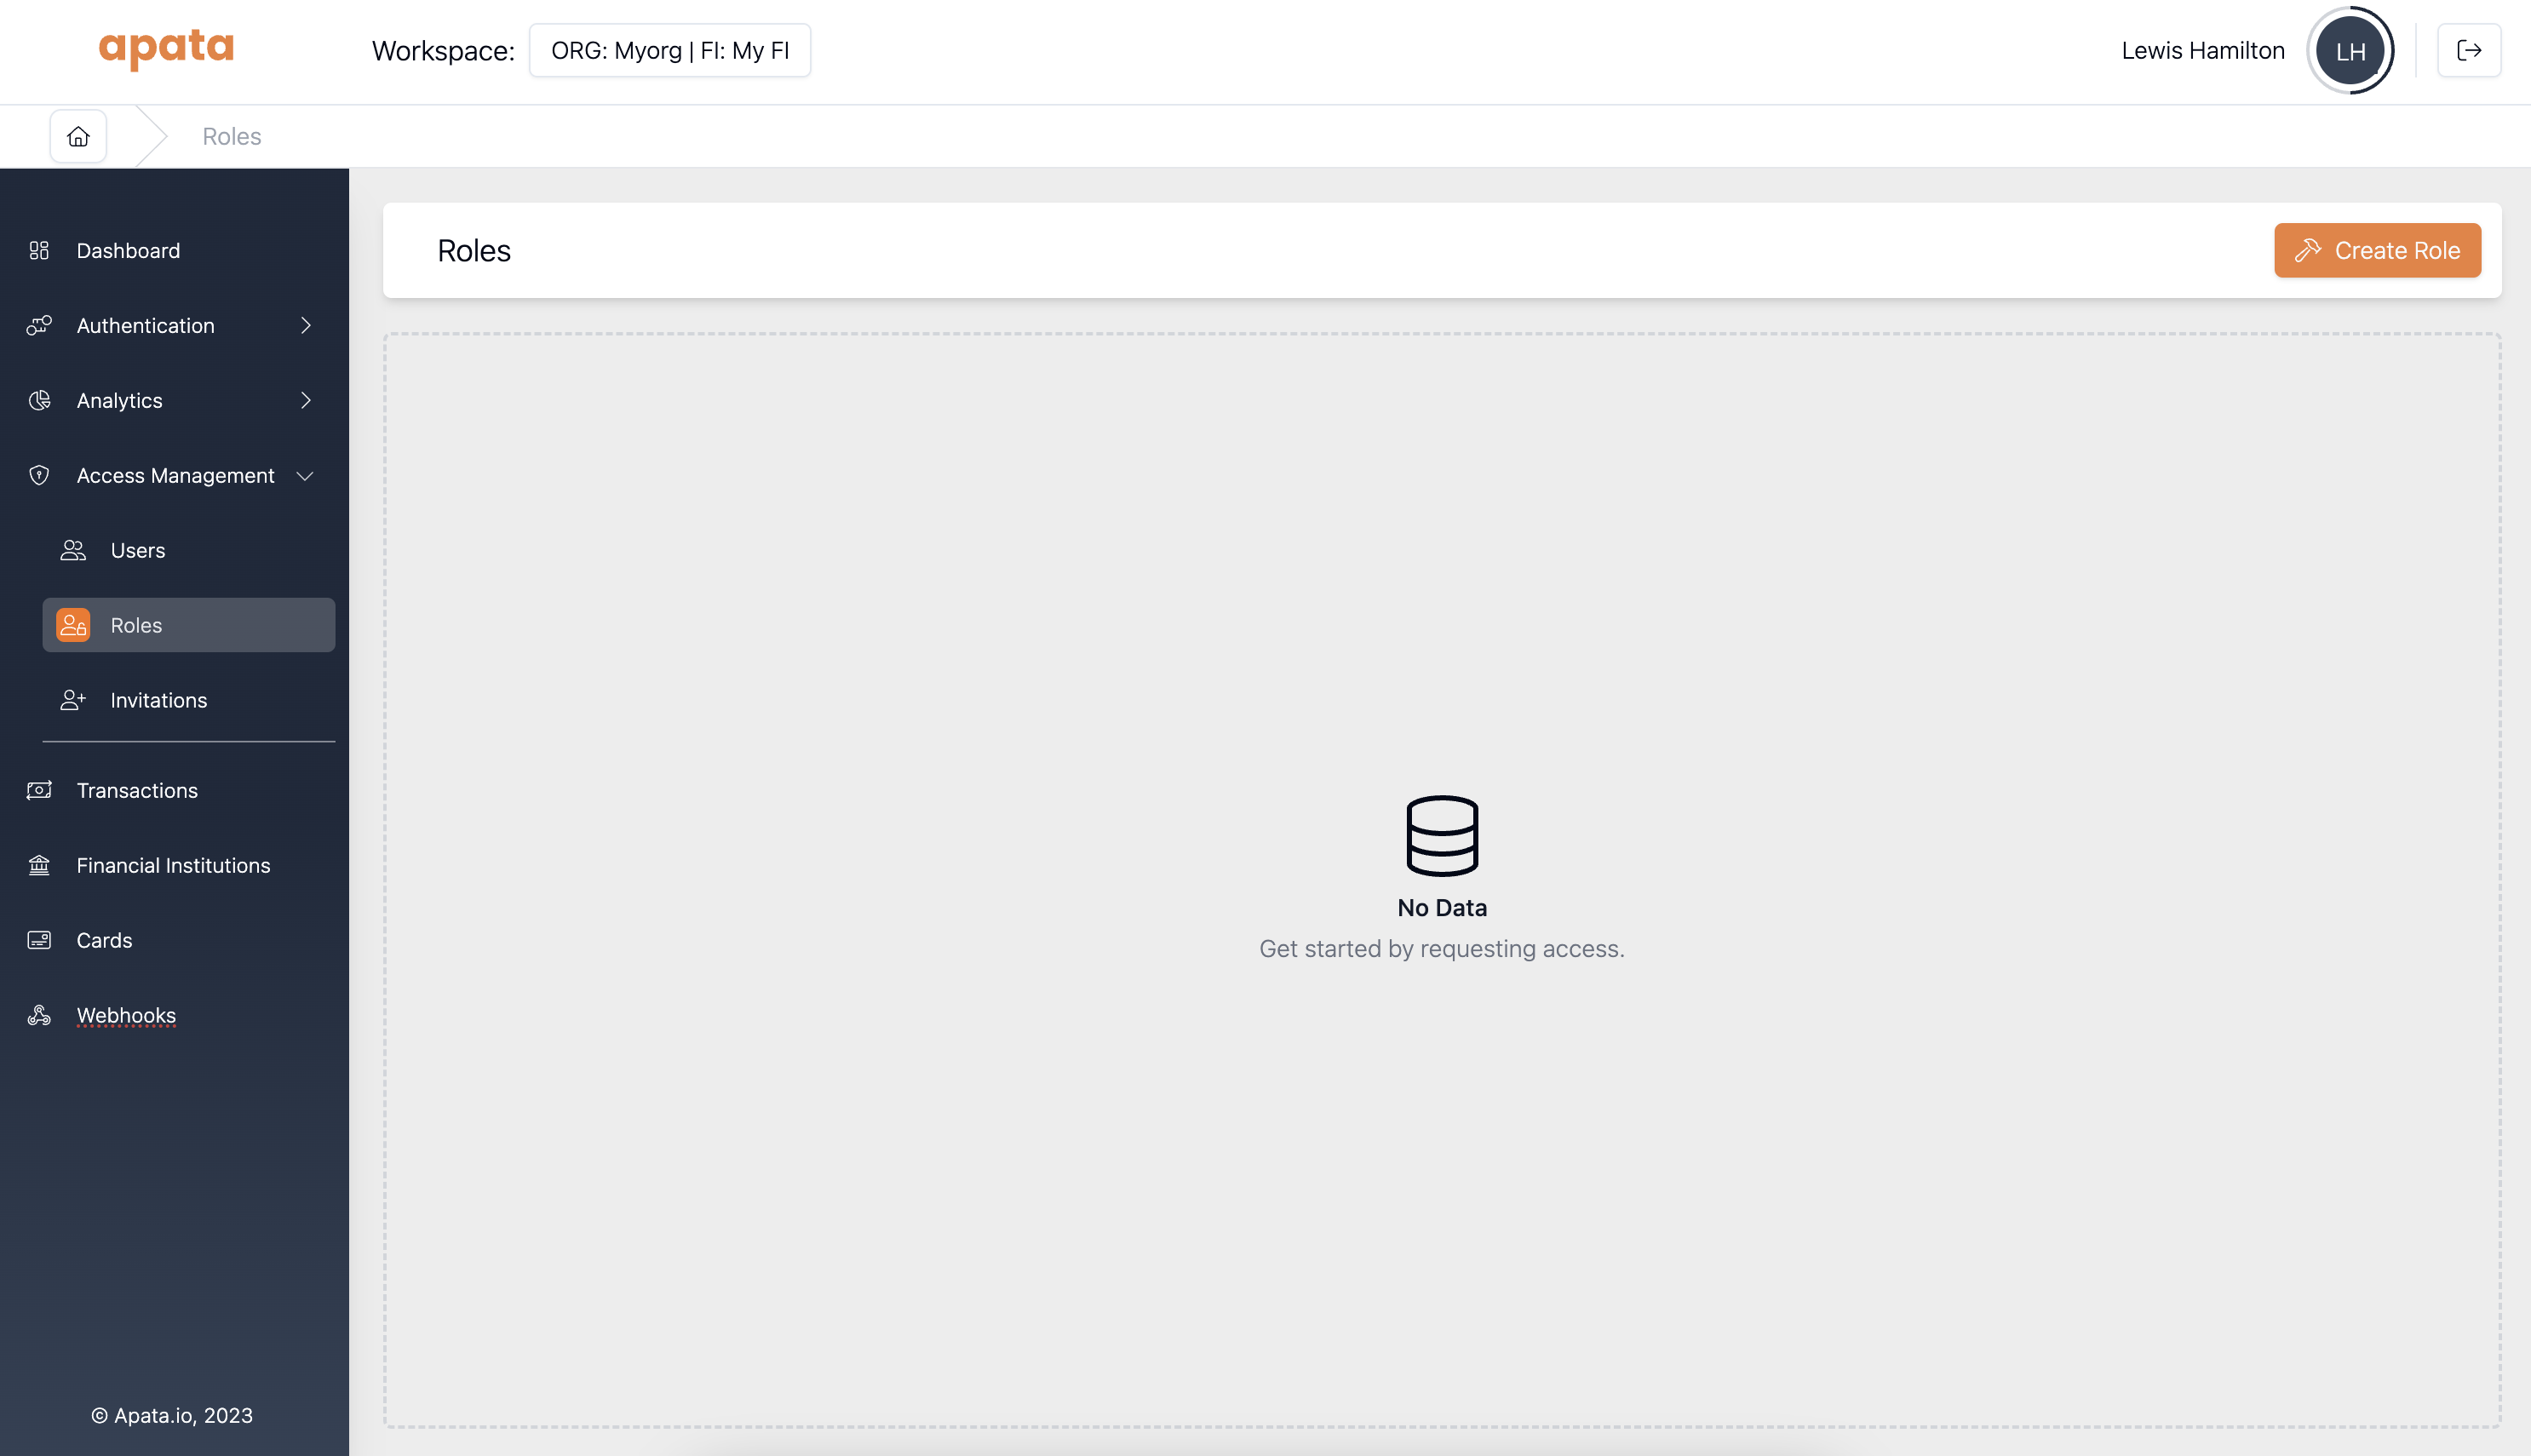
- Specify name, description, and permissions
Inviting Users
Scope matters: Ensure you're in the correct scope before inviting.
- Organisation-level: For organisation employees (developers, account managers)
- FI-level: For FI employees or external partners
If a user needs access to multiple FIs but isn't an organisation employee, invite them to each FI individually.
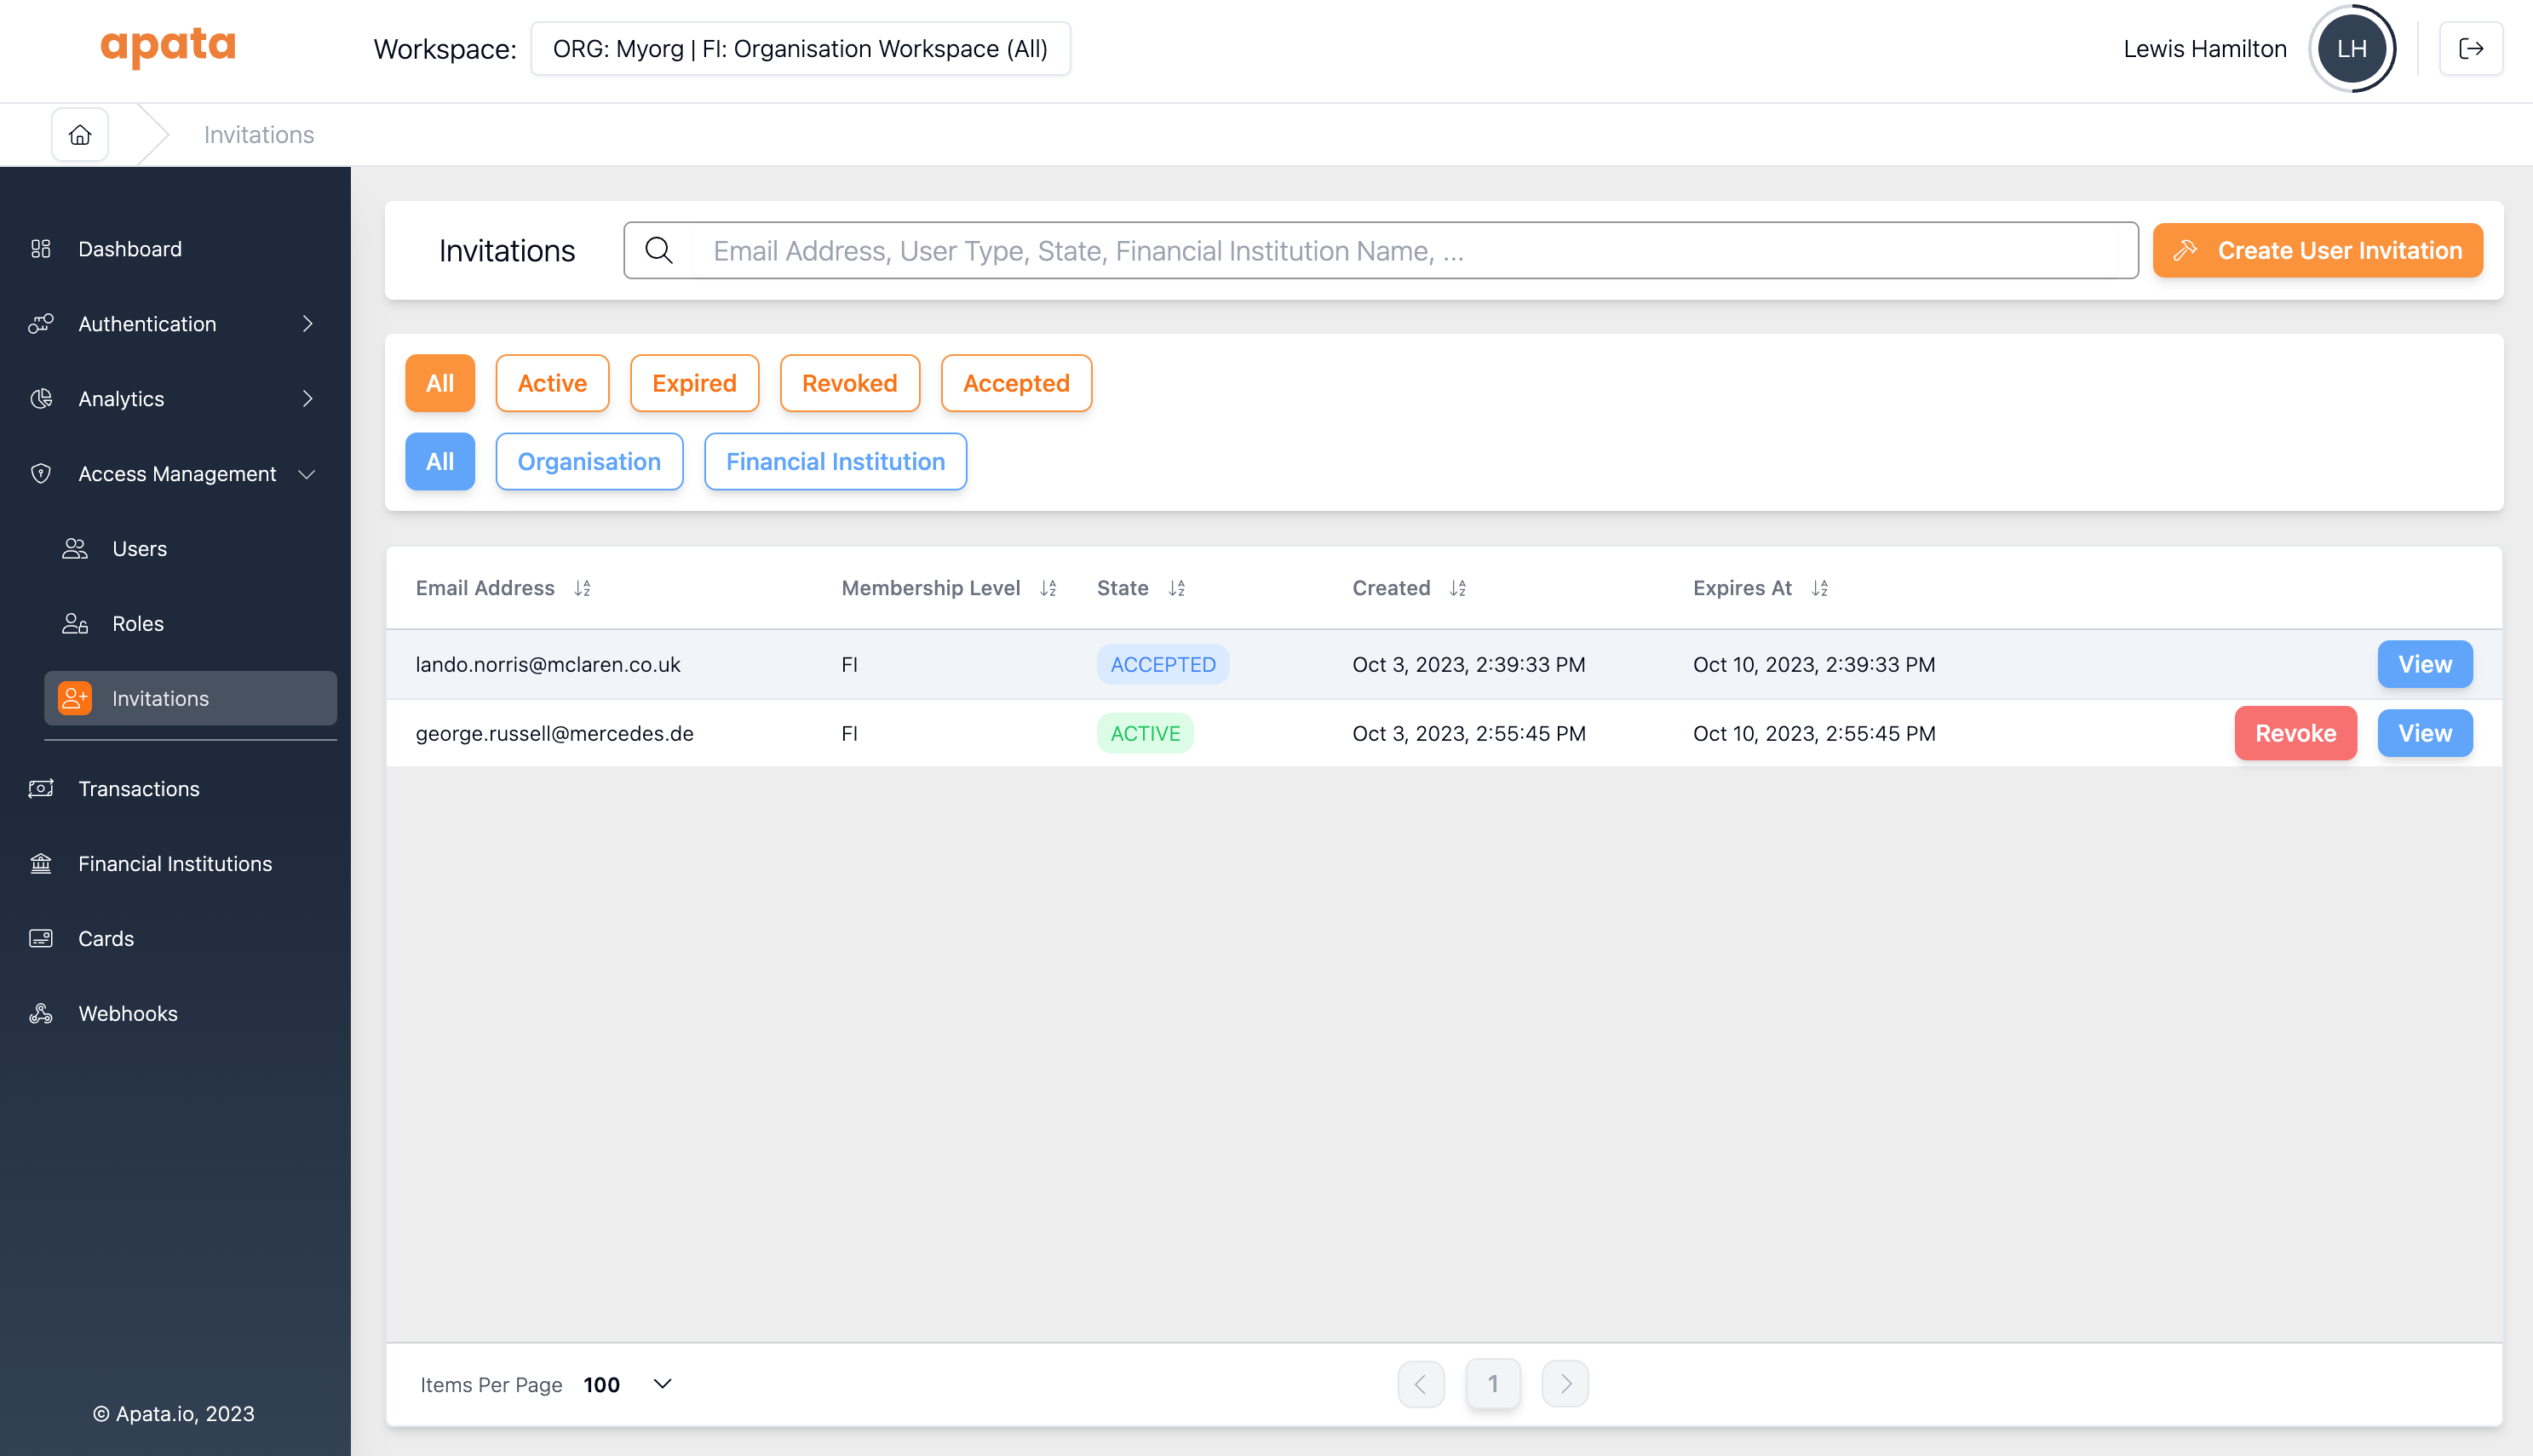
Sending an Invitation
- Go to Access Management → Invitations
- Click Invite User
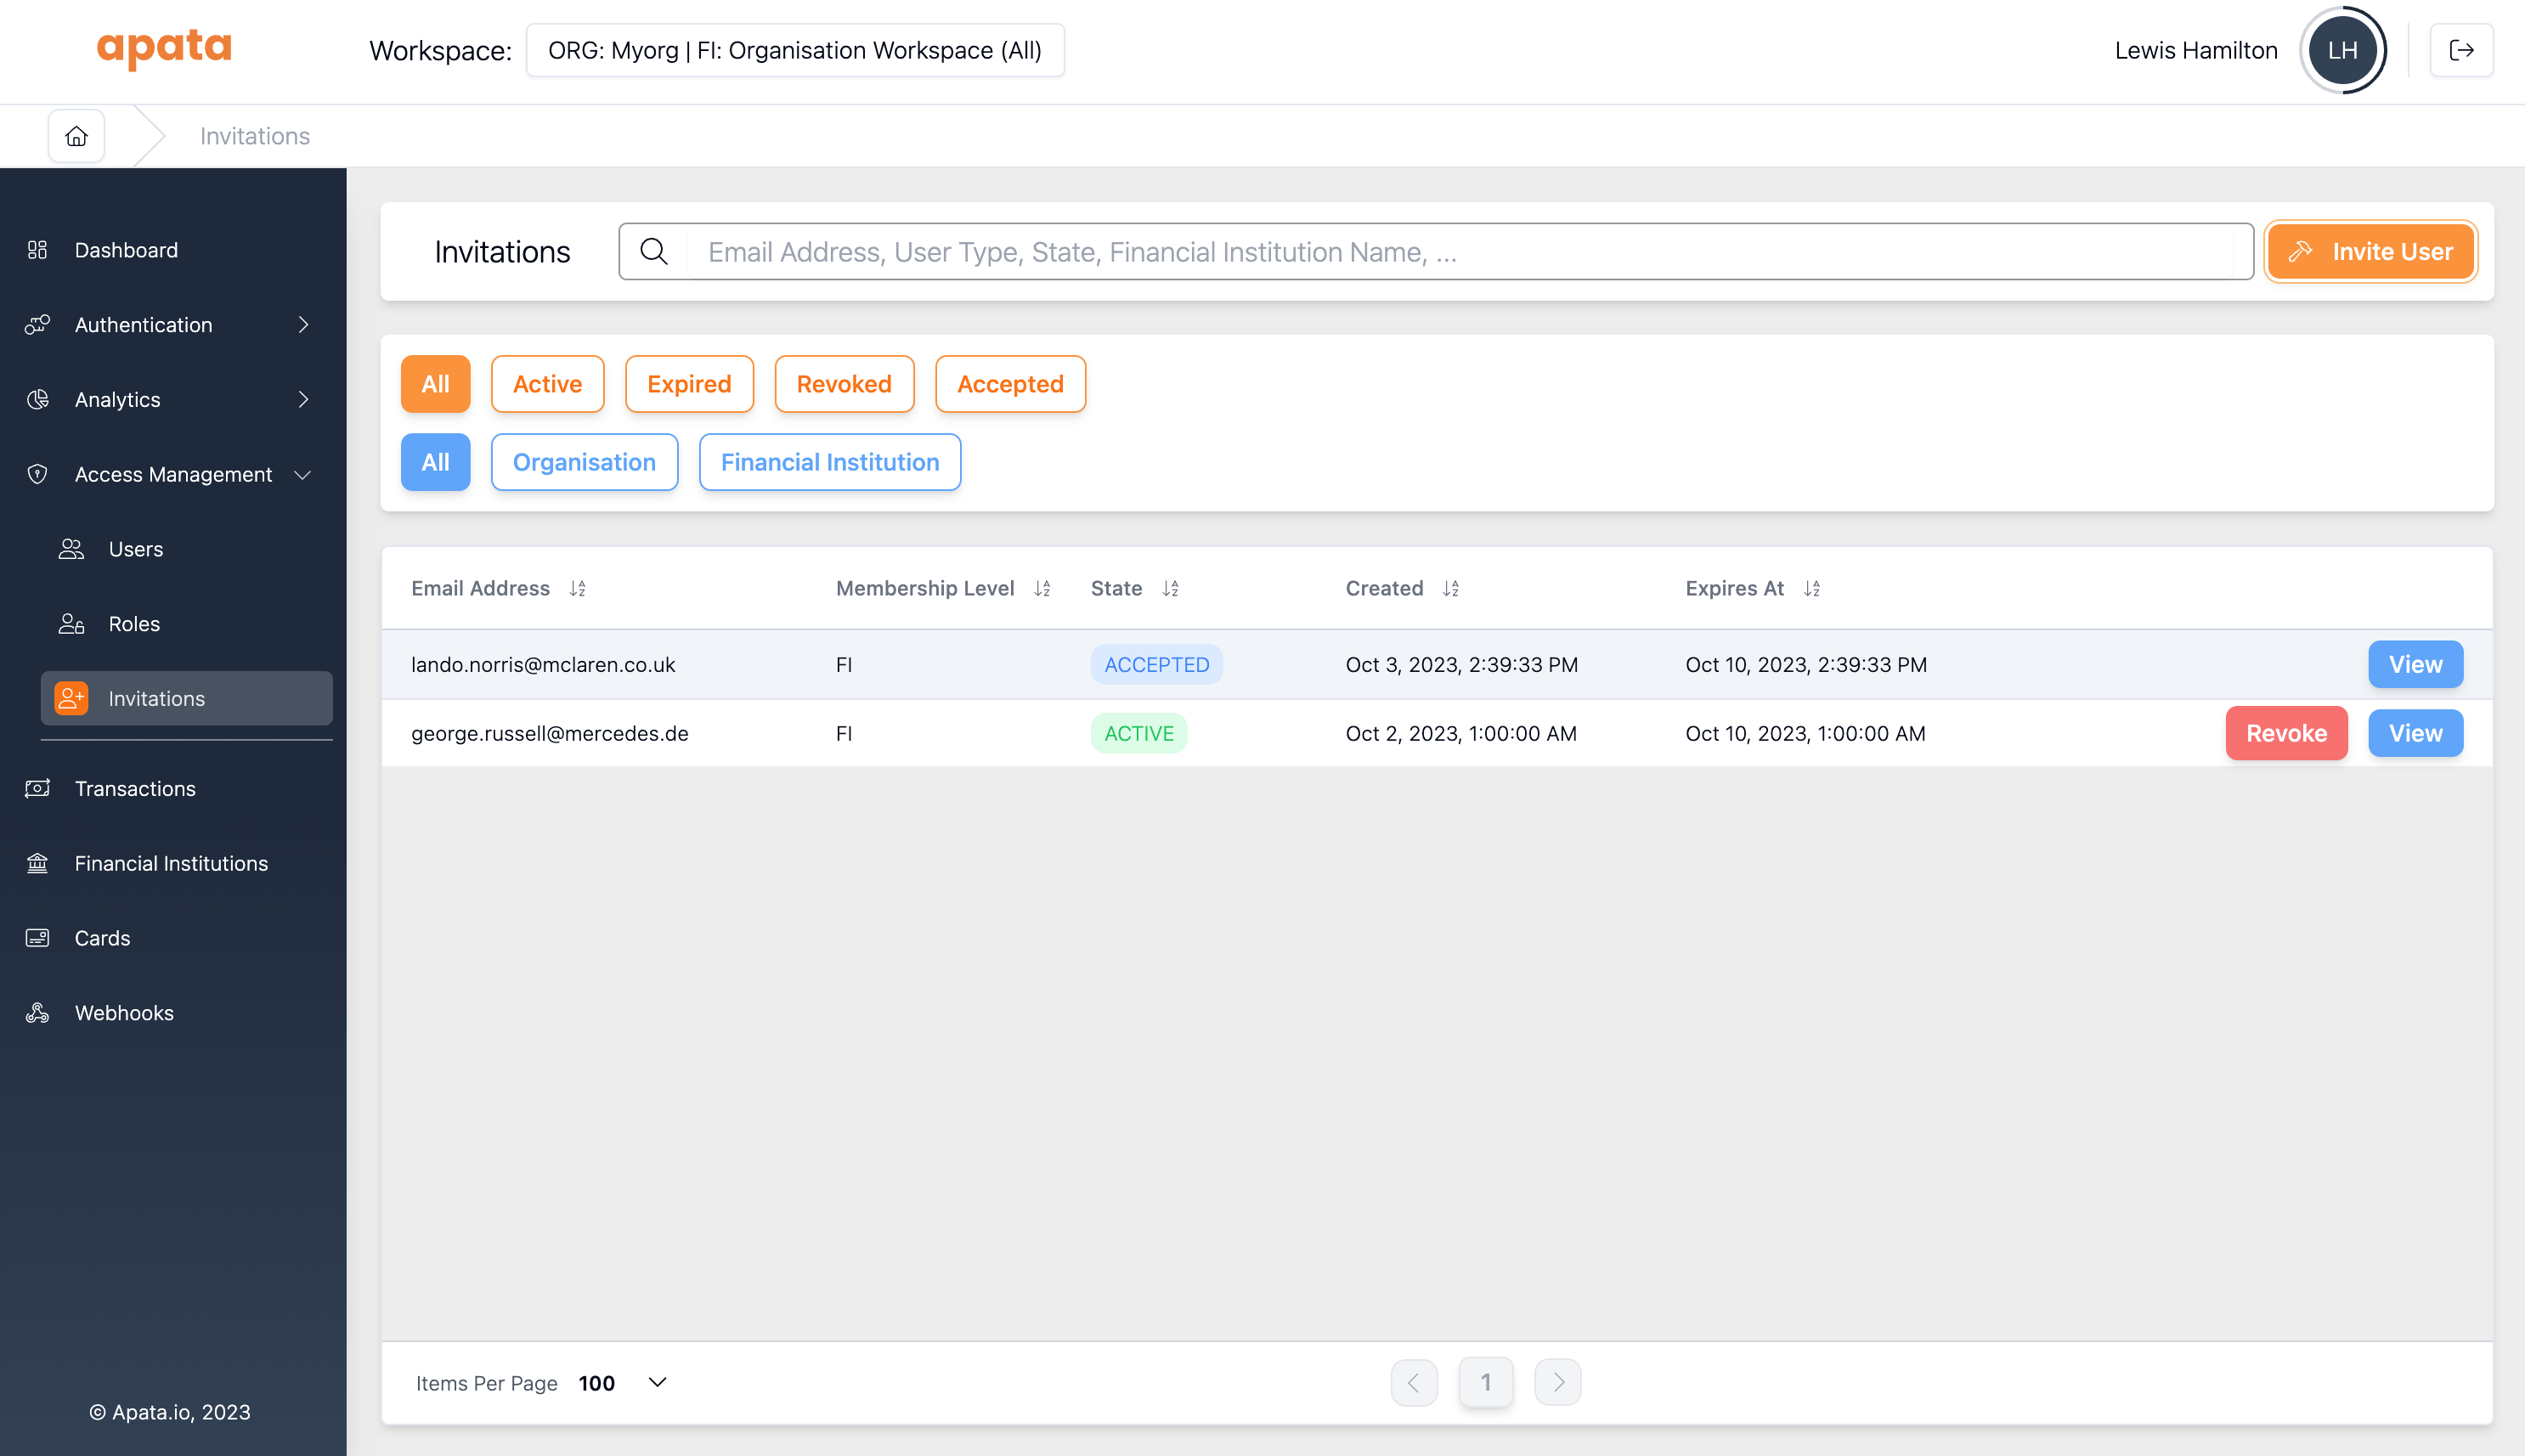
- Enter email address and configure permissions
- Optionally assign roles
- Send invitation
The user receives an email with a link to complete signup.
Invitations expire in 7 days. If not accepted, the invitation must be reissued.
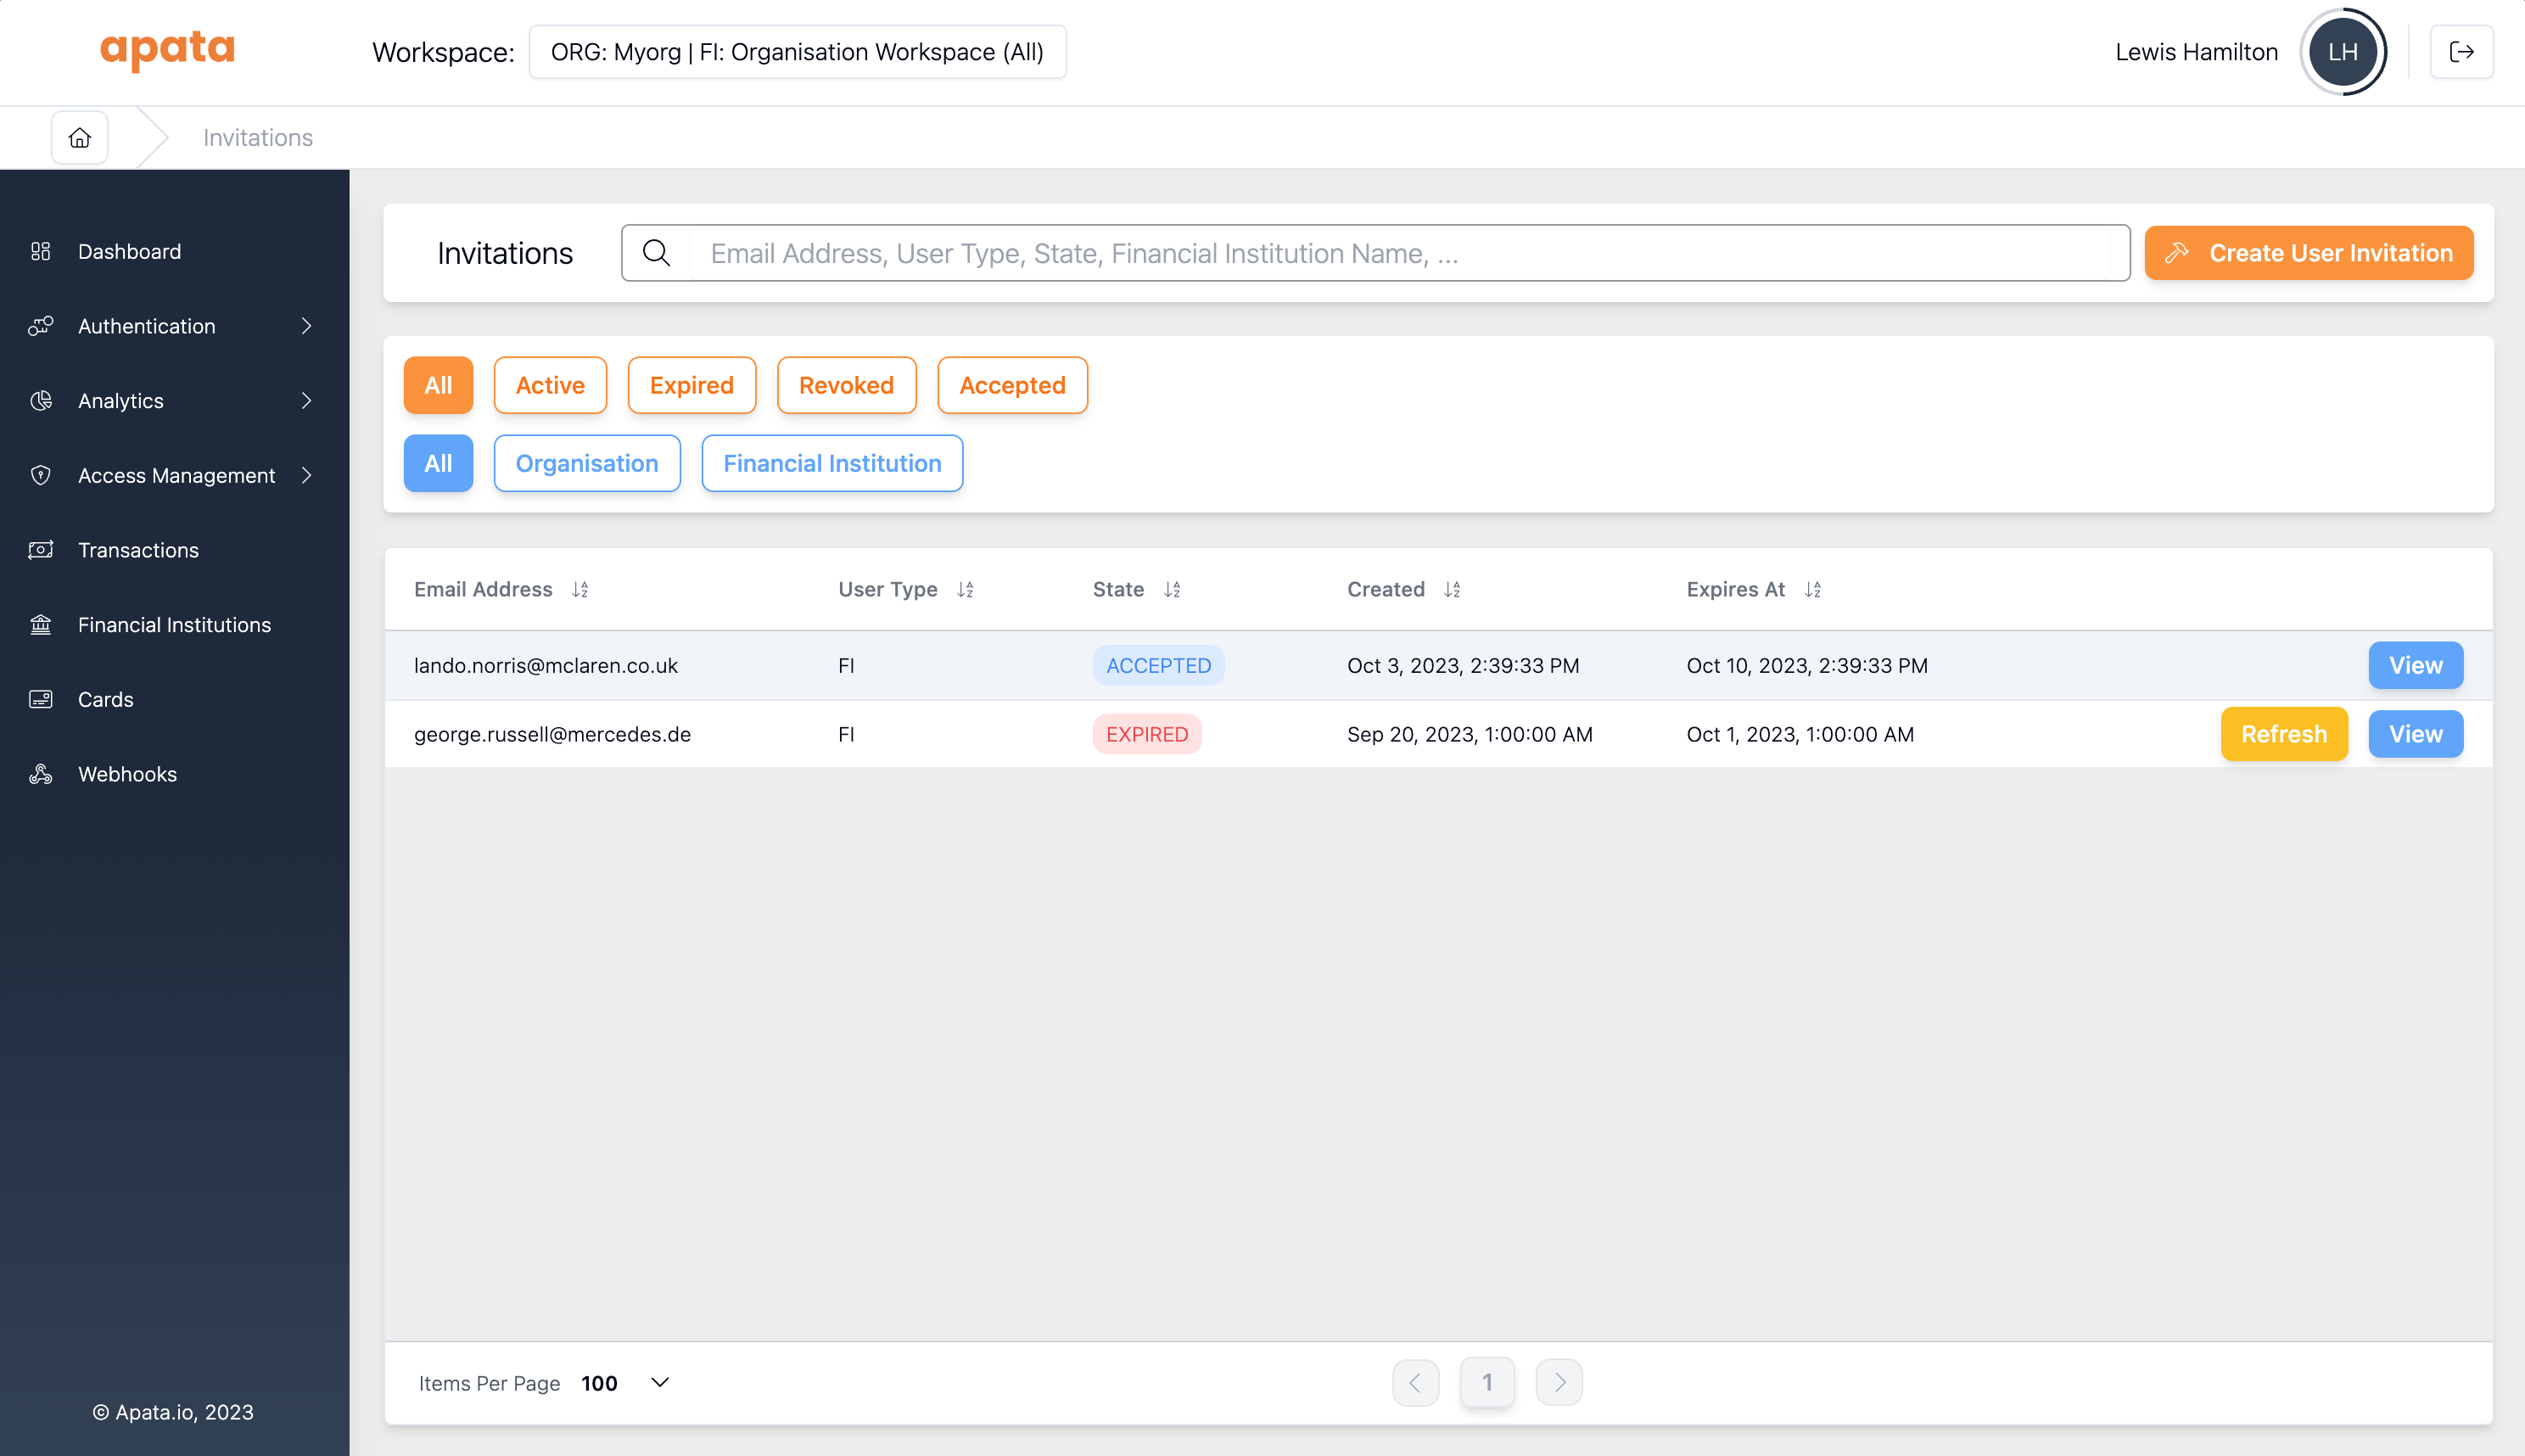
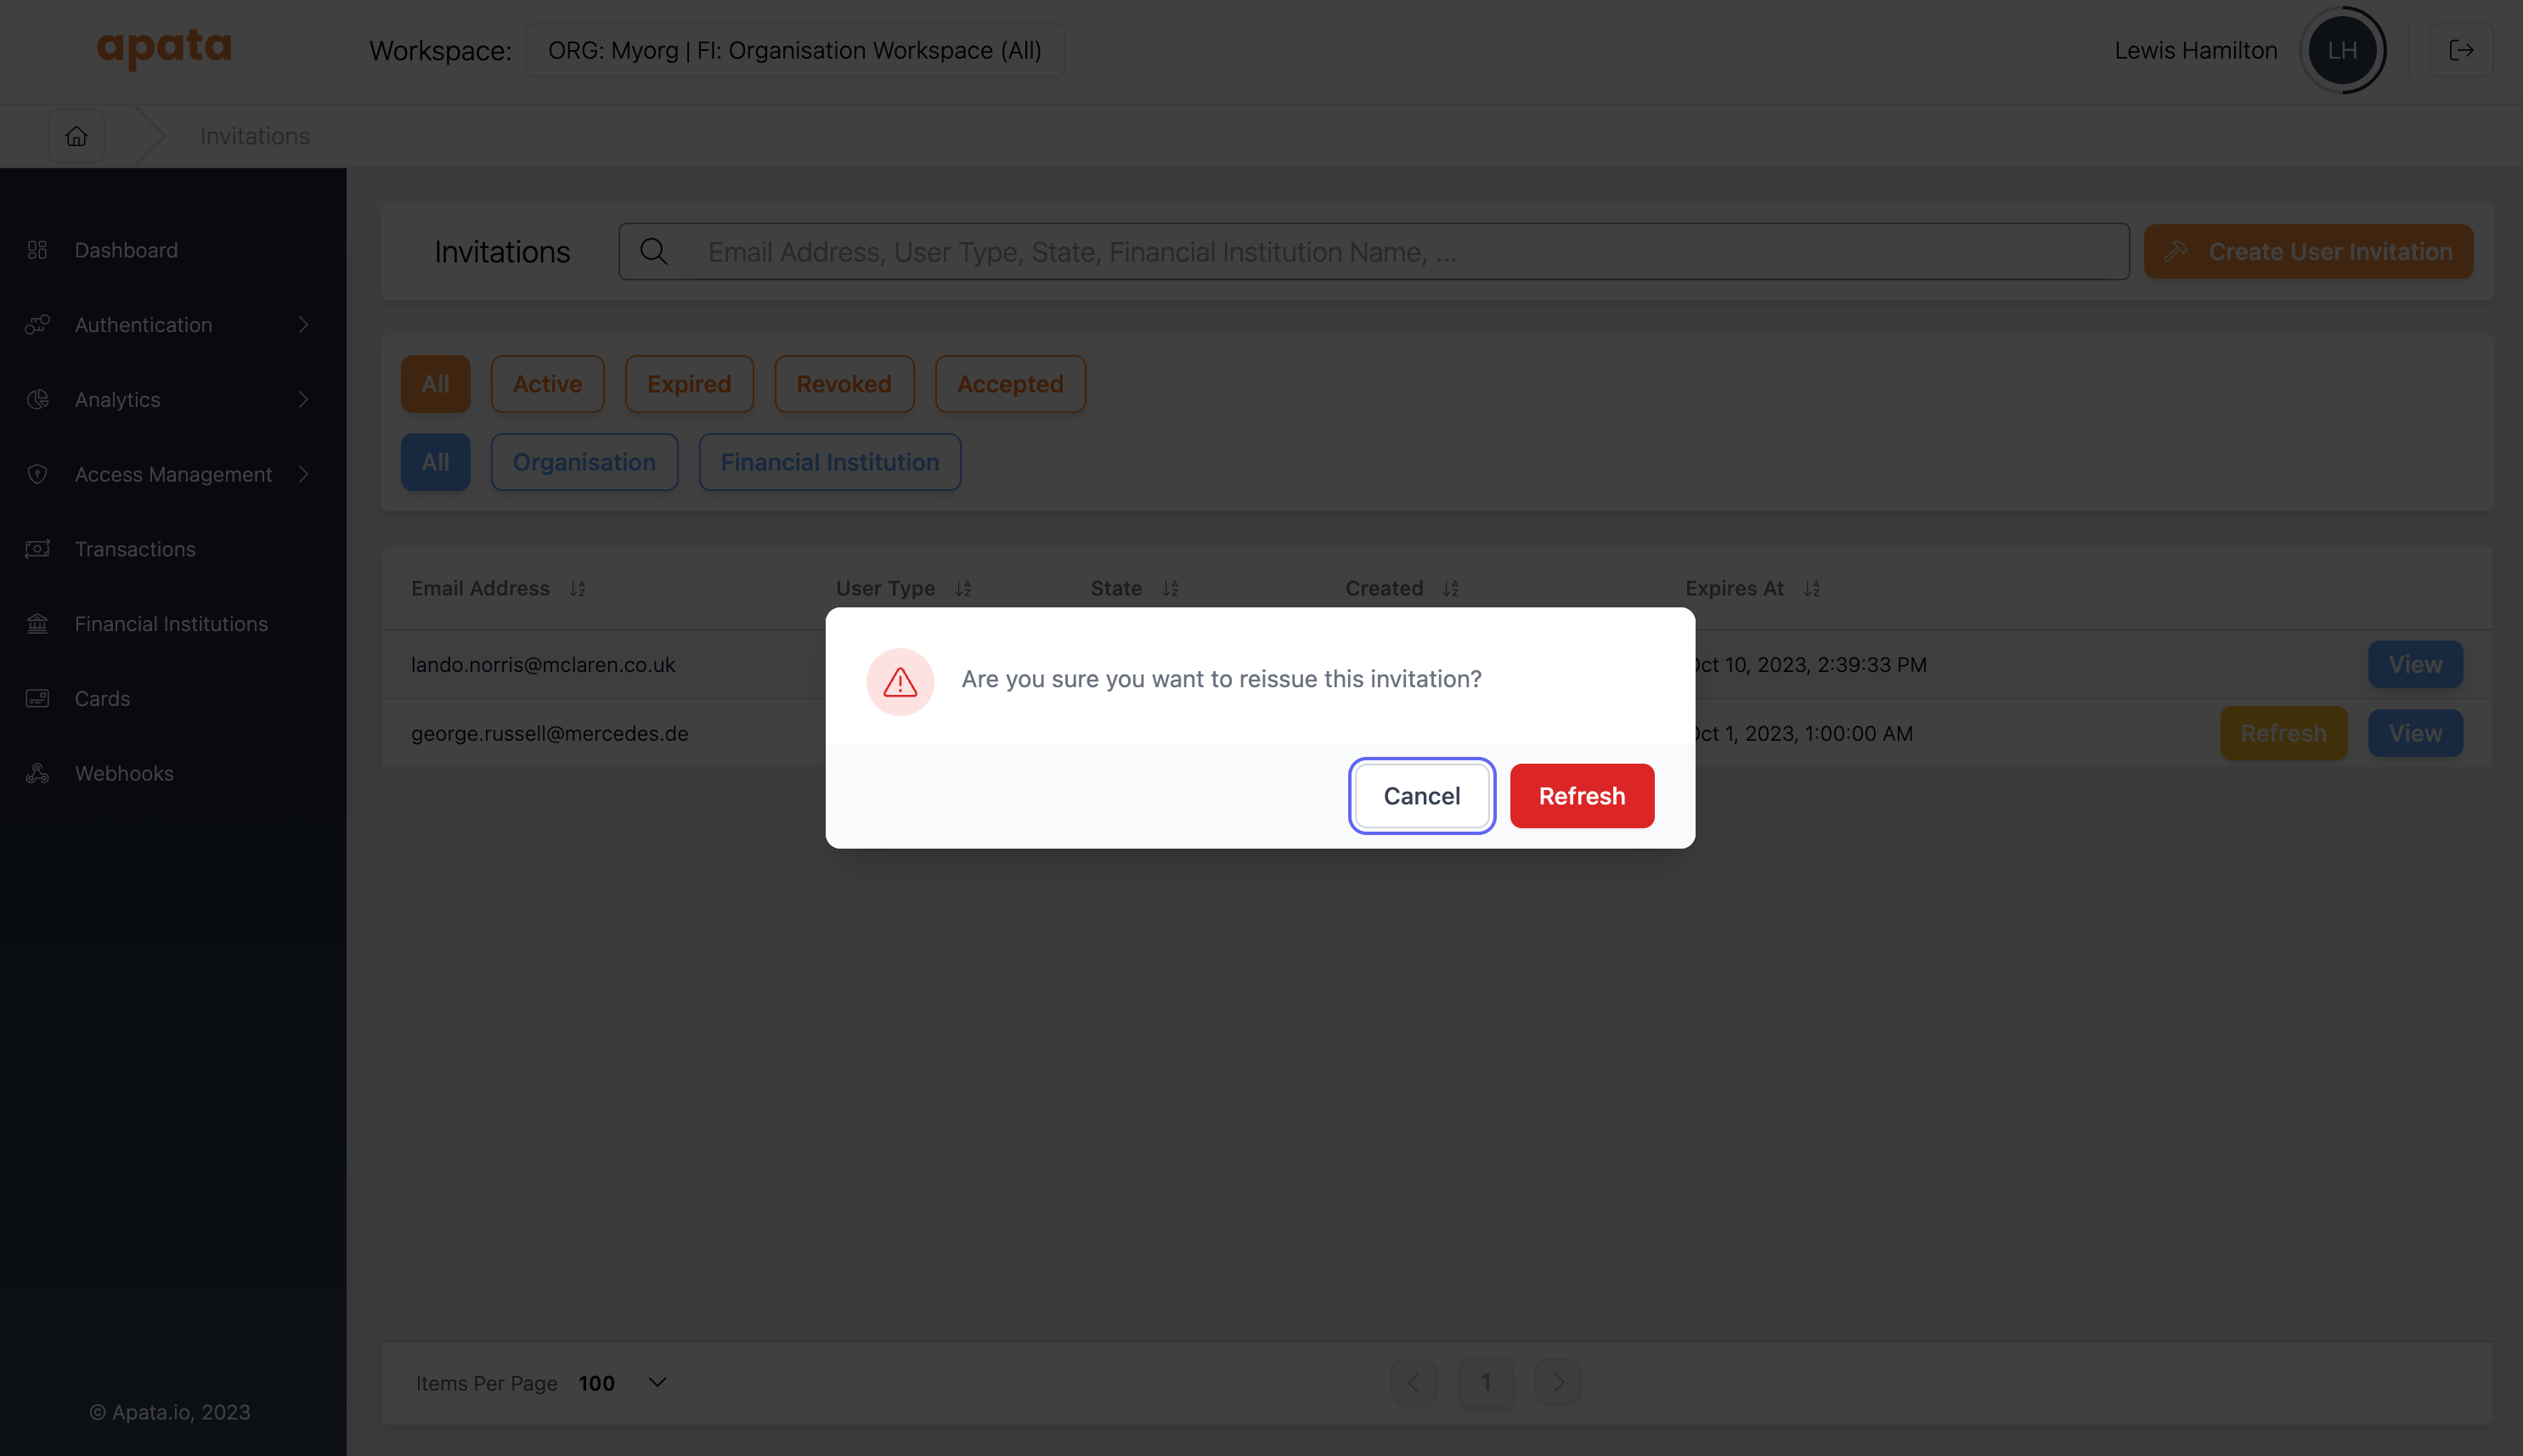
Resending an Invitation
- Navigate to Invitations
- Find the expired invitation
- Click Refresh
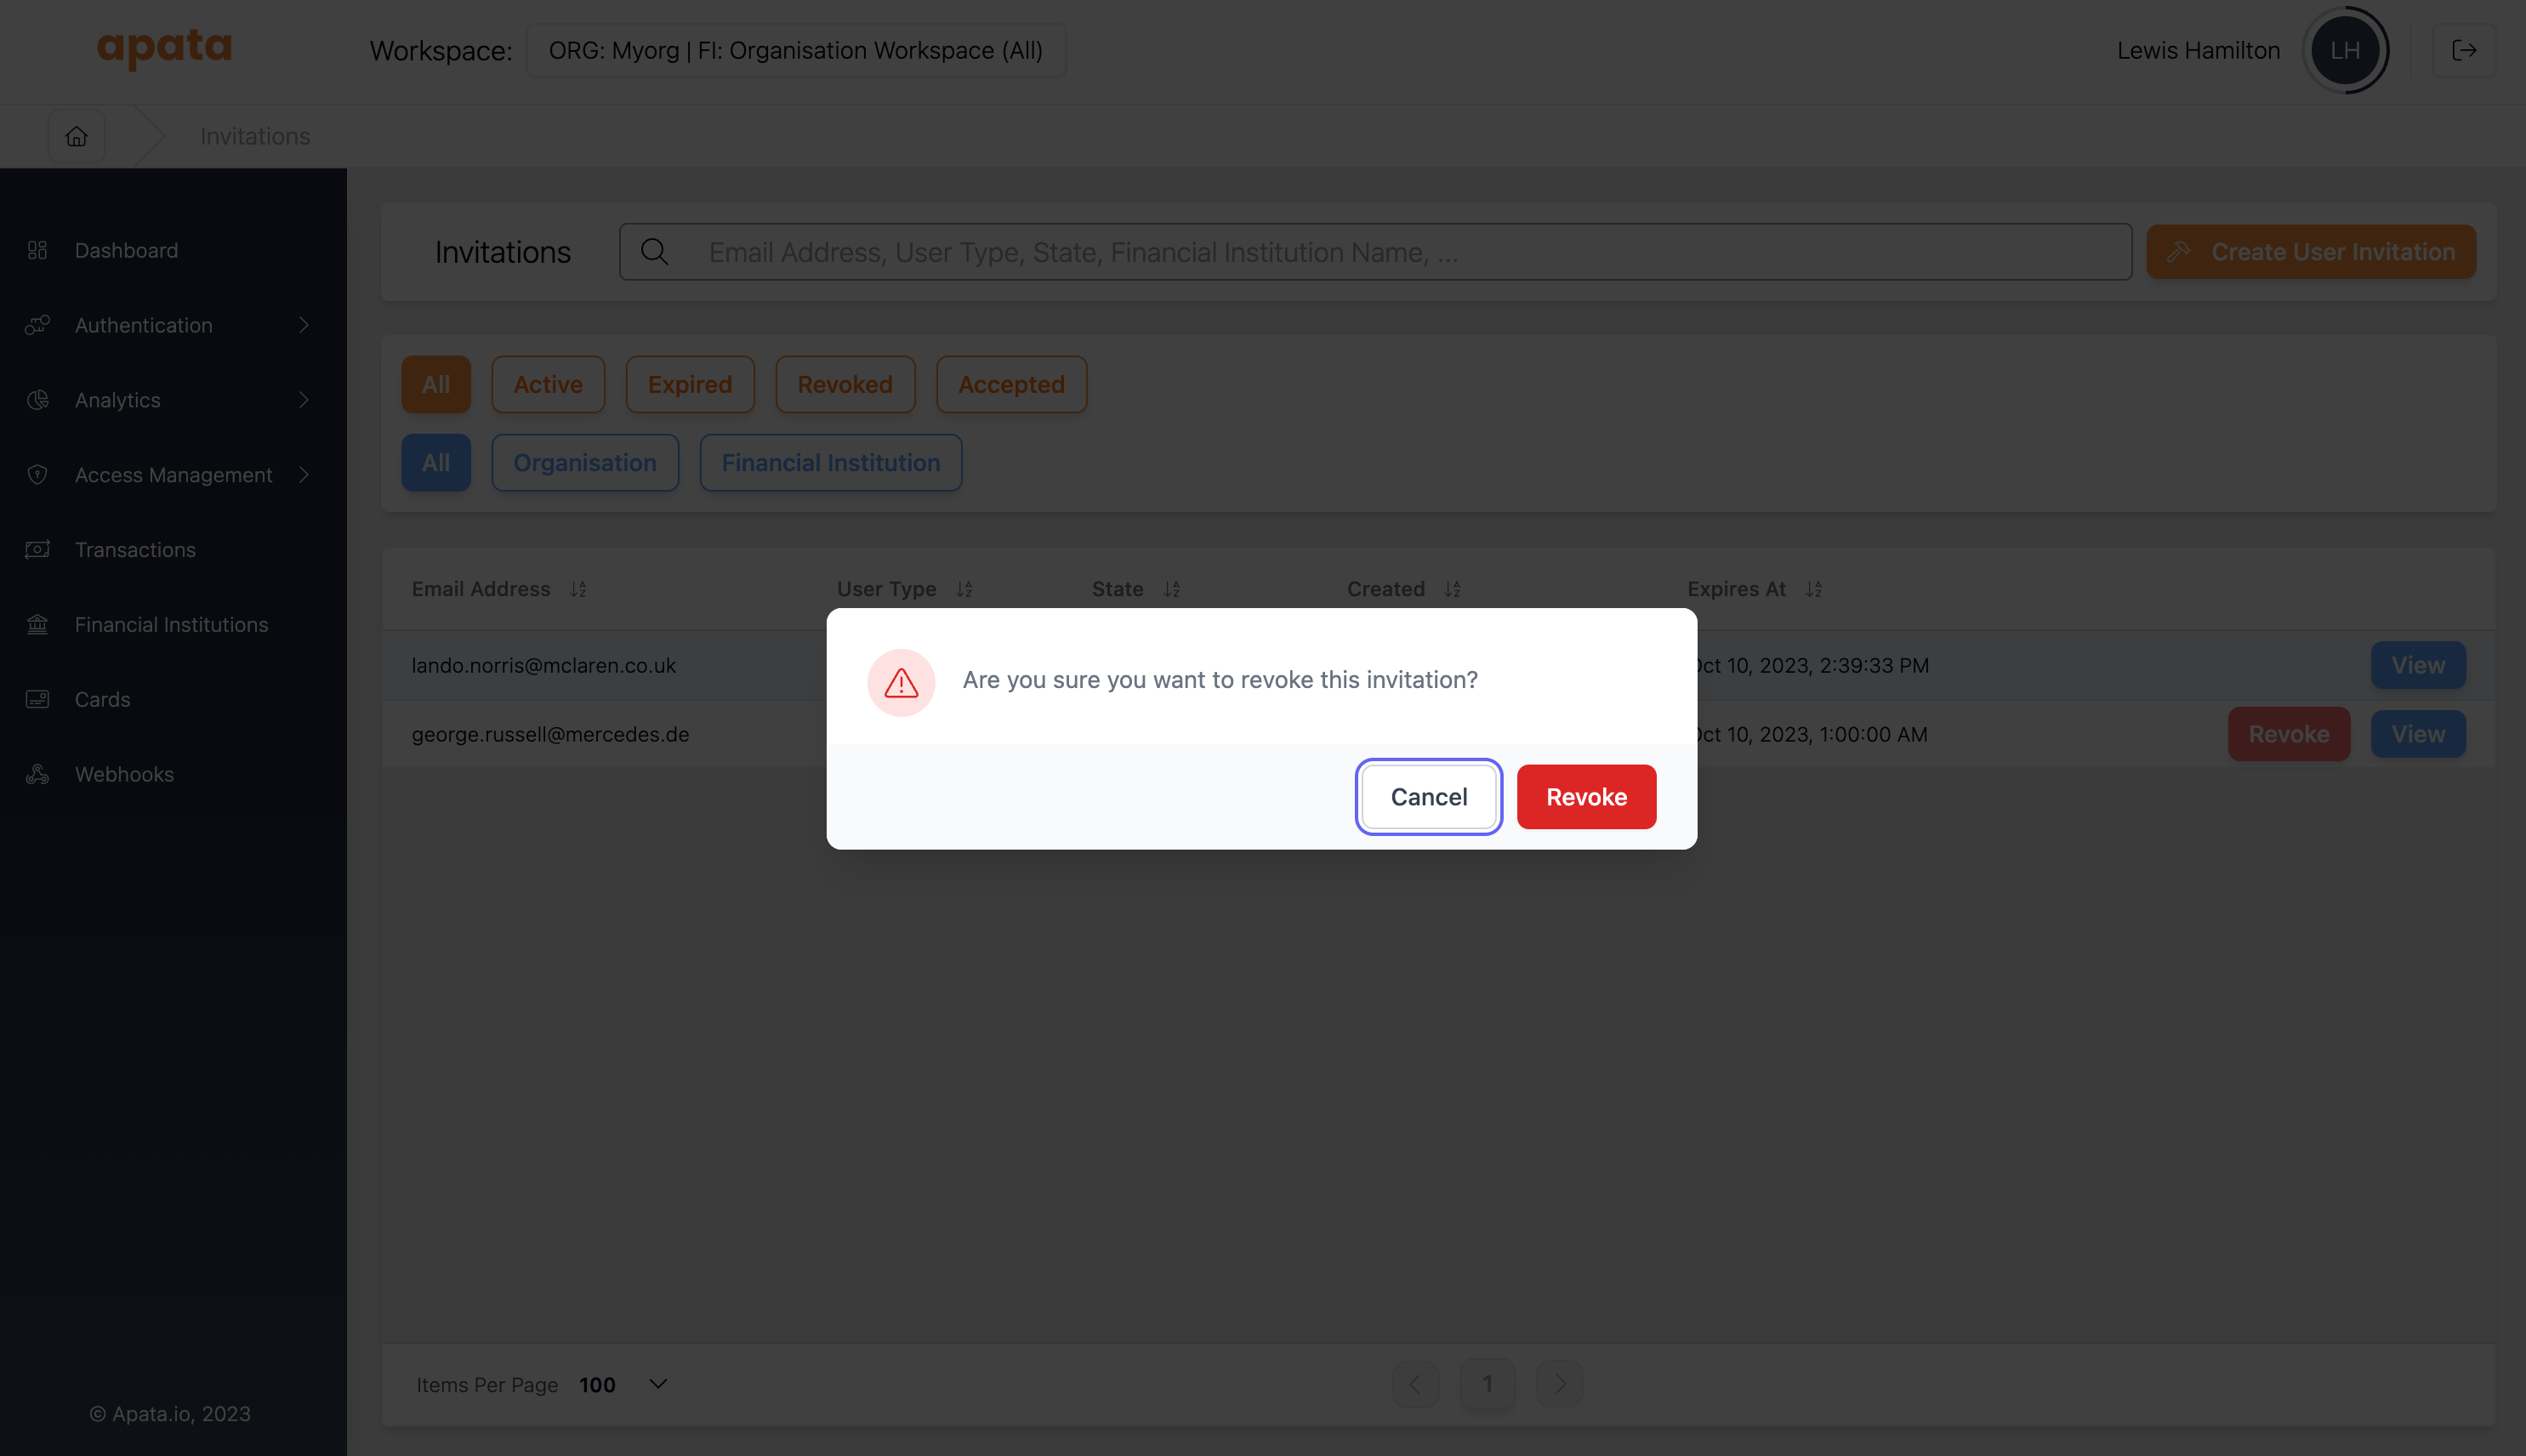
Revoking an Invitation
- Navigate to Invitations
- Find the active invitation
- Click Revoke
User Sign-Up
New users are prompted to create an account:
- Provide name, phone number, and password
- Configure an authenticator app for MFA
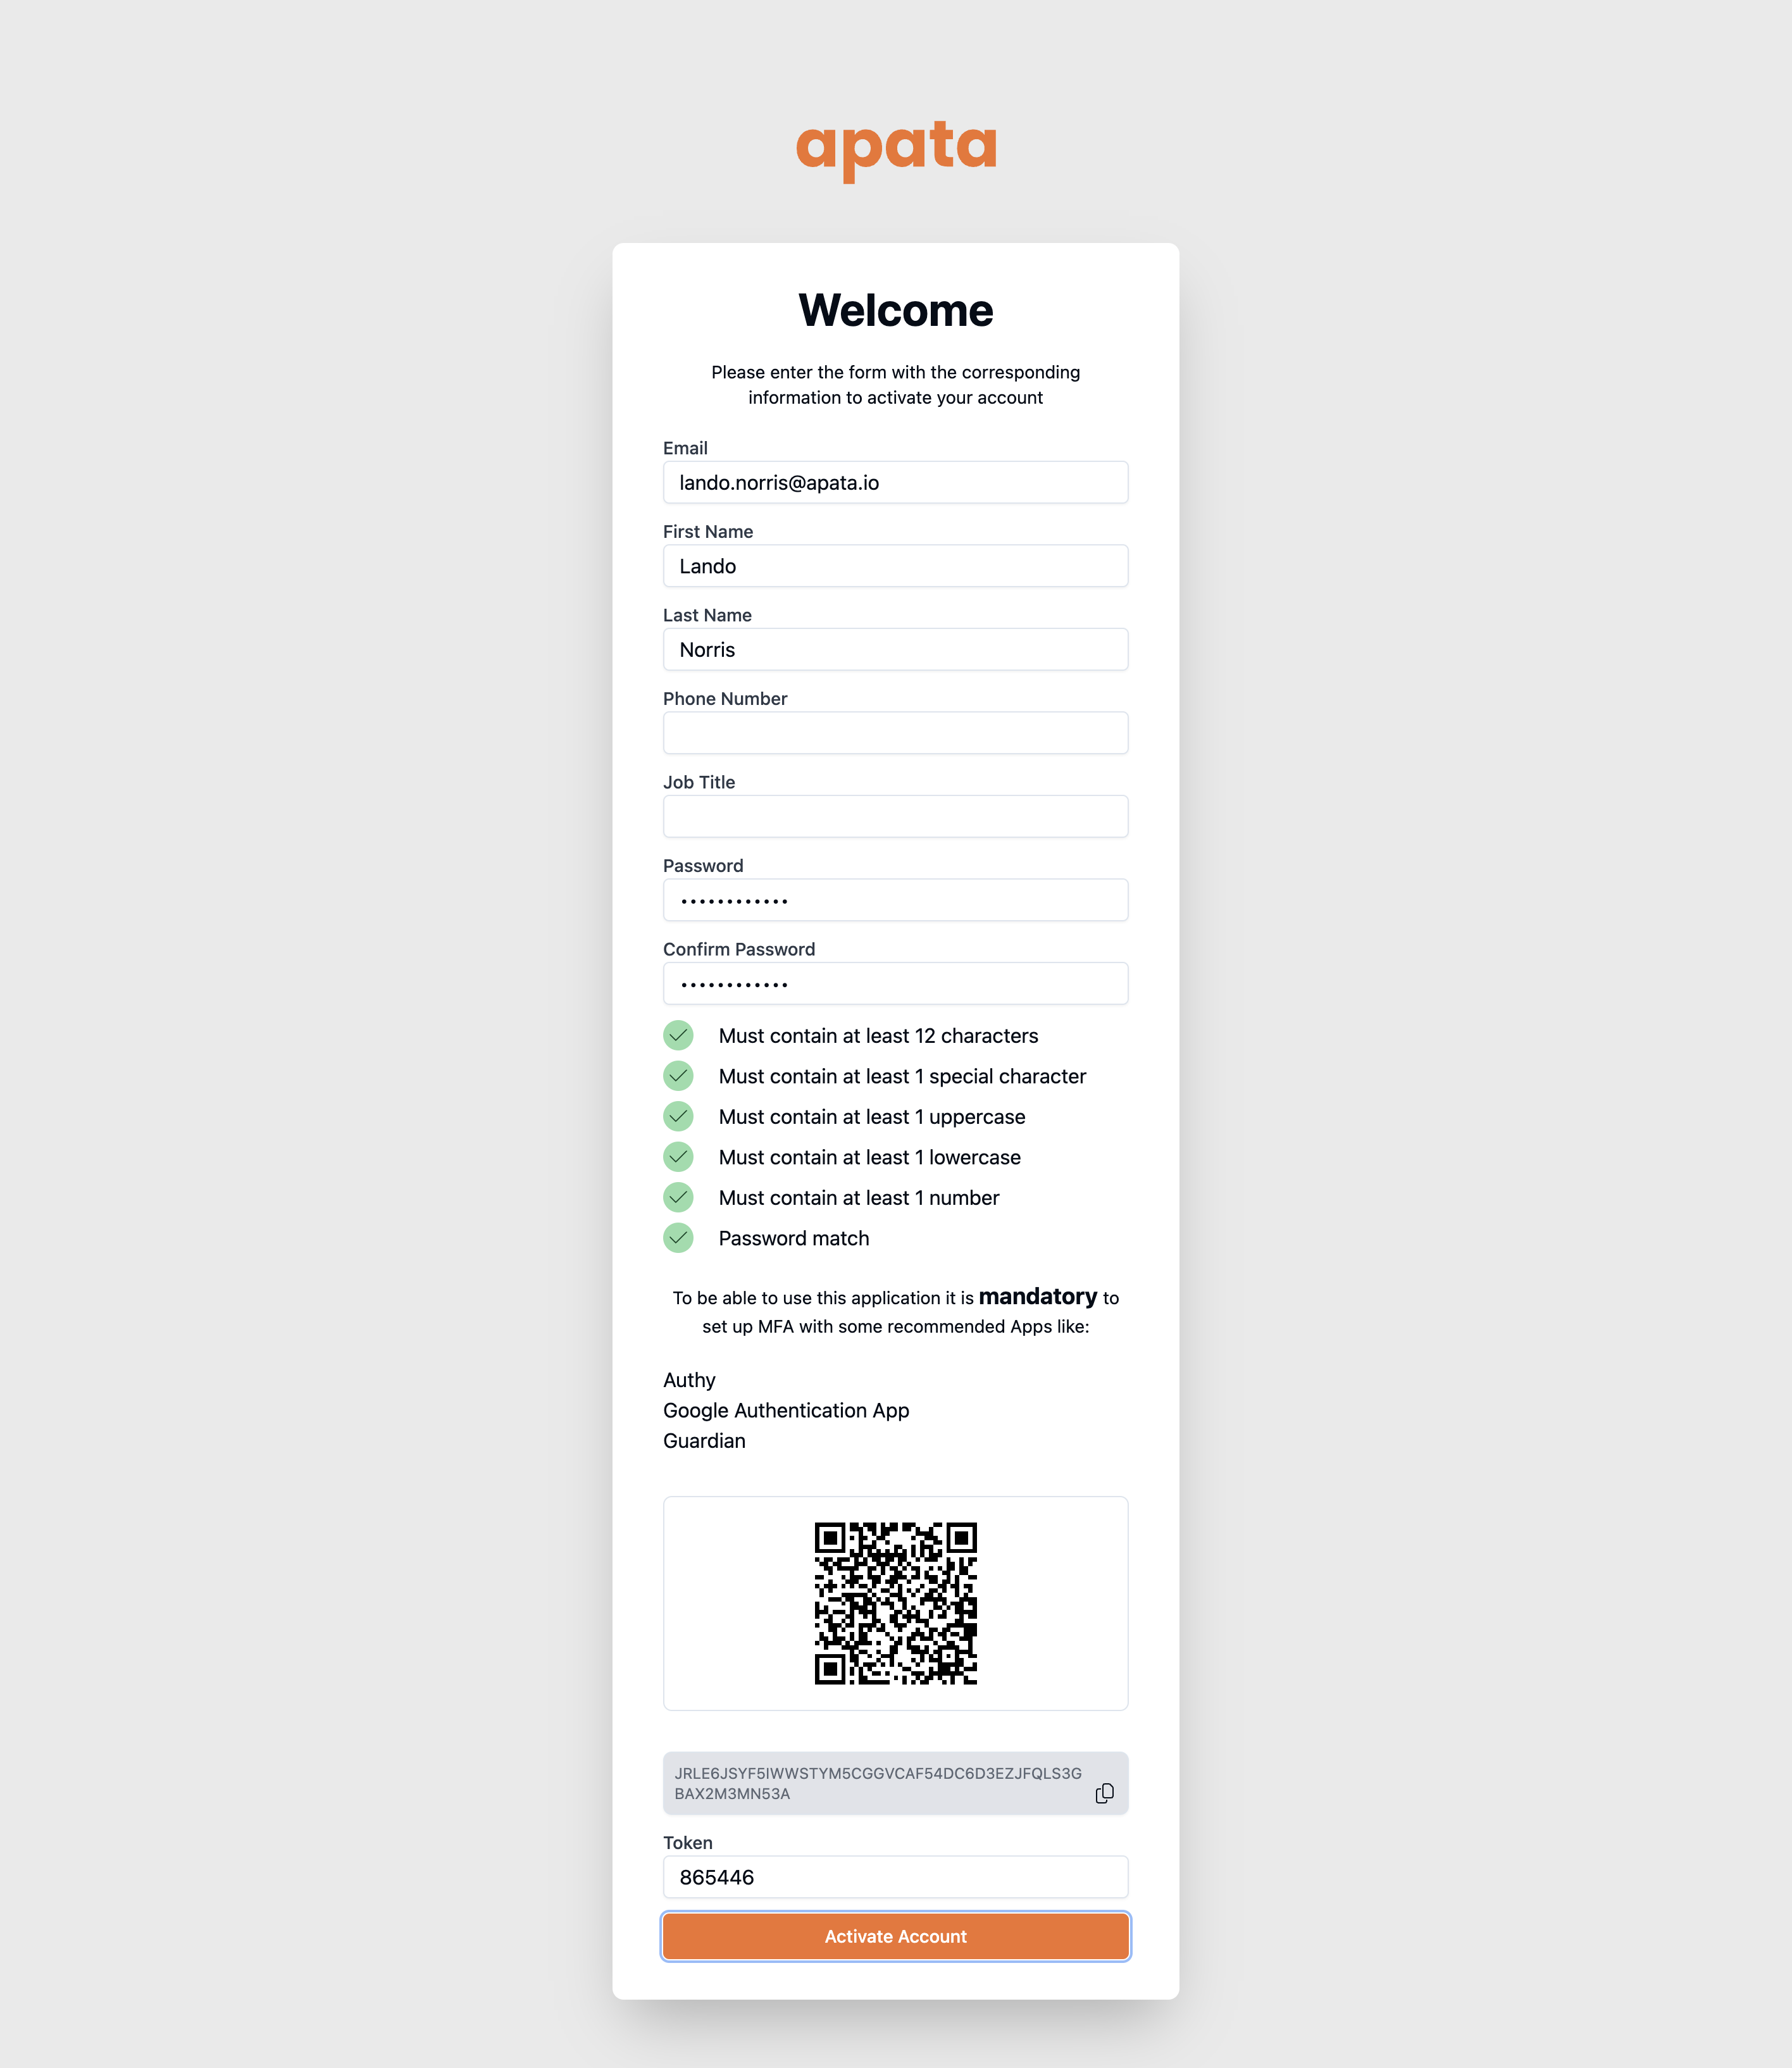
Recommended authenticator apps:
- Google Authenticator
- Microsoft Authenticator
- Authy
Keep your authenticator code safe. If you lose access, your account must be deleted and recreated by an Apata administrator.
Resetting MFA
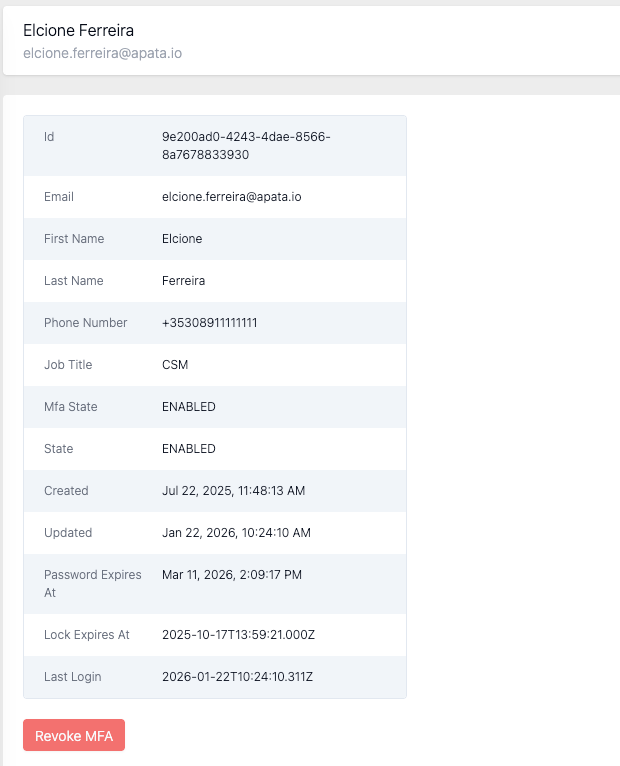
If a user loses access to their MFA device, an organisation-level user can reset it.
Only organisation-level users can revoke MFA for other users.
- Select Organisation Workspace (All)

- Navigate to Access Management → Users and find the user
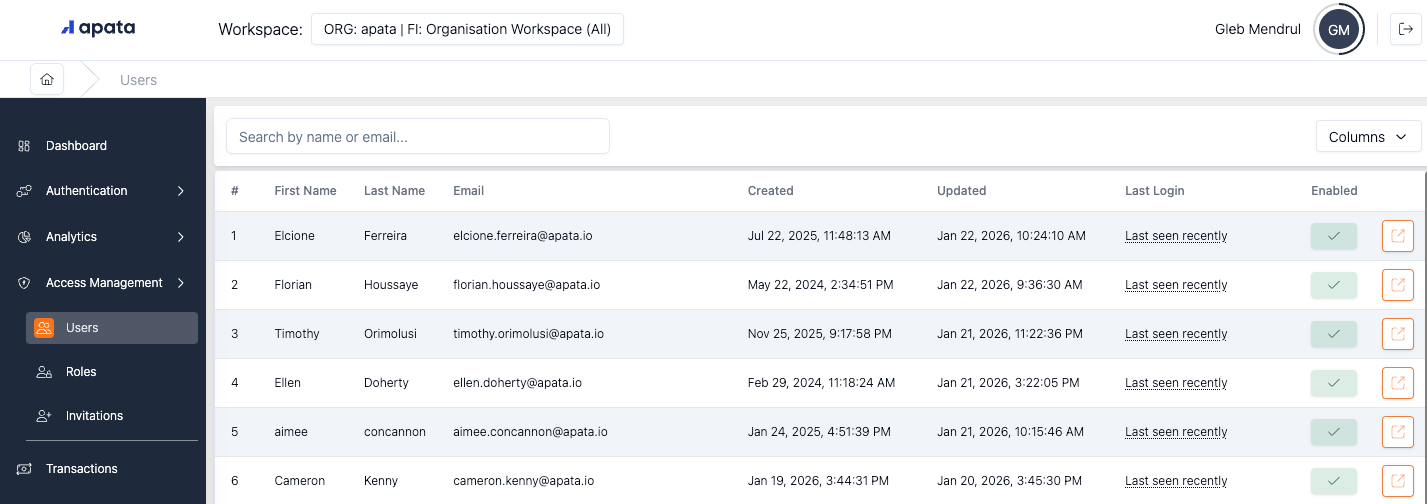
- Click Revoke MFA
Best Practices
Use Roles for Common Permission Sets
Create roles for common access patterns:
- Read-Only Analyst – View permissions for transactions and analytics
- Challenge Admin – Manage challenge methods, profiles, interfaces
- Full Admin – All permissions
Principle of Least Privilege
Grant only the permissions users need:
- Start with View permissions
- Add Manage permissions only when required
- Use specific FI permissions instead of "All FIs" when possible
Audit User Access Regularly
- Review user permissions periodically
- Remove access for departed employees promptly
- Use the Audit Log to track permission changes
Related Topics
- Organisation – Top-level entity containing FIs
- Financial Institution – Entity managing cards and transactions
- Audit Log – Track user actions and changes